

There’s something genuinely magical about sinking your teeth into perfectly cooked baby back ribs that have been lovingly rubbed with a sensational blend of sweet, smoky, and spicy seasonings. These Dry Rub Ribs are exactly that magic—savory and spice-infused morsels that will steal the show at your very next barbecue or cozy backyard gathering. As an intermediate-level recipe, it’s a delightful challenge for home cooks who want to elevate their grilling game. With a 30-minute prep window and a long, slow cook of 2.5 to 3 hours, these ribs reward your patience by transforming into fall-off-the-bone perfection, and a brief 10-minute rest guarantees that every savory juice stays right where it belongs—inside the meat. At roughly 450 calories per serving, this dinner course feels indulgent without going overboard, thanks to a carefully crafted dry rub that combines brown sugar for a touch of sweetness, smoked paprika for a whisper of campfire charm, and spices like garlic, cumin, and coriander that dance across your taste buds.
When I first experimented with this blend of seasonings, I was the reigning cookout newbie, eager to impress my friends and family. By the end of that afternoon, my backyard had erupted in applause—spurred by the irresistible harmony of toasted mustard seed notes, a flicker of cayenne heat, and the bright zing of apple cider vinegar spritzed through the cooking process. Whether you’re hosting a weekend BBQ or simply craving a standout dinner, these dry rub ribs promise to deliver an unforgettable feast. They’re versatile enough to pair with your favorite BBQ sauce on the side, yet bold enough to stand proudly on their own. As you read on, you’ll discover how to prep, season, cook, serve, and even store these gems so that every bite is as captivating as the first.
KEY INGREDIENTS IN DRY RUB RIB
Before we dive into turning our racks of baby back ribs into savory showstoppers, let’s talk about the powerhouse ingredients that come together to create that unforgettable dry rub and cooking process. Each component plays a specific role, building layers of flavor that balance sweetness, smokiness, and a touch of heat. Here’s a closer look:
- Baby Back Ribs
These tender racks are prized for their lean, juicy meat. Removing the membrane and applying a dry rub ensures every inch is infused with flavor and cooks evenly.
- Brown Sugar
Adds a gentle sweetness that caramelizes under heat, creating a lightly crisp exterior and counterbalancing the spice elements.
- Smoked Paprika
Delivers a warm, smoky depth reminiscent of slow-smoking over hardwood, even if you’re using an oven.
- Garlic Powder
Brings mellow, savory richness that melds with the other spices, enhancing the overall umami profile.
- Onion Powder
Contributes a subtle sweetness and aromatic foundation that helps round out the spice blend.
- Ground Cumin
Offers earthy, nutty undertones and a hint of warmth that pairs beautifully with both sweet and smoky notes.
- Kosher Salt
Essential for seasoning and drawing moisture from the meat’s surface, helping the rub adhere and intensify flavors.
- Black Pepper
Provides a sharp, woody bite that contrasts with sweet and smoky elements, keeping the palate engaged.
- Cayenne Pepper (optional)
If you like a kick, this adds a lively heat that can be dialed up or down to suit your taste.
- Mustard Powder
Imparts a tangy, piquant edge that wakes up the other spices and cuts through the richness.
- Ground Coriander
Features bright, citrusy notes that lighten the heavier spices and introduce a fresh complexity.
- Olive Oil
Acts as a binder for the dry rub, locking in moisture and helping the seasoning adhere to the meat.
- Apple Cider Vinegar
Used for spritzing or pooling in the baking sheet to maintain tenderness and inject a lively tang during cooking.
HOW TO MAKE DRY RUB RIB
Ready to transform these ingredients into a show-stopping rack of ribs? The slow-and-low approach brings out the best in our baby back ribs, while periodic spritzes of apple cider vinegar keep them juicy and tender. Follow these detailed steps to master the art of dry rub rib grilling or roasting:
1. Begin by preparing the ribs. Remove the membrane from the back of each rack of ribs by sliding a knife under the thin skin and peeling it off in one piece with your fingers or using a paper towel for extra grip. This step ensures your rub penetrates every nook of meat.
2. In a medium bowl, combine the brown sugar, smoked paprika, garlic powder, onion powder, ground cumin, kosher salt, black pepper, cayenne pepper, mustard powder, and ground coriander. Use a whisk or spoon to mix until you have a uniform dry rub bursting with color and aroma.
3. Rub the olive oil over both sides of the ribs. This helps the dry rub stick and adds an extra layer of moisture that keeps the meat succulent during the long cook.
4. Generously apply the mixed dry rub all over both sides of the ribs, pressing it firmly into the meat so that each rectangle of rib is fully coated in that sweet-and-spicy magic.
5. Preheat your grill or oven to 275°F (135°C). For grilling, set up for indirect cooking by placing coals or burners on one side and the ribs on the cooler side.
6. Place the ribs on the grill grates or on a baking sheet if using the oven. If grilling, pour a half cup of apple cider vinegar into a spray bottle; if roasting, carefully pour the vinegar into the baking sheet so it pools around the ribs.
7. Cook the ribs low and slow for 2.5 to 3 hours, spritzing with apple cider vinegar every 45 minutes if you’re grilling. This mist keeps the surface from drying out and helps tenderize the meat from the outside in.
8. Check for tenderness by inserting a toothpick or fork into the meat; it should glide in with just a little resistance, indicating the collagen has broken down perfectly.
9. Once fully cooked, remove the ribs from the heat and let them rest for about 10 minutes before slicing. This rest period lets the juices redistribute, so every bite is as juicy as possible.
SERVING SUGGESTIONS FOR DRY RUB RIB
After all that loving preparation and slow cooking, it’s time to showcase your masterpiece. Serving these succulent ribs is as much about presentation and complementary flavors as it is about the meat itself. Below are four creative ways to elevate your rib feast and ensure every guest at your table is wowed by both taste and style.
- Grilled Corn and Herb Slaw
Pair your ribs with a bright slaw made from char-grilled corn kernels, shredded cabbage, fresh cilantro, and a light lime vinaigrette. The crisp, tangy slaw cuts through the richness of the ribs and adds textural contrast.
- Baked Potato Wedges with Garlic Aioli
Serve thick-cut potato wedges tossed in olive oil, rosemary, and garlic salt, baked until golden. Accompany with a creamy garlic aioli dip for a cozy, crave-worthy sidekick that soaks up every drip of BBQ juice.
- Charred Vegetable Platter
Roast or grill a colorful assortment—bell peppers, zucchini, eggplant, and red onions—drizzled in olive oil and sprinkled with flaky sea salt. The smoky char on these veggies pairs seamlessly with the ribs’ dry rub.
- Mini Coleslaw Sliders
Slice your rested ribs into individual bones and nestle each in a mini brioche bun topped with a dollop of coleslaw. These bite-sized sliders are perfect for parties, letting guests graze and mingle.
HOW TO STORE DRY RUB RIB
When you’ve cooked such a delicious batch of dry rub ribs, leftovers are a welcome invitation for another feast. Proper storage is key to preserving both taste and tenderness, whether you’ll enjoy them the next day or pull them from the freezer months later. Below are best practices to keep those ribs just as flavorful as when they first came off the grill or out of the oven.
- Refrigeration in an Airtight Container
Allow ribs to cool slightly, then transfer to a shallow, airtight container. Store in the fridge for up to 3–4 days. Keep any residual pan juices poured over the meat to maintain moisture.
- Freezing in Vacuum-Sealed Bags
For longer storage—up to 3 months—slice the ribs into portions and vacuum-seal each batch. This removes excess air and prevents freezer burn, locking in the dry rub’s aroma and the meat’s juiciness.
- Individual Wrapping for Quick Reheating
Wrap single servings in aluminum foil after cooling, then place in a resealable freezer bag. When reheating, you can pop them right into the oven or on the grill for five to ten minutes until warmed through.
- Storing Sauce Separately
If you plan to add BBQ sauce later, keep it in a separate sealed jar in the refrigerator. This prevents the sauce from softening the dry-rub crust and lets you control sauciness on each reheated portion.
CONCLUSION
Bringing this Dry Rub Rib recipe to life is like hosting a flavor fireworks show in your own backyard. We walked through every step—from dismantling that membrane to mixing a spice-perfect dry rub, from patient low-and-slow cooking with apple cider vinegar spritzes to letting the ribs rest for succulent, tender bites. Armed with simple yet dynamic ingredients like brown sugar, smoked paprika, and mustard powder, you’ve learned how to balance sweet, smoky, and spicy notes so your baby back ribs can truly shine as the centerpiece of any dinner or BBQ. Feel free to print out this guide and tuck it into your recipe binder for easy reference next time you’re ready to fire up the grill or preheat the oven. And don’t forget, there’s a handy FAQ section below that dives into common questions about timing, equipment, and spice adjustments.
I’m thrilled to hear how your rib adventure turns out—so please drop a comment or question below if you try this recipe, have a twist that worked wonders, or need a hand trouble‐shooting anything from seasoning balance to cooking times. Your feedback not only helps me refine this recipe but also supports fellow home cooks who are eager to bring delicious Dry Rub Ribs to their tables. Whether you’re a grilling guru or a kitchen newcomer, I’m here cheering you on. Happy cooking, and may your next rack of ribs be the juiciest, most flavorful one yet!
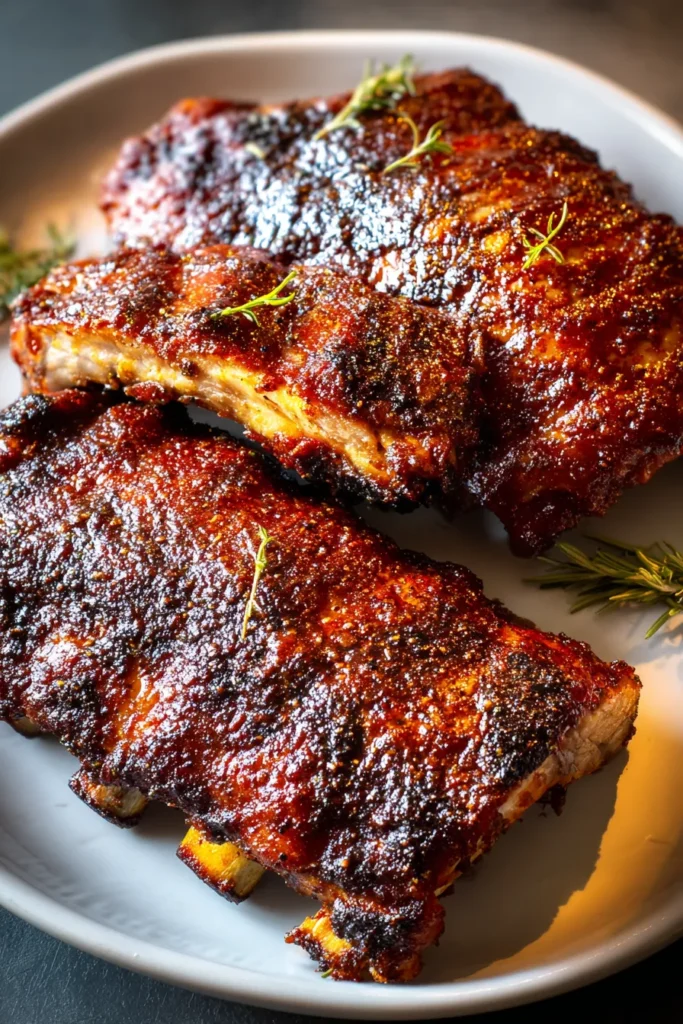

Dry Rub Rib
Description
Experience mouthwatering baby back ribs coated in a flavorful dry rub that combines sweet, smoky, and spicy notes, creating an unforgettable BBQ feast.
Ingredients
Instructions
-
Begin by preparing the ribs. Remove the membrane from the back of each rack of ribs. This can be done by sliding a knife under the membrane and peeling it off in one piece with your fingers or using a paper towel for grip.
-
In a medium bowl, combine the brown sugar, smoked paprika, garlic powder, onion powder, ground cumin, kosher salt, black pepper, cayenne pepper, mustard powder, and coriander. Mix well to create your dry rub.
-
Rub the olive oil over both sides of the ribs. This helps the dry rub stick and adds moisture.
-
Generously apply the dry rub mixture over both sides of the ribs, pressing it into the meat.
-
Preheat your grill or oven to 275°F (135°C). If using a grill, set it up for indirect cooking.
-
Place the ribs on the grill grates or on a baking sheet if using the oven. If using a grill, add a half cup of apple cider vinegar in a spray bottle. If in the oven, pour the vinegar into the baking sheet partially.
-
Cook the ribs for 2.5 to 3 hours, spritzing the ribs with apple cider vinegar every 45 minutes if grilling. This will maintain moisture and tenderness.
-
Check the ribs for tenderness by inserting a toothpick or fork; they should easily penetrate with a little resistance.
-
Once cooked to your liking, remove the ribs from the heat and let them rest for about 10 minutes before slicing.
Nutrition Facts
Serving Size 4
- Amount Per Serving
- Calories 88kcal
Note
- For added flavor, consider marinating the ribs with the dry rub overnight in the refrigerator.
- Adjust the spice levels to your taste by altering the amount of cayenne pepper.
- The apple cider vinegar spritz not only adds flavor but helps keep the ribs moist during cooking.
- Enjoy with your favorite BBQ sauce on the side, though these ribs are flavorful enough to stand alone.

