

There’s something utterly irresistible about bite-sized treats that deliver a big burst of flavor in every nibble. Cherry Pie Bites are exactly that little piece of joy we all crave—flaky, golden pastry hugging sweet, juicy cherries in the heart of each pocket. As a home cook who’s spent countless weekends experimenting in the kitchen, I can tell you these miniature wonders are perfect for everything from effortless weeknight desserts to stealing the show at your next bake sale. With just a handful of ingredients and an overall prep time of around 20 minutes (plus a brief 10-minute rest), these pie bites come together in no time, leaving you free to mingle with guests—or sneak a few extra before everyone arrives!
What makes these Cherry Pie Bites so exciting is not only their flavor but how versatile and beginner-friendly they are. Whether you’re a seasoned baker or someone who just learned how to crack an egg, these little pockets of happiness will have you feeling like a pastry pro. The recipe sits comfortably in the “Dessert” and “Appetizer” categories, making it a go-to for gatherings big and small. Each bite clocks in at about 200 calories, so you can indulge mindfully. I still remember the first time I served these at a friend’s party—they vanished in minutes, and people kept asking for the recipe. Now I’m passing it to you, so let’s dive into the magic behind these cherry-filled delights!
KEY INGREDIENTS IN CHERRY PIE BITES
Before we roll up our sleeves, let’s take a friendly stroll through the essentials. Each element plays a starring role, contributing to the flaky texture, the fruity pop, or that golden sheen that makes these treats truly irresistible. Here’s what you’ll need:
- Refrigerated pie crusts
These pre-made crusts simplify the process and ensure a consistently flaky, buttery base. They roll out easily, reducing prep time and frustration—perfect for bakers of all levels.
- Cherry pie filling
This brings that signature burst of sweetness and bright ruby color. The syrupy filling surrounds each cherry cluster, lending juiciness while balancing the rich crust.
- Egg
Beaten into an egg wash, this single egg gives the crust its glossy, golden finish. It also helps any additional toppings, like sugar, stick beautifully to the surface.
- Milk
Mixed with the egg, milk lightens the wash and ensures an even, velvety coating that browns attractively without drying out the pastry.
- Granulated sugar (optional)
A light dusting on top adds extra sparkle and crunch. It’s a small flourish, but one that transforms each mini pie into a delightful little jewel.
HOW TO MAKE CHERRY PIE BITES
Ready to transform simple ingredients into mouthwatering morsels? Follow these steps closely, and you’ll have batches of perfect Cherry Pie Bites in about 15 minutes of baking time.
1. Preheat your oven to 400°F (200°C) and line a baking sheet with parchment paper to prevent sticking and ensure easy cleanup.
2. Roll out the refrigerated pie crusts on a lightly floured surface, keeping them even in thickness for uniform baking.
3. Using a round cookie cutter (about 3 inches in diameter), cut circles out of the dough. Aim for 12–16 circles per crust to make sure each bite is just the right size.
4. Place a small spoonful of cherry pie filling (around 3–4 cherries) in the center of each circle. Be careful not to overfill to avoid leaks.
5. Fold the dough over the filling into a semi-circle and press the edges with a fork to seal tightly, preventing any juicy escape routes.
6. In a small bowl, beat the egg with the milk to create an egg wash. Use a pastry brush to brush the tops of each pie bite, guaranteeing a glossy finish.
7. If you like a little extra sweetness and crunch, sprinkle a pinch of granulated sugar on top of each pie bite before baking.
8. With a sharp knife, carefully cut a small slit on the top of each pie bite to allow steam to escape during baking.
9. Arrange the pie bites on your prepared baking sheet, spacing them slightly apart so they bake evenly.
10. Bake in the preheated oven for about 12–15 minutes, or until the crust is golden brown and crisp.
11. Remove from the oven and let the pie bites cool slightly before serving to set the filling and prevent burns.
SERVING SUGGESTIONS FOR CHERRY PIE BITES
When it comes to serving these Cherry Pie Bites, your creativity can shine just as brightly as their golden crust. Whether you’re hosting a festive gathering or enjoying a cozy afternoon tea, here are four mouthwatering ideas to elevate your presentation and taste experience:
- Classic Whipped Cream Dollop
Serve each warm bite with a small spoonful of softly whipped cream on top. The airy creaminess cuts through the sweet cherry filling, creating a divine contrast in texture and flavor.
- Vanilla Ice Cream Pairing
Place two or three pie bites on a dessert plate alongside a scoop of vanilla ice cream. As the ice cream melts, it mingles with the cherry juices—pure bliss in every spoonful.
- Cheese Board Companion
Add Cherry Pie Bites to a cheese platter, arranging them among assorted cheeses like brie or goat. The sweet-tart fruit flavor provides a playful counterpoint to savory, creamy cheeses.
- Dusting of Powdered Sugar
For a more elegant look, gently dust the pie bites with powdered sugar just before serving. It adds visual appeal and a light, delicate sweetness that complements the cherry filling beautifully.
HOW TO STORE CHERRY PIE BITES
Preserving the flaky texture and juicy filling of Cherry Pie Bites is easy when you know a few simple tricks. Proper storage means you can bake a big batch ahead of time and still delight guests (or family members) with fresh-tasting treats later on. Here are the best methods to keep these bites tasting their best:
- Refrigerate in an airtight container: Once completely cooled, place the pie bites in a single layer or separated by parchment paper. Seal tightly to prevent moisture loss and chill for up to two days.
- Reheat in the oven: To restore that just-baked crispness, warm the bites at 350°F (175°C) for about 5–7 minutes before serving. Avoid the microwave to prevent a soggy crust.
- Freeze for longer storage: Flash-freeze the arranged, unbaked pie bites on a parchment-lined tray. Once solid, transfer to a freezer-safe bag and freeze for up to a month. Bake directly from frozen, adding a few extra minutes to the time.
- Room-temperature refresh: If stored at room temperature for a short time (a few hours), keep the bites covered with a clean kitchen towel to maintain their crisp exterior and prevent them from drying out.
CONCLUSION
I hope you’ve enjoyed this deep dive into the world of Cherry Pie Bites—those miniature cherry pies that pack a burst of flavor in every bite! We’ve covered everything from gathering your ingredients to storing leftover treats, ensuring you’re fully equipped to create these delicious pastries. With a beginner-friendly difficulty level, minimal prep time, and warm, sweet cherry centers, these bites fit seamlessly into any occasion—be it an after-dinner dessert, an appetizer at a brunch, or a sweet surprise at your next party. Feel free to print this article and stash it in your recipe binder for quick access whenever the craving strikes. And don’t forget: underneath, you’ll find a handy FAQ section that addresses your most pressing questions, so there’s no doubt you’ll succeed.
Whether this is your first time rolling out a pie crust or you’re simply hunting for an easy dessert that leaves a lasting impression, Cherry Pie Bites won’t disappoint. If you give them a try, I’d love to hear how they turned out. Share your tips, ask questions, or drop feedback below—your kitchen adventures inspire me, and I’m always here to help. Happy baking!
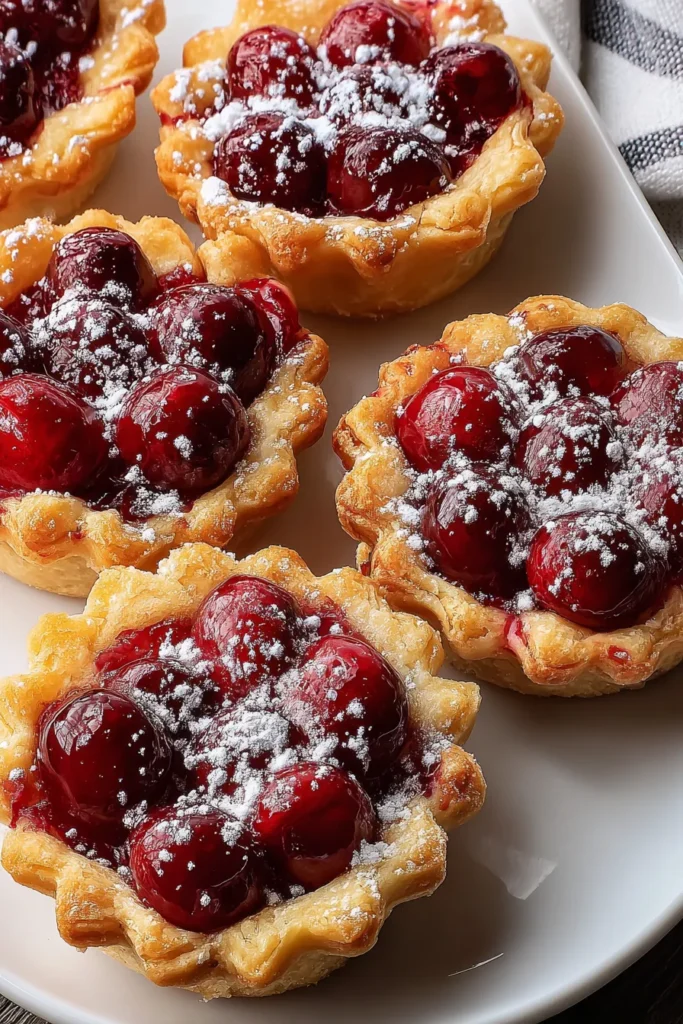

Cherry Pie Bites
Description
These cherry pie bites are flaky, sweet, and irresistible, perfect for any gathering. Warm, with a delicious cherry filling, they’re a delightful little treat that everyone will love.
Ingredients
Instructions
-
Preheat your oven to 400°F (200°C) and line a baking sheet with parchment paper.
-
Roll out the refrigerated pie crusts on a lightly floured surface.
-
Using a round cookie cutter (about 3 inches in diameter), cut circles out of the pie crusts. You should be able to get about 12-16 circles per crust.
-
Place a small spoonful of cherry pie filling (about 3-4 cherries) in the center of each circle. Be careful not to overfill.
-
Fold the dough over the filling to create a semi-circle and press the edges with a fork to seal tightly.
-
In a small bowl, beat the egg with the milk to create an egg wash. Brush the top of each pie bite with the egg wash.
-
If desired, sprinkle a pinch of granulated sugar on top of each pie bite for extra sweetness and a nice crunch.
-
Use a sharp knife to carefully cut a small slit on the top of each pie bite to allow steam to escape during baking.
-
Arrange the pie bites on the prepared baking sheet, making sure they are spaced slightly apart.
-
Bake in the preheated oven for about 12-15 minutes, or until the crust is golden brown and crisp.
-
Remove from the oven and let cool slightly before serving.
Nutrition Facts
Serving Size 12
- Amount Per Serving
- Calories 13kcal
Note
- You can experiment with different fillings like apple or blueberry for a variety.
- These pie bites are perfect for parties and can be made in advance.
- Serve with a dollop of whipped cream or a scoop of vanilla ice cream for an extra treat.
- Store leftovers in an airtight container for up to two days.
- They are delicious both warm and at room temperature!

