

Transform dessert time into a delightful carnival of color and flavor with Fruity Pebbles Cheesecake Tacos! Each crunchy shell, made from vibrant cereal and buttery crumbs, cradles a luxuriously creamy cheesecake filling that practically begs to be adorned with fresh fruit jewels. This whimsical twist on dessert is perfect for beginner bakers—no complicated techniques here! You’ll be in and out of the kitchen in just under half an hour of active prep, plus a quick bake and chill time. With just 20 minutes of hands-on work, a 12-minute bake, and an hour of rest, these tacos come together effortlessly. At around 300 calories per serving, they’re a playful yet reasonable treat for parties, potlucks, or a fun family gathering.
Whether you’re craving a colorful finale for a birthday bash or simply want to relive a bit of childhood nostalgia, these cheesecake tacos deliver. The crunchy, candy-hued shells snap with every bite, giving way to tangy, sweet cream cheese bliss. Top them with strawberries, blueberries, kiwi, or even more Fruity Pebbles for an extra pop of color and texture. This dessert is a true conversation starter—imagine your friends’ faces when they see those rainbow edges! Keep reading for the full recipe, tips on mixing and baking, plus creative serving and storage ideas to make these tacos a go-to dessert staple.
KEY INGREDIENTS IN FRUITY PEBBLES CHEESECAKE TACOS
Before we dive into the step-by-step, let’s talk about the stars of the show. Each ingredient brings its own magic to these playful tacos, from the crunchy base to the feather-light filling.
- Fruity Pebbles cereal
A rainbow of tiny, crisp puffs that form the heart of your taco shells. They add vibrant color, sweetness, and a nostalgic crunch that sets these desserts apart.
- Graham cracker crumbs
Ground until fine, these crumbs provide structure and a subtle honey-like flavor that balances the sweetness of the cereal, helping the shells hold their shape.
- Butter
Melted golden goodness that binds the cereal and crumbs together. It ensures the shells crisp up evenly during baking and gives a rich, buttery mouthfeel.
- Cream cheese
The creamy backbone of the filling. When beaten until smooth, it offers a tangy, velvety base that pairs beautifully with sweet elements.
- Sugar
Granulated sugar sweetens the cream cheese mixture just enough to please your sweet tooth without overpowering the tangy notes.
- Vanilla extract
A splash of pure vanilla elevates the flavor profile, adding warm, fragrant complexity to the cheesecake filling.
- Heavy whipping cream
Whipped to airy perfection, it lightens the cream cheese blend, giving each bite that dreamy, cloud-like texture.
- Powdered sugar
Finely sifted into the cream, it helps stabilize the whipped cream and adds a gentle sweetness that dissolves instantly.
- Fresh fruit
Slices of strawberries, blueberries, kiwi, or any seasonal berries add a refreshing burst, contrast in texture, and a pop of natural color on top.
HOW TO MAKE FRUITY PEBBLES CHEESECAKE TACOS
Below is your complete roadmap to crafting these colorful cheesecake tacos. Follow each step carefully, and you’ll have a stunning dessert in no time!
1. Preheat your oven to 350°F (175°C). Ensuring the oven reaches the right temperature helps the shells bake evenly and become perfectly crisp.
2. In a medium bowl, combine the Fruity Pebbles cereal, graham cracker crumbs, and melted butter. Use a spatula or clean hands to mix thoroughly until every flake and crumb is coated.
3. Press the mixture firmly into the bottoms and sides of a lightly greased taco mold or cupcake pan. A gentle but firm press ensures the shells keep their shape and hold up to the cheesecake filling.
4. Bake in your preheated oven for 10–12 minutes, or until the shells turn lightly golden around the edges. Once baked, remove from the oven and let them cool in the molds to set fully.
5. In a large mixing bowl, beat the softened cream cheese, sugar, and vanilla extract together using a hand mixer or stand mixer. Continue until the texture is smooth and creamy.
6. In a separate mixing bowl, whip the heavy cream with the powdered sugar until stiff peaks form. This means the cream stands straight up when you lift the whisk.
7. Gently fold the whipped cream into the cream cheese mixture. Folding preserves the airy texture, giving you a light yet rich cheesecake filling.
8. Spoon the filling into a piping bag (or use a spoon) and fill each taco shell generously, creating a beautiful, peaked presentation.
9. Garnish each taco with fresh fruit of your choice—think bright strawberries, plump blueberries, or tangy kiwi slices for a refreshing finish.
10. Chill the assembled tacos in the refrigerator for at least 1 hour. This rest time allows the filling to set properly and intensify in flavor.
SERVING SUGGESTIONS FOR FRUITY PEBBLES CHEESECAKE TACOS
When it’s time to wow your guests, presentation is just as fun as the flavors themselves. Here are four inspiring ways to serve these colorful taco treats and make every bite feel like a festive celebration.
- Display on a festive platter
Arrange your tacos on a bright, colorful platter that echoes the cereal’s rainbow hues. Sprinkle a few extra Fruity Pebbles around the edges for a cohesive look and invite guests to help themselves.
- Add a fresh herb garnish
A few small sprigs of fresh mint perched atop each taco bring a pop of green that contrasts beautifully with the fruit and adds a hint of cooling aroma.
- Drizzle with fruit coulis
For an elegant touch, lightly drizzle a homemade or store-bought raspberry or mango coulis over the tacos. The vibrant red or orange sauce enhances flavor depth and creates a professional look.
- Pair with a fun beverage
Complement the sweet, creamy tacos with a crisp sparkling lemonade or a mild iced coffee. The effervescence and slight tartness of the drinks cleanse the palate between bites.
HOW TO STORE FRUITY PEBBLES CHEESECAKE TACOS
Proper storage ensures your cheesecake tacos stay fresh, flavorful, and ready for your next craving. Follow these tips to maintain crunch, creaminess, and vibrant color even a day later.
- Refrigerate in an airtight container
Place the assembled tacos upright in a shallow, airtight container. Seal tightly and store in the refrigerator for up to 24 hours. This prevents the shells from becoming soggy and keeps the filling firm.
- Store shells separately
If you’ve made extra taco shells, let them cool completely, then stash them in a resealable plastic bag or airtight container at room temperature. Use within two days for maximum crunch.
- Keep fruit toppings chilled
Prepare your fresh fruit garnish in a separate, covered container and store in the fridge. Add the fruit just before serving to maintain its bright color and fresh texture.
- Freeze filling for later
Spoon leftover cheesecake filling into a freezer-safe tub, leaving an inch of headspace. Cover with plastic wrap and a tight-fitting lid. Freeze for up to one month. Thaw in the fridge overnight before piping into fresh shells.
CONCLUSION
What a journey through color, texture, and flavor! These Fruity Pebbles Cheesecake Tacos have taken a simple cereal and transformed it into a show-stopping dessert that’s as fun to make as it is to eat. From the first crunch of that candy-hued shell to the soft, tangy, dreamy cheesecake filling, every bite is an explosion of nostalgia and joy. We’ve covered everything you need: ingredient breakdowns, step-by-step instructions, clever serving ideas, and foolproof storage tips. Whether you’re whipping these up for a casual get-together or a special celebration, you’ll be armed with confidence and creativity. Feel free to print this article and save it in your recipe binder so you can revisit this whimsical treat whenever inspiration strikes. Don’t forget, there’s an FAQ section below for any lingering questions or troubleshooting!
We hope this vibrant recipe brings a smile to your kitchen and delights everyone lucky enough to try it. If you experiment with different fruits, sprinkle on extra cereal, or discover a new way to plate these tacos, we want to hear all about it. Please leave your comments, share your feedback, or ask questions if you need any help along the way. Happy baking, and here’s to many colorful, cheesecake-filled taco adventures ahead!
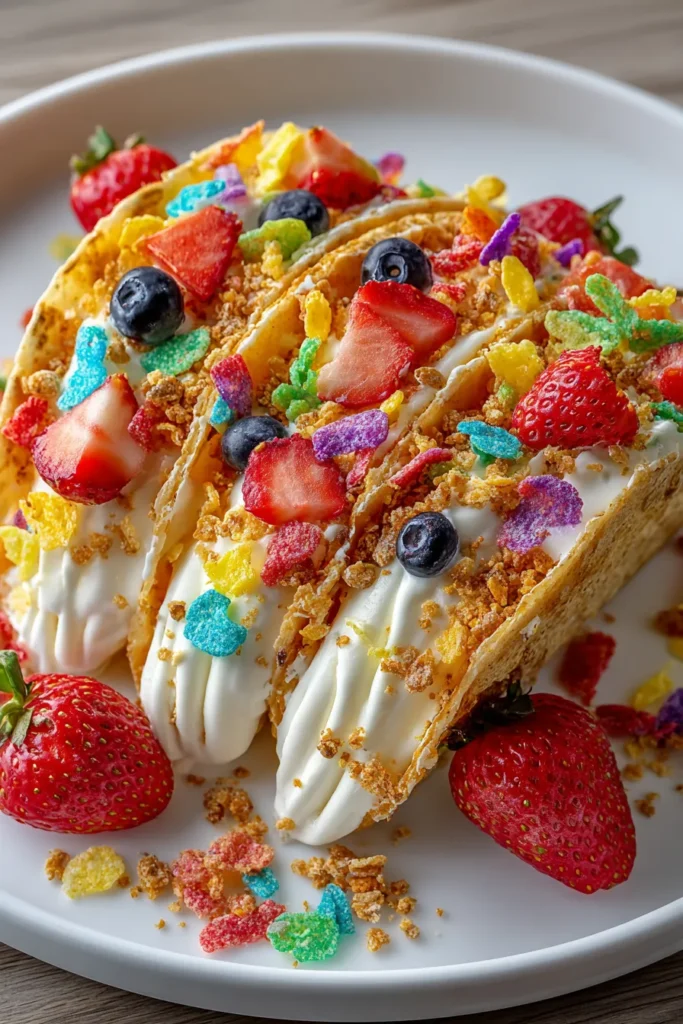

Fruity Pebbles Cheesecake Tacos
Description
Experience a whimsical twist on dessert with these delightful tacos filled with creamy cheesecake and topped with fresh fruit. A burst of color and flavor in every bite!
Ingredients
Instructions
-
Preheat your oven to 350°F (175°C).
-
In a medium bowl, combine Fruity Pebbles cereal, graham cracker crumbs, and melted butter. Mix until well combined.
-
Press the mixture firmly into the bottoms and sides of a lightly greased taco mold or cupcake pan to form the taco shells.
-
Bake in the preheated oven for 10-12 minutes or until the shells are lightly golden. Remove from oven and allow them to cool in the molds.
-
In a large mixing bowl, beat the softened cream cheese, sugar, and vanilla extract together until smooth and creamy.
-
In a separate mixing bowl, whip the heavy cream with the powdered sugar until stiff peaks form.
-
Gently fold the whipped cream into the cream cheese mixture until smooth and well combined.
-
Spoon the cheesecake filling into a piping bag or use a spoon to fill each taco shell.
-
Garnish the cheesecake tacos with fresh fruit of your choice.
-
Chill in the refrigerator for at least 1 hour before serving to allow the filling to set.
Nutrition Facts
Serving Size 6
- Amount Per Serving
- Calories 50kcal
Note
- For an added burst of color and flavor, add a sprinkle of Fruity Pebbles on top of each taco before serving.
- You can use a muffin tin if you don't have a taco mold by pressing the cereal mixture into the bottoms of each cup to form mini taco shells.
- Experiment with different types of fresh fruit for varied flavor profiles.
- This recipe is perfect for parties and can be made a day in advance for convenience.

