

Warm, fluffy buns filled with creamy cheesecake and spiced apples – a comforting treat for any time of day! These Apple Cheesecake Buns bring together the perfect blend of softly sweet dough, tangy cream cheese, and tender apple pieces kissed with cinnamon and brown sugar. Whether you’re easing into a slow weekend morning breakfast or looking for a show-stopping dessert to share at a brunch gathering, these buns deliver comfort and delight in every bite. With an intermediate difficulty level, you’ll spend about an hour prepping, 25 minutes baking, and another 1.5 hours letting the dough rise, so plan on a total rest time of around two hours. Each bun clocks in at approximately 280 calories, making them a gratifying indulgence that’s worth every delicious penny.
When you sink your teeth into that first warm, gooey roll, you’ll notice how the subtly sweet, milk-enriched dough gives way to a velvety cheesecake center, followed by pockets of apple that have softened just enough to remain slightly crisp. The infusion of cinnamon brings a cozy warmth, while a drizzle of caramel sauce on top takes these buns to the next level. As someone who’s tested countless baking adventures, I promise you’ll fall head over heels for the dance of flavors here. And trust me, once you taste them fresh from the oven, you’ll be rushing to prepare the next batch—these buns are that irresistible!
KEY INGREDIENTS IN APPLE CHEESECAKE BUNS
Before diving into the step-by-step process, let’s break down what makes these Apple Cheesecake Buns so special. Each component plays a crucial role, from helping the dough rise to delivering the rich, creamy texture and spiced sweetness. Here’s what you’ll need:
- Active dry yeast
This is the leavening agent that gives the dough its airy, fluffy structure. When activated in warm water, it creates carbon dioxide bubbles for a light, springy texture.
- Warm water
Tempered at around 110°F to 115°F, this water awakens the yeast without killing it, ensuring a robust rise and perfect dough consistency.
- Sugar
Added to the dough to feed the yeast and lightly sweeten the bread, helping achieve a golden-brown crust and tender crumb.
- Warm milk
Also set to about 110°F to 115°F, the milk enriches the dough with fats and proteins for a softer, more flavorful bun.
- Unsalted butter
Melted into the dough, this butter adds richness, moisture, and subtle flavor, while helping create an irresistibly tender bite.
- Salt
Balances sweetness and strengthens the gluten network in the dough, giving it structure and preventing it from becoming too dense.
- Egg
Contributes color, additional richness, and binding power, helping the dough hold together and develop a slight chewiness.
- All-purpose flour
The backbone of the recipe, this flour provides the gluten structure needed to trap the gas produced by the yeast and create that classic bread-like texture.
- Cream cheese
Softened and beaten with sugar, it forms the luscious cheesecake layer that’s tangy, smooth, and utterly dreamy between the dough rolls.
- Granulated sugar
Whipped into the cream cheese, this sugar adds sweetness and helps achieve a silky, scoopable filling.
- Vanilla extract
A splash of pure vanilla elevates the cream cheese filling, imparting a warm, fragrant note that complements both the apples and the dough.
- Diced apples
Fresh, bite-sized apple pieces (Granny Smith recommended) lend natural sweetness, slight crispness, and bursts of fruity flavor with every mouthful.
- Ground cinnamon
This spice scatters warmth throughout the apple mixture, bringing that familiar, comforting cinnamon sweetness.
- Brown sugar
Combined with cinnamon, it caramelizes the apples slightly during cooking, creating a deep, rich flavor and hint of molasses.
- Butter (for sautéing apples)
Melted in a pan, this butter softens the apple pieces and binds them to the cinnamon and brown sugar, ensuring each apple bite is tender and flavorful.
HOW TO MAKE APPLE CHEESECAKE BUNS
Baking these Apple Cheesecake Buns might feel like a multi-step process, but each phase is straightforward and rewarding. You’ll first create a soft, elastic dough, then prepare two delicious fillings before assembling, resting, and baking to golden perfection. Let’s dive in!
1. In a large mixing bowl, gently dissolve the yeast in warm water. Stir just until it’s combined, then set aside for about 5 minutes until the mixture becomes visibly frothy, indicating the yeast is active.
2. Add the sugar, warm milk, melted butter, salt, and beaten egg to the yeast mixture. Stir thoroughly so every ingredient is evenly incorporated, forming a rich, slightly sweet base.
3. Gradually add 3½ cups of all-purpose flour, stirring until a soft, slightly sticky dough forms. If it’s too wet, add a little more flour, but keep it tacky enough for easy kneading.
4. Transfer the dough to a lightly floured surface and knead for 5–7 minutes until it becomes smooth and elastic, resisting gently when pulled.
5. Place the dough ball into a greased bowl, cover it with a clean towel, and let it rise in a warm spot for 1 to 1½ hours, or until it has doubled in size.
6. While the dough rises, prepare the cheesecake filling. In a medium bowl, beat together the softened cream cheese, granulated sugar, and vanilla extract until completely smooth and creamy.
7. In another bowl, toss the diced apples with ground cinnamon and brown sugar. Melt the butter in a pan over medium heat, then sauté the apple mixture for about 5 minutes, until the apples are tender but still hold their shape. Set aside to cool.
8. Once risen, punch down the dough to release air. Roll it out on a floured surface into a 12×18-inch rectangle with an even thickness.
9. Spread the cream cheese mixture over the rolled-out dough, leaving a 1-inch border all around to prevent filling leaks.
10. Spoon and evenly distribute the cooled apple mixture over the cheesecake layer, making sure each section of dough gets fruit.
11. Beginning at the longer edge, tightly roll the dough into a log, pressing gently to seal the seam and ends so nothing spills out.
12. Using a sharp knife, slice the log into 12–15 buns, depending on how thick you like them.
13. Arrange the buns cut-side up in a greased baking dish. Cover with a towel and let them rise for an additional 30 minutes to puff up.
14. Meanwhile, preheat your oven to 350°F (175°C) so it’s ready when the buns finish their second rise.
15. Bake the buns for 20–25 minutes, or until the tops are a golden brown and set.
16. Allow the buns to cool slightly before serving, so the filling settles and becomes perfectly sliceable.
SERVING SUGGESTIONS FOR APPLE CHEESECAKE BUNS
These Apple Cheesecake Buns are a star all on their own, but with a few fun finishing touches and thoughtful pairings, you can lift them to an even more memorable experience. Whether you want to keep things cozy at home or impress guests at a weekend brunch, here are some serving ideas to make these buns shine on any table.
- Serve them warm straight from the oven, allowing the creamy cheesecake and apple filling to be slightly gooey. If desired, lightly dust with powdered sugar for an elegant, bakery-inspired look.
- Drizzle with homemade caramel sauce just before serving. The gentle sweetness and silky texture of the caramel complement the tangy cream cheese and spiced apples beautifully.
- Offer alongside a steaming mug of spiced latte or chai tea. The warm spices in the drink will echo the cinnamon in the buns, creating a harmonious flavor experience.
- Plate with a small scoop of vanilla ice cream or a dollop of whipped cream. The cold creaminess contrasts wonderfully with the warm bun, making for a delightful dessert duo.
HOW TO STORE APPLE CHEESECAKE BUNS
If you end up with leftovers (though that’s often a happy problem), you’ll want to keep these buns fresh and moist for enjoying throughout the week. Proper storage methods ensure they retain their flavor, texture, and that wonderful creamy-cheesecake layer.
- Room-temperature storage: Once completely cooled, place the buns in an airtight container or wrap them tightly in plastic wrap. They’ll stay soft and delicious for up to two days at room temperature.
- Refrigeration: To preserve the cream cheese filling longer, refrigerate the buns in a covered container. They’ll keep beautifully for 3–4 days, though the dough may firm up—simply warm for 10–15 seconds in the microwave before serving.
- Freezing: Arrange the cooled buns in a single layer on a baking sheet and freeze until solid. Transfer to a freezer bag, removing as much air as possible. They can stay frozen for up to one month. Thaw overnight in the fridge and warm before serving.
- Reheating tips: Whether from fridge or freezer, gently reheat in a 325°F oven for 10–12 minutes or microwave for 15–20 seconds on medium power to revive that freshly baked taste and soft texture.
CONCLUSION
From the first moment you whisk together yeast, warm milk, and a touch of sugar, you’ll know these Apple Cheesecake Buns are something special. Each stage—whether it’s kneading the soft dough until it’s silky and elastic, whipping up that sweet cream cheese filling, or gently sautéing apple pieces until they’re tender and fragrant—builds a dimension of flavor and texture that’s simply irresistible. As an intermediate-level recipe, it invites you to engage with classic baking techniques, rewarding your effort with buns that look and taste as if they came straight from a cozy bakery. Don’t forget: you can print this article and save it for later, so you’ll always have the recipe on hand when cinnamon and apple cravings strike. There’s also a helpful FAQ section below where you’ll find answers to common questions, from dough rising tips to substitutions you can try.
I can’t wait to hear how your batch turns out! If you have any questions about rising times, ingredient swaps, or decorating ideas, please leave a comment. Your feedback and baking triumphs make this journey so much fun, and I’m here to help if you need a second opinion or a troubleshooting tip. Happy baking, and may every bite be as comforting and delicious as you imagined!
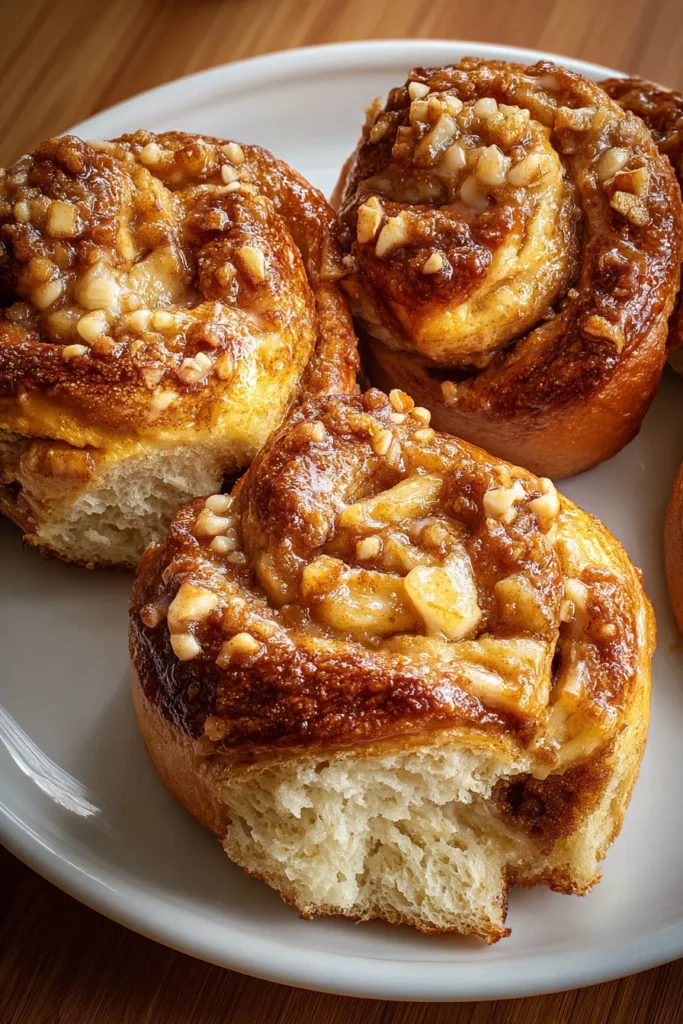

Apple Cheesecake Buns
Description
These Apple Cheesecake Buns are a delightful fusion of fluffy dough, rich cream cheese, and sweet cinnamon-spiced apples, perfect for sharing or savoring yourself.
Ingredients
Instructions
-
In a large mixing bowl, dissolve the yeast in warm water, let it sit for about 5 minutes until it becomes frothy.
-
Stir in the sugar, warm milk, melted butter, salt, and egg.
-
Gradually add 3 1/2 cups of flour, mixing until the dough becomes soft and slightly sticky. Add more flour if necessary.
-
Knead the dough on a floured surface for about 5-7 minutes until smooth and elastic.
-
Place the dough in a greased bowl, cover, and let it rise in a warm place until doubled in size, about 1-1.5 hours.
-
While the dough is rising, prepare the cheesecake filling by beating together cream cheese, granulated sugar, and vanilla extract until smooth.
-
In a separate bowl, combine diced apples, cinnamon, and brown sugar. Melt the butter in a pan over medium heat and cook the apples until they are softened, about 5 minutes. Let cool.
-
Once the dough has doubled in size, punch it down and roll it out to a rectangle about 12x18 inches.
-
Spread the cream cheese mixture over the rolled-out dough, leaving a 1-inch border around the edges.
-
Evenly spread the apple mixture over the cream cheese layer.
-
Starting from the longer side, tightly roll up the dough into a log shape and pinch the seams to seal.
-
Cut the roll into 12-15 slices, depending on your preferred thickness.
-
Arrange the buns in a greased baking dish, cover with a towel, and let them rise again for about 30 minutes.
-
Preheat your oven to 350°F (175°C).
-
Bake the buns for 20-25 minutes or until golden brown.
-
Allow to cool slightly before serving.
Nutrition Facts
Serving Size 12
- Amount Per Serving
- Calories 21kcal
Note
- For a more intense apple flavor, use Granny Smith apples which hold their shape well when baked.
- These buns can be prepared the night before, allow them to rise the second time in the fridge.
- A drizzle of caramel sauce on top before serving can add a delicious touch.
- To keep the buns moist, keep them covered with foil when storing.
- Always check the yeast expiry date for the best results in dough rising.

