

When you crack open a jar of crisp homemade refrigerator pickles, you’re greeted with that satisfying snap and an explosion of tangy, refreshing flavors that seem to dance on your taste buds. These pickles are the kind that instantly elevate any sandwich from good to unforgettable, or add that zingy side to your burger that keeps you coming back for more. It all begins with simple, vine-ripened cucumbers sliced into perfect rounds, layered with sweet onion rings, and bathed in a zesty brine that mingles white vinegar, a hint of sugar, and a symphony of spices. As you swirl peppercorns, mustard seeds, and garlic through the mix, you’ll notice the kitchen filling with an almost electric energy—this isn’t just pickling, it’s culinary alchemy.
Every spoonful delivers a harmony of textures and tastes: the snap of the cucumber, the whisper of dill, and the faint warmth of red pepper flakes if you’ve chosen to embrace the spice. There’s a joy in waiting—letting those flavors meld for at least 24 hours in the fridge, transforming raw vegetables into crunchy, tangy delights that feel like a celebration in every bite. Whether you’re a novice in the kitchen or a seasoned home cook, this recipe is delightfully approachable. With just 20 minutes of prep, a brief 10 minutes on the stove, and a day of anticipation, you’ll have pickles ready to garnish your salads, sandwiches, or simply enjoy straight from the jar. These aren’t just any pickles—they’re your new go-to snack, side dish, and kitchen confidence booster all rolled into one briny, delicious package.
KEY INGREDIENTS IN CRISP HOMEMADE REFRIGERATOR PICKLES
Before you dive into pickling, let’s talk about what makes these pickles truly shine. Each ingredient plays a vital role, from creating that unmistakable crunch to layering bright, tangy, and aromatic notes. Quality and freshness here will be your secret weapon for the ultimate refrigerator pickle experience.
- Cucumbers
The star of the show, cucumbers provide the signature crunch and mild, refreshing flavor. Choose firm, vine-ripened cukes to ensure a snappy texture that holds up in the brine.
- Onions
Thinly sliced onions add subtle sweetness and a tender bite that complements the crisp cucumbers. They absorb the brine beautifully, offering layers of savory-sweet contrast.
- White Vinegar
This clear, sharp vinegar contributes the essential acidic backbone, brightening every flavor and preserving the veggies for that tangy punch.
- Water
Dilutes the vinegar just enough to balance the acidity and create a perfectly drinkable brine that infuses the vegetables evenly.
- Salt
Draws moisture from the cucumbers, creating that satisfying snap, while seasoning each slice and syncing all flavors together.
- Sugar
Softens the tartness of the vinegar and salt, introducing a gentle sweetness that rounds out the overall taste.
- Mustard Seeds
Impart a mild, nutty heat that pops in your mouth, adding complexity and little bursts of piquancy.
- Whole Black Peppercorns
Provide a warm, peppery kick that counterpoints the sweetness and acidity—tiny flavor bombs in every jar.
- Dill Seeds
Bring an earthy herb flavor, intensifying the classic dill pickle aroma and linking all the spices harmoniously.
- Garlic Cloves
Smashed to release their full, pungent aroma, garlic infuses the brine with bold, savory undertones.
- Red Pepper Flakes (optional)
If you crave a bit of heat, these flakes introduce a gentle fire that lingers pleasantly on the tongue.
- Fresh Dill
Tucked right into the mix, sprigs of fresh dill release bright, grassy oils that crown these pickles with that unmistakable herbaceous note.
HOW TO MAKE CRISP HOMEMADE REFRIGERATOR PICKLES
Ready to transform these everyday ingredients into crunchy, tangy pickles? This simple, step-by-step process ensures an even brine infusion and maximum flavor with minimal fuss.
1. Start by thoroughly washing your cucumbers and onions under cool running water, removing any garden grit. Slice the cucumbers into even 1/4-inch rounds and cut the onions into thin, uniform rings to ensure consistent texture and brine absorption.
2. In a large mixing bowl, layer the cucumber slices and onion rings alternately, creating a beautiful stack of fresh veggies. Set this bowl aside while you focus on preparing your pickling brine.
3. In a medium saucepan, combine the white vinegar, water, salt, and sugar. Place over medium heat and stir occasionally to dissolve the salt and sugar completely. Watch carefully so the mixture doesn’t boil over.
4. Once the brine is fully clear and fragrant, remove it from heat and stir in the mustard seeds, whole black peppercorns, dill seeds, smashed garlic cloves, and red pepper flakes (if you’re adding that spicy kick). Mix thoroughly so each spice is evenly suspended.
5. Carefully pour the warm brine over the cucumber and onion layers, ensuring every piece is fully submerged. Use a large spoon to gently toss the vegetables, distributing the spices throughout.
6. Tuck the fresh dill sprigs into the bowl, nestling them among the cucumber and onion. Cover the bowl with a tight-fitting lid or plastic wrap and allow everything to cool to room temperature.
7. Once cooled, transfer the pickled vegetables and brine into clean mason jars or airtight containers. Press down lightly so all the cucumbers and onions are covered by the brine.
8. Seal the jars and place them in the refrigerator. Plan to let the pickles marinate for at least 24 hours, though the flavors deepen beautifully over 2 to 3 days.
9. Keep your crisp homemade refrigerator pickles for up to 2 to 3 weeks, enjoying them on sandwiches, salads, or straight from the jar as a satisfying snack.
SERVING SUGGESTIONS FOR CRISP HOMEMADE REFRIGERATOR PICKLES
Refrigerator pickles are an incredibly versatile addition to your culinary lineup, and serving them creatively can turn every meal into an adventure. Their bright acidity, refreshing crunch, and herbaceous flair make them the perfect complement to a wide range of dishes. Whether you’re looking to enhance a casual sandwich, craft a gourmet charcuterie board, or simply enjoy a guilt-free snack, these pickles are your answer. Let these suggestions spark your imagination and get you reaching for those jars whenever you want to add a zingy twist.
- Classic Sandwich Upgrade
Layer pickle slices on your favorite deli meat and cheese sandwich to introduce a tangy crunch that cuts through rich flavors. For best results, drain off excess brine and pat the pickles dry before placing them on soft bread or a crusty baguette.
- Charcuterie Board Addition
Use whole pickle chips or spears as a vibrant contrast alongside cured meats, cheeses, and olives. Arrange pickles in small bowls or fan them out for a visually appealing platter that invites guests to mix and match.
- Tangy Salad Mix-In
Chop your pickles into bite-sized pieces and toss them into green salads, potato salads, or pasta salads. The acidic punch brightens creamy dressings, while the crunch adds delightful texture.
- Snack on Their Own
For a quick, guilt-free nibble, pull a jar from the fridge and enjoy a few crisp rounds straight from the brine. The cool acidity is surprisingly refreshing between meals or alongside a cold beverage.
HOW TO STORE CRISP HOMEMADE REFRIGERATOR PICKLES
Proper storage is crucial to preserving the signature crunch and vibrant flavors of your homemade pickles. Unlike traditional canning, these refrigerator pickles depend on cold temperatures rather than heat processing, so keeping them chilled and sealed is key. Maintaining a steady refrigerator environment near 35–40°F ensures the brine remains clear and the cucumbers stay firm. Below are some tried-and-true tips to maximize freshness and flavor over their 2–3 week shelf life.
- Airtight Mason Jars
Transfer cooled pickles into sterilized, airtight mason jars with tight-sealing lids. This prevents odors from other foods in the fridge from seeping in and protects the brine from contamination.
- Full Brine Coverage
Always ensure the cucumbers and onions are completely submerged in brine. If needed, add a small glass weight or extra fresh dill sprig to press the veggies below the liquid surface, avoiding any exposed pieces that could soften or develop off-flavors.
- Consistent Chilling
Store your jars on a middle or lower shelf, where the temperature remains most stable. Avoid placing them near the fridge door to prevent temperature fluctuations that might compromise crunch.
- Clean Utensils Only
Every time you sample your pickles, use a clean fork or spoon to avoid introducing bacteria or stray crumbs into the jar. This simple habit widens the window of optimal freshness and keeps your pickles tasting their best.
CONCLUSION
This recipe for Crisp Homemade Refrigerator Pickles has taken you from simple ingredients—vine-ripened cucumbers, sweet onions, and a vibrant spice blend—to the moment where you crack open the jar and hear that joyous snap. With just 20 minutes of hands-on preparation, a quick 10-minute brine simmer, and a day of anticipation in the fridge, you’ll find yourself rewarded with deeply flavorful, irresistibly crunchy pickles. Whether you follow the serving suggestions to upgrade your sandwiches, spruce up charcuterie boards, or enjoy them as a refreshing snack, these pickles bring an exciting burst of tang and texture to every bite. Remember that the longer you wait (up to about 3 days), the more these flavors harmonize, so plan ahead and let patience work its magic.
Feel free to print this article and tuck it into your recipe binder or kitchen drawer for easy reference. You can also save it digitally so it’s always at your fingertips when those cucumber cravings strike. Below, you’ll find a handy FAQ section to address any lingering questions or troubleshooting tips as you master your pickling skills. If you try this recipe, please drop a comment or reach out with any questions, feedback, or personal pickle stories. I’d love to hear how your batches turned out, which serving methods you enjoy most, or any creative spice variations you’ve experimented with. Happy pickling!
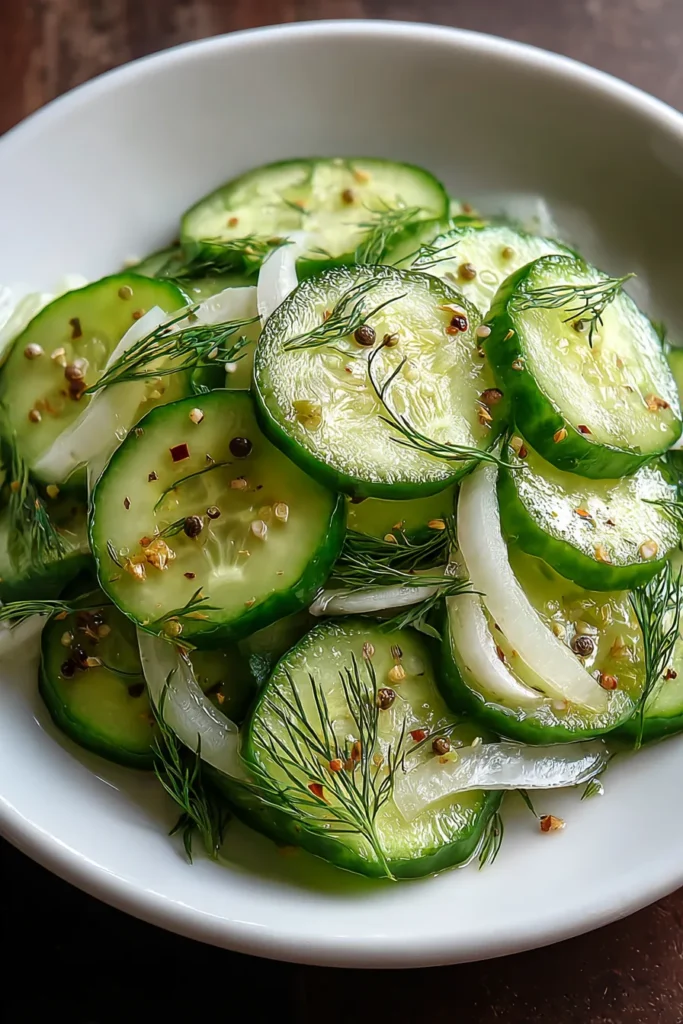

Crisp Homemade Refrigerator Pickles
Description
These crisp homemade refrigerator pickles burst with flavor from vine-ripened cucumbers, spices, and a zesty brine. Perfect for snacking or a side dish, they add a delicious crunch to any meal.
Ingredients
Instructions
-
Start by thoroughly washing your cucumbers and onions. Slice the cucumbers into rounds, about 1/4-inch thick. Slice the onions into thin rings.
-
In a large bowl, layer the cucumber slices and onions. Set aside while you prepare the pickling brine.
-
In a medium saucepan, combine the white vinegar, water, salt, and sugar. Heat the mixture over medium heat, stirring occasionally, until the salt and sugar have dissolved completely.
-
Once the brine solution is ready, remove it from heat and add the mustard seeds, black peppercorns, dill seeds, garlic cloves, and red pepper flakes (if using). Stir well to combine.
-
Carefully pour the brine over the cucumber and onion mixture, ensuring all vegetables are fully covered. Use a spoon to mix everything, so the spices are evenly distributed.
-
Tuck the fresh dill sprigs into the mixture. Cover the bowl with a lid or plastic wrap and let it cool to room temperature.
-
Once cooled, transfer the pickled vegetables into mason jars or airtight containers. Make sure the brine covers the cucumbers and onions completely.
-
Seal the jars or containers and place them in the refrigerator. Allow the pickles to marinate for at least 24 hours before enjoying, though they will get more flavorful the longer they sit.
-
Enjoy your crisp homemade refrigerator pickles within 2 to 3 weeks for optimal taste and crunch.
Nutrition Facts
Serving Size 6
- Amount Per Serving
- Calories 8kcal
Note
- These pickles are perfect as a side dish, sandwich topping, or even as a snack.
- Feel free to experiment by adding other spices like coriander seeds or fennel seeds to customize the flavor.
- If you're not a fan of spicy foods, simply omit the red pepper flakes.
- Always use fresh cucumbers for the best texture and taste.
- Adjust the sweetness of your pickles by increasing or decreasing the sugar based on your taste preferences.

