

Every bite of this classic school cafeteria pizza transports me back to the vibrant lunch lines of grade school. I can almost hear the chatter of friends swapping slices and swapping stories, the hum of the fluorescent lights overhead, and that unmistakable warmth of a golden crust under my fingertips. This homemade pizza brings all those memories rushing back—fluffy yet sturdy crust, a tangy red sauce that tastes like childhood, and a perfect blanket of gooey mozzarella and cheddar. Best of all, it’s an easy pizza recipe that anyone can master, even on a busy weeknight. With just a 20-minute prep, a quick 20-minute bake, and an hour of hands-off resting time, you’ll be indulging in comfort food faster than you can say “lunch bell.”
Whether you’re planning a laid-back family dinner or craving a nostalgic slice at lunchtime, this beginner-friendly recipe covers all the bases. It’s as versatile as your imagination—feel free to top it with pepperoni, sausage, or any vibrant veggies you love. Each slice clocks in around 300 calories (based on an eighth of the pizza), making it a delightful yet manageable treat. This is school pizza reinvented for home cooks who want to savor those cafeteria flavors without lining up at 11:45 AM. Let’s dive into how to turn simple pantry staples into the most heartwarming, cheesy experience you’ve had in years.
KEY INGREDIENTS IN SCHOOL CAFETERIA PIZZA
To recreate that iconic cafeteria-style slice, you need a handful of pantry staples that come together in harmony. Each ingredient plays its part in achieving the signature fluffy crust, rich sauce, and melty cheese we all remember (and love!).
- Warm water
Provides the ideal temperature for activating yeast, kickstarting the fermentation that gives your crust its light, airy texture.
- Sugar
Feeds the yeast so it can bubble and foam, resulting in a perfectly risen dough with a hint of sweetness.
- Active dry yeast
The magic behind the rise, producing gas bubbles that make your crust tender and puffy.
- All-purpose flour
The foundation of your dough. Its balanced protein content ensures a crust that’s both chewy and sturdy enough to hold sauce and toppings.
- Salt
Enhances flavor depth and controls yeast activity, preventing an overly fast rise and keeping the dough elastic.
- Vegetable oil
Adds tenderness to the crust and helps the dough slide off the bowl easily. It also contributes to a golden exterior when baked.
- Pizza sauce
Brings that classic tangy tomato flavor. You can stir in dried herbs like oregano or basil for an extra burst of cafeteria-style authenticity.
- Shredded mozzarella cheese
The star of melty, stretchy goodness. A soft, mild cheese that blankets the pizza in gooey deliciousness.
- Shredded cheddar cheese
Offers a sharper bite and pleasing color contrast when combined with mozzarella.
- Toppings of choice
Pepperoni, sausage, or vegetables add personality and extra flavor—whatever you loved grabbing in the lunch line, go for it!
HOW TO MAKE SCHOOL CAFETERIA PIZZA
Bringing this school cafeteria staple to life in your kitchen is a joyously simple process. From mixing the dough to baking that bubbling cheese, you’ll feel like a kid again in the best possible way.
1. In a large mixing bowl, combine the warm water and sugar, stirring until the sugar is completely dissolved. This ensures an even sweetness and primes the liquid environment for the yeast.
2. Sprinkle the active dry yeast evenly over the surface of the water. Let it rest undisturbed for about five minutes, or until it becomes bubbly and foamy on top—this indicates the yeast is alive and ready to work.
3. Add the all-purpose flour, salt, and vegetable oil to the yeast mixture. Use a wooden spoon or your hands to mix until a rough dough forms, ensuring no dry patches remain.
4. Transfer the dough to a lightly floured surface and knead for 8–10 minutes, or until it feels smooth and elastic. This step develops the gluten network, giving the crust structure.
5. Place the dough in a lightly oiled bowl, turning it once to coat. Cover with a damp cloth and let it rise in a warm, draft-free spot for about one hour, until it doubles in size.
6. Preheat your oven to 475°F (245°C) and generously grease a large baking sheet with oil or nonstick spray to prevent sticking.
7. Punch down the risen dough and roll it out on a floured surface into a rectangle that fits your baking sheet.
8. Spread the pizza sauce evenly over the dough, leaving a small border around the edges for the crust.
9. Sprinkle the mozzarella and cheddar cheeses uniformly over the sauce, creating that classic gooey layer.
10. Top with your chosen pepperoni, sausage, or vegetables, arranging them so each slice gets a fair distribution.
11. Bake in the preheated oven for 15–20 minutes, or until the crust is golden and the cheese is bubbling and slightly browned.
12. Remove from the oven and allow the pizza to cool for a few minutes before slicing. This brief rest helps the cheese set and makes cutting cleaner.
SERVING SUGGESTIONS FOR SCHOOL CAFETERIA PIZZA
Serving these nostalgic slices is part of the fun—after all, cafeteria pizza was never about fancy plating, but about pure, unadulterated enjoyment. To elevate your presentation and bring out every flavor note, here are some of my favorite ways to serve:
- Classic Diner Style
Lay slices on a plain white plate and wrap each in a triangle of parchment paper. It feels just like grabbing pizza at the lunch table and keeps crusts crisp until the last bite.
- Herb-Infused Garnish
Sprinkle freshly chopped basil or oregano over the hot cheese. The warm herbs release their oils and brighten each slice, mimicking a schoolyard twist from the 90s.
- Dipping Sauces Trio
Offer small bowls of ranch, marinara, and garlic butter for dipping. The extra layers of flavor make every bite a new discovery and add a playful element to your meal.
- Side of Refreshing Salad
Pair your pizza with a simple mixed greens salad tossed in lemon vinaigrette. The crisp, acidic greens cut through the richness of cheese and dough, balancing the plate.
HOW TO STORE SCHOOL CAFETERIA PIZZA
When you’ve got more pizza than you can eat in one sitting—or just want to savor leftovers—you’ll want to store it properly to maintain that fresh-baked taste and texture. Follow these tips to keep your pizza nearly as delightful days later as it was fresh from the oven:
- Refrigerator Storage
Wrap individual slices tightly in plastic wrap or aluminum foil, then place them in an airtight container. They’ll stay fresh for up to four days. Reheat in a hot oven or toaster oven to crisp the crust.
- Freezer Method
Lay slices in a single layer on a baking sheet and flash-freeze for an hour. Transfer frozen slices to a zip-top freezer bag, removing as much air as possible. They’ll keep for up to two months; reheat straight from frozen at 375°F until bubbly.
- Paper Towel Technique
If you prefer softer crust, sandwich slices between paper towels inside a container. The towels absorb excess moisture, preventing sogginess while keeping the toppings intact for 2–3 days.
- Recrisping Hack
For that fresh-baked crunch, heat a skillet over medium heat, add a drop of oil, then place the slice cheese-side up. Cover with a lid for a minute to melt the cheese fully, then remove the lid to crisp the bottom.
CONCLUSION
This recipe for School Cafeteria Pizza is more than just a throwback; it’s a ticket to reliving those treasured memories with every bite. From the bubbling cheese to the fluffy homemade crust, you’ve learned how pantry staples—warm water, sugar, yeast, flour, and oil—come together to mimic that much-loved lunch line classic. We’ve covered the key ingredients, step-by-step instructions with bold techniques you need to master, creative serving ideas, and foolproof storage methods to keep slices tasting fresh. Whether you’re gathering around the kitchen counter with the kids or hosting a casual pizza night with friends, this comfort food gem is guaranteed to delight both nostalgic adults and curious little ones alike.
Feel free to print this article and save it in your recipe binder for future gatherings and family dinners. You’ll find a FAQ section just below to answer any lingering questions about dough consistency, topping variations, or reheating tips. If you try this recipe, I’d love to hear how it turned out—drop a comment, share your own cafeteria pizza memories, or ask for help if you get stuck at any step. Your feedback, questions, and stories make this kitchen chat all the more special, and I can’t wait to hear about your delicious adventures with homemade school pizza!
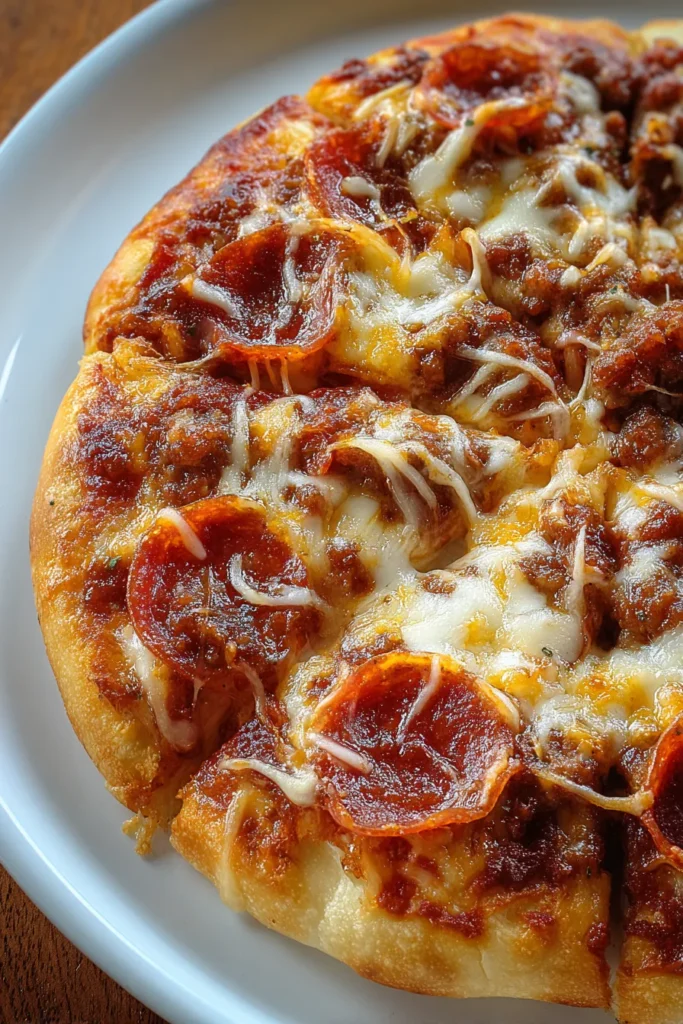

School Cafeteria Pizza
Description
Experience the heartwarming flavors of school cafeteria pizza, featuring a fluffy crust, rich sauce, melty cheese, and your favorite toppings. Perfect for sharing!
Ingredients
Instructions
-
In a large mixing bowl, combine the warm water and sugar. Stir until the sugar is dissolved.
-
Sprinkle the yeast over the water and let it sit until the yeast gets bubbly, about 5 minutes.
-
Add the flour, salt, and vegetable oil to the yeast mixture. Mix until a dough forms.
-
Knead the dough on a floured surface for about 8-10 minutes or until smooth and elastic.
-
Place the dough in a lightly oiled bowl, cover it with a damp cloth, and let it rise in a warm place until it doubles in size, about 1 hour.
-
Preheat your oven to 475°F (245°C). Grease a large baking sheet.
-
Punch down the dough and roll it out to fit the baking sheet.
-
Spread the pizza sauce evenly over the dough.
-
Sprinkle the mozzarella and cheddar cheeses over the sauce.
-
Add your choice of toppings evenly across the pizza.
-
Bake in the preheated oven for 15 to 20 minutes or until the crust is golden and the cheese is bubbly.
-
Allow the pizza to cool for a few minutes before slicing and serving.
Nutrition Facts
Serving Size 8
- Amount Per Serving
- Calories 38kcal
Note
- This recipe mimics the classic school cafeteria pizza slice, bringing a taste of nostalgia.
- Feel free to customize the toppings to suit your taste preferences.
- For a different flavor profile, try mixing herbs like oregano or basil into the pizza sauce.
- Double the recipe for a larger crowd or for leftovers to enjoy later.

