

Bursts of deep crimson weave through a base of rich, fudgy chocolate in these Red Velvet Brownies—truly a vibrant twist on a classic treat! These decadent Red Velvet Brownies are the kind of dessert that feels both familiar and exciting, marrying the moist crumb you crave from red velvet cake with the chewy, luscious texture of a brownie. The magic happens when you fold in creamy white chocolate chips and a hint of tangy apple cider vinegar, creating layers of flavor that dance on your taste buds. Whether you’re a seasoned baker or testing your wings with an easy brownies recipe for the first time, you’ll find this dessert irresistibly approachable. With just 20 minutes of prep, 30–35 minutes of baking, and a quick 10-minute rest time, you’ll be slicing into these beauties in under an hour—definitely a win for anyone craving homemade chocolate treats without a ton of fuss.
On top of being a beginner-friendly dessert, these brownies pack about 350 calories per serving (when cut into 12 squares), making them perfect for sharing at a weekend brunch, a cozy movie night, or a special Valentine’s Day spread. The combination of granulated and brown sugar keeps things sweet and tender, while the unsweetened cocoa powder ensures a subtle chocolate undertone that never overpowers the signature red color. Plus, a dash of vanilla extract rounds out the flavor profile, making every bite feel comforting and complete. Personally, I love whipping up this recipe when I want a pop of color at gatherings—your friends and family will be swooning over that luscious hue and begging you for the recipe!
KEY INGREDIENTS IN RED VELVET BROWNIES
Before diving into the step-by-step, let’s chat about the heart and soul of this recipe: the ingredients. Each one plays an essential role in creating the perfect texture, color, and flavor that make these brownies so unforgettable. From the foundation of melted butter to the pop of white chocolate, here’s what you’ll need:
- Unsalted butter
This is your richness anchor. When melted, it binds the sugars and dry ingredients together, lending a smooth, velvety mouthfeel to the brownies without adding any extra saltiness.
- Granulated sugar
Provides sweetness and structure. As it dissolves into the melted butter, it helps create a tender crumb and balances the tang from the vinegar.
- Brown sugar
Adds moisture and a subtle caramel note. Its natural molasses content deepens the flavor profile and keeps the brownies wonderfully chewy.
- Large eggs
Serve as a key binding and leavening agent. Beating them until light and fluffy incorporates air, giving your brownies a lift while maintaining that fudgy density.
- Vanilla extract
Rounds out the flavors with sweet, aromatic notes. It complements both the cocoa and white chocolate, ensuring a well-balanced taste.
- Red food coloring
Delivers the iconic crimson hue. Beyond aesthetics, it amplifies the visual excitement and complements the mild cocoa flavor.
- Apple cider vinegar
Adds a subtle tang that brightens the overall taste. It also interacts with the baking powder to give a slight lift and tender crumb.
- All-purpose flour
Forms the structure of the brownies. When combined just right, it keeps them from becoming cakey while giving enough body to hold the chocolate chips.
- Unsweetened cocoa powder
Offers rich, bittersweet cocoa notes. This small amount ensures the brownies truly read as red velvet rather than traditional chocolate.
- Baking powder
A gentle leavening agent. It creates just enough lift to keep the edges tender without turning your brownies into cake.
- Salt
Enhances all the flavors. Even in sweet desserts, a pinch of salt is critical for depth and balance.
- White chocolate chips
Melt into creamy pockets throughout the brownies. They add a sweet, luxurious contrast to the cocoa and vinegar tang.
HOW TO MAKE RED VELVET BROWNIES
Let’s roll up our sleeves and transform these simple ingredients into a pan of irresistible brownies. Throughout these steps, focus on technique—melting, mixing, folding—and you’ll end up with a perfectly textured treat. Remember, baking is as much about gentle handling as it is about precise measurements, so take it slow and steady.
1. Preheat your oven to 350°F (175°C). Lightly grease a 9×13-inch baking pan with butter or line it with parchment paper for easy removal and clean edges.
2. Place the unsalted butter in a medium saucepan over low heat. Stir until it’s completely melted and smooth. Once melted, remove from heat and let the butter cool for a few minutes so it doesn’t cook the eggs in the next steps.
3. In a large mixing bowl, combine the granulated sugar, brown sugar, melted butter, and vanilla extract. Stir until the mixture is completely smooth and homogeneous, ensuring no sugar clumps remain.
4. Crack in the eggs, one at a time, beating well after each addition. Aim for a light and fluffy consistency; this will help give your brownies a tender rise.
5. Stir in the red food coloring and apple cider vinegar, mixing until the deep ruby hue is evenly distributed throughout the batter.
6. In a separate bowl, sift together the all-purpose flour, unsweetened cocoa powder, baking powder, and salt. This step removes lumps and ensures a consistent dry mix.
7. Gradually add the dry ingredients into the wet mixture, stirring gently with a spatula until just combined. Be cautious here—overmixing can lead to tougher brownies.
8. Fold in the white chocolate chips until they’re evenly scattered throughout the batter, creating pockets of creamy sweetness in every bite.
9. Pour the batter into the prepared pan and spread it evenly with a spatula, smoothing the top for uniform baking.
10. Bake for 30–35 minutes, or until a toothpick inserted into the center emerges with a few moist crumbs—this ensures that fudgy interior.
11. Allow the brownies to cool in the pan on a wire rack for about 10 minutes. Then lift them out by the parchment for easy slicing into squares.
SERVING SUGGESTIONS FOR RED VELVET BROWNIES
Once your brownies have cooled and you’re ready to impress, it’s all about presentation and pairing. Whether you’re bringing these to a dinner party or simply indulging at home, these serving ideas will elevate your experience and highlight the vibrant twist on a classic treat.
- Cream Cheese Frosting Dollop
Top each brownie with a swirl of cream cheese frosting to mimic the classic red velvet cake vibe. The tangy, creamy frosting complements the cocoa undertones and brings an extra layer of luxury to every bite.
- Fresh Berries and Mint
Garnish your brownie platter with fresh berries like strawberries, raspberries, or blueberries. A sprig of mint adds a pop of color and refreshing aroma that cuts through the richness.
- Vanilla Ice Cream Scoop
Serve each brownie warm alongside a scoop of vanilla bean ice cream. The contrast between hot and cold creates an indulgent dessert that’s hard to resist, and the vanilla accentuates the red velvet flavors.
- Drizzle of White Chocolate
Melt a handful of white chocolate chips and use a spoon to drizzle intricate patterns over the cooled brownies. This not only looks elegant but also reinforces the creamy pockets you’ll find inside.
HOW TO STORE RED VELVET BROWNIES
Proper storage ensures your Red Velvet Brownies stay moist, flavorful, and irresistible days after baking. Brownies can lose their luscious texture if they’re exposed to air or stored incorrectly, so follow these tips for maximum freshness—perfect for planning ahead or stretching out the enjoyment of these chocolate treats.
- Airtight Container at Room Temperature
Place fully cooled brownies in a single layer inside an airtight container. Keep them at room temperature, away from direct sunlight, for up to 3 days. This method maintains that signature fudgy interior and soft edges.
- Refrigeration for Extended Freshness
If you need to store the brownies longer, wrap individual squares in plastic wrap and place them in a sealed container in the fridge. They’ll stay fresh for up to a week—but let them come to room temperature before serving to recover their ideal texture.
- Freezing for Monthly Stashes
For longer-term storage, wrap each brownie square in wax paper and then place them in a freezer-safe bag. Freeze for up to 3 months. Thaw overnight in the fridge or for a couple of hours on the counter. This method preserves both the red hue and the fudgy consistency.
- Layering with Parchment Paper
When stacking brownies in a container, place parchment paper between layers to prevent them from sticking together. This is especially helpful if you’re using a deep box or planning to transport your dessert to gatherings.
CONCLUSION
These Decadent Red Velvet Brownies have everything you need to create a memorable dessert: vibrant color, luscious fudginess, hints of tangy vinegar, and pockets of creamy white chocolate. From the moment you melt that first stick of butter to the satisfying pull of a warm brownie out of the pan, this recipe promises a delightful baking experience. Whether you’re a beginner baker or a seasoned pro, the balance of straightforward steps and sensational results will make this treat a go-to in your kitchen. Feel free to print this article for easy reference and save it for those moments when you want to wow your friends and family with homemade chocolate treats bursting with red velvet flair. And don’t forget—you can find a FAQ below to answer any lingering questions about measurements, substitutions, or troubleshooting.
I hope this recipe inspires you to get creative in the kitchen. If you try these brownies, please drop a comment below and share your results—did you add extra white chocolate chips or swap in beetroot powder for a natural red tint? Any questions, feedback, or troubleshooting tips you need, just let me know. Happy baking, and here’s to many more colorful, delicious creations in your dessert repertoire!
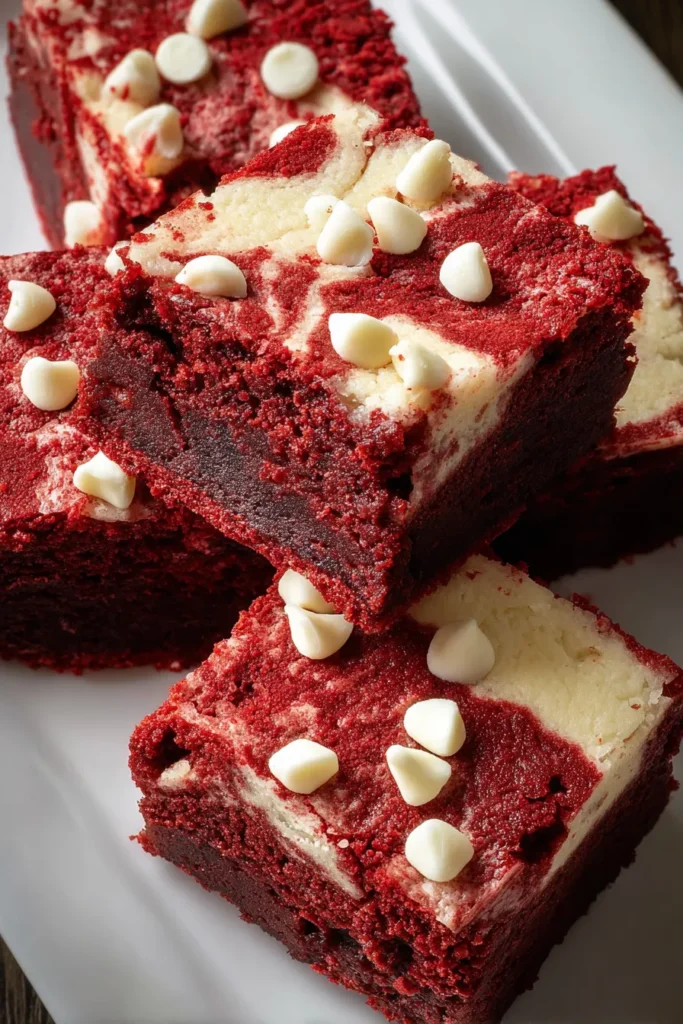

Red Velvet Brownies
Description
Experience the rich flavors of red velvet in these fudgy brownies, infused with creamy white chocolate and a touch of tang from apple cider vinegar.
Ingredients
Instructions
-
Preheat your oven to 350°F (175°C). Grease a 9x13-inch baking pan lightly with butter or line it with parchment paper for easy removal.
-
In a medium saucepan, melt the butter over low heat until completely liquid. Remove from heat and let it cool for a few minutes.
-
In a large mixing bowl, combine the granulated sugar, brown sugar, melted butter, and vanilla extract. Stir until the mixture is smooth and fully incorporated.
-
Add the eggs one at a time, beating well after each addition until the mixture is light and fluffy.
-
Stir in the red food coloring and apple cider vinegar, mixing until the color is evenly distributed.
-
In a separate bowl, sift together the flour, cocoa powder, baking powder, and salt.
-
Gradually add the dry ingredients into the wet mixture, stirring gently until just combined. Do not overmix.
-
Fold in the white chocolate chips until they're evenly distributed throughout the batter.
-
Pour the batter into the prepared baking pan, spreading it evenly with a spatula.
-
Bake in the preheated oven for 30-35 minutes, or until a toothpick inserted into the center comes out with a few moist crumbs.
-
Allow the brownies to cool in the pan on a wire rack before cutting them into squares.
Nutrition Facts
Serving Size 12
- Amount Per Serving
- Calories 33kcal
Note
- Red velvet is traditionally known for its moist texture and vibrant color.
- You can add a cream cheese frosting on top for extra flavor reminiscent of a classic red velvet cake.
- If you cannot find red food coloring, beetroot powder can be a natural alternative.
- Be sure to monitor the baking time closely as overbaking can result in dry brownies.

