

Ever found yourself longing for the cozy warmth of homemade apple pie but in a simpler, handheld form? Apple Pie Bars with Streusel Topping answer that craving with a buttery shortbread crust, a spiced apple filling bubbling with cinnamon-kissed sweetness, and a golden, crunchy streusel that adds texture at every bite. These bars bring together the classic flavors of fall—tart apples, warm nutmeg, and a hint of lemon—nestled between layers of tender dough and an irresistible crumb. As soon as they emerge from the oven, the kitchen becomes a haven of comforting flavors. They are perfect for busy weekdays when you still want that homemade touch, or for weekend brunch spreads where friends gather and laughter fills the room. Each square is a small piece of nostalgia, recalling cozy afternoons spent leaf-peeping or sipping hot cider by the fireplace. Whether you serve them warm with ice cream or pack them for an afternoon snack, these bars promise that perfect balance of sweet and spiced in every bite.
What started as a spontaneous experiment in my own kitchen quickly turned into an all-time favorite for family gatherings and potlucks alike. I still remember the first time I served these bars at a fall bake sale—my friend’s eyes lit up as she bit into the mix of tender apple slices, rich cinnamon, and buttery streusel. She declared it “the best thing since sliced pie,” and honestly, I couldn’t disagree. Sweet and spiced, these easy Apple Pie Bars with a crunchy streusel topping showcase a buttery crust, a luscious apple filling, and that delightful streusel that adds a perfect crunch on top. They come together in just under an hour, and cleanup is a breeze because everything happens in a few bowls. Whether you’re a beginner looking to impress or a seasoned baker craving a quick twist on tradition, these bars are your go-to dessert. They’re perfect for potlucks, school lunches, or enjoying with an afternoon cup of tea—so let’s dive in and bring those fall flavors to life!
KEY INGREDIENTS IN APPLE PIE BARS WITH STREUSEL TOPPING
Before you get started, it’s helpful to know why each ingredient plays a starring role in these Apple Pie Bars with Streusel Topping. The balance of tender dough, spiced apple filling, and crunchy streusel comes down to simple pantry staples. From the foundation of a flaky crust to the final sprinkle of sweet topping, each component is critical to achieving those layers of flavor and texture that make every bite irresistible.
- All-purpose flour: Provides structure and tenderness to the crust and streusel, ensuring a sturdy base that holds up to the apple filling while still remaining tender.
- Granulated sugar: Adds sweetness and helps the crust brown beautifully, balancing the natural tartness of the apples.
- Unsalted butter: When creamed into the flour and sugar, imparts a rich, buttery flavor and yields that melt-in-your-mouth texture in both crust and streusel.
- Salt: Enhances all the flavors in the recipe, cutting through sweetness and deepening the overall taste profile.
- Apples: The heart of the filling, offering natural sweetness and a juicy bite; firm varieties hold their shape under the streusel.
- Ground cinnamon: Warms and spices the filling and streusel, adding depth and that classic apple-pie aroma.
- Lemon juice: Brightens the filling and prevents apple slices from browning, lending a subtle tang.
- Nutmeg: Adds a hint of warm spice that complements the cinnamon and enriches the apple mixture.
- Old-fashioned oats: Contribute chewiness and rustic texture to the streusel, balancing the smooth apple layer.
- Brown sugar: Brings molasses notes to the streusel topping, creating a toffee-like sweetness and enhancing its golden hue.
HOW TO MAKE APPLE PIE BARS WITH STREUSEL TOPPING
Now that you know what goes into these bars, let’s walk through the process of building layer upon layer of flavor. Whether you’re a beginner or a seasoned baker, these instructions will guide you step-by-step to ensure your Apple Pie Bars turn out perfectly every time. Get your mixing bowls ready and let’s transform simple ingredients into a show-stopping dessert!
1. Preheat your oven to 350°F (175°C). Grease a 9×9-inch baking pan and set aside.
2. In a medium bowl, combine 1 cup of flour, 1/4 cup of granulated sugar, 1/2 cup of softened butter, and 1/4 teaspoon of salt. Mix until the dough is crumbly. Press the mixture evenly into the bottom of the prepared pan.
3. Bake the crust for about 15 minutes or until it starts to lightly brown. Remove from the oven and set aside.
4. While the crust is baking, prepare the apple filling. In a large bowl, toss the sliced apples with 1/4 cup of granulated sugar, 1 teaspoon of cinnamon, 1 tablespoon of flour, 1 teaspoon of lemon juice, and 1/4 teaspoon of nutmeg. Ensure each slice is well-coated.
5. Spread the apple mixture evenly over the warm crust, creating a uniform layer.
6. To make the streusel topping, combine 1/2 cup of flour, oats, brown sugar, and 1/2 teaspoon of cinnamon in a bowl. Incorporate 1/3 cup of softened butter until the mixture becomes crumbly.
7. Sprinkle the streusel topping evenly over the apple layer, making sure to cover all the fruit.
8. Bake in the preheated oven for 30–35 minutes or until the streusel is golden brown and the apples are tender.
9. Remove from the oven and allow the bars to cool completely in the pan on a wire rack. Once cooled, cut into bars and serve.
SERVING SUGGESTIONS FOR APPLE PIE BARS WITH STREUSEL TOPPING
When it comes to serving your homemade Apple Pie Bars, the possibilities are endless. These bars shine as a solo snack or a featured dessert at gatherings—just one bite reveals a buttery crust, a tender apple center, and a cozy streusel finish. Presentation can elevate these treats from simple bars to a feast for the eyes and palate. Whether you’re aiming for a rustic family-style spread or a more refined tea-time delight, a few thoughtful touches will bring out the best in these flavors. Pairing each square with complementary sides or drinks enhances that sweet and spiced profile, and a dusting of powdered sugar or a scoop of creamy ice cream takes the experience to new heights. Below are a few of my favorite ways to showcase these apple bars, so you can delight guests, share with family, or just treat yourself to a little moment of bliss any day of the week.
- Serve warm with a generous scoop of vanilla ice cream so the melting cream seeps into the streusel for a decadent, gooey finish.
- Dust with powdered sugar and garnish with a sprig of mint for an elegant presentation, perfect alongside coffee or afternoon tea.
- Plate bars on a rustic wooden board and add small bowls of caramel sauce and whipped cream for a DIY dessert bar at parties.
- Pair chilled bars with a hot mug of apple cider or spiced chai tea to complement the autumnal spices and enhance cozy vibes.
HOW TO STORE APPLE PIE BARS WITH STREUSEL TOPPING
Storing your Apple Pie Bars correctly ensures they stay fresh and delicious for days, whether you’re planning ahead for lunchboxes, meal prep, or simply want leftovers on hand for quick desserts. The combination of a buttery crust, tender apple filling, and crumbly streusel means you’ll need to protect each layer from drying out or becoming soggy. With a few simple techniques—like choosing the right container, controlling humidity, and selecting the ideal temperature—you can preserve that just-baked texture and flavor. Whether you store them at room temperature, in the refrigerator, or freeze them for later use, these bars hold up surprisingly well. I’ve tried several methods over countless baking sessions, and the tips below represent the best ways to extend freshness without compromising taste. Just follow these guidelines, and you’ll enjoy a perfect bar every time you take one out of your storage container.
- Room temperature: Store completely cooled bars in an airtight container with parchment paper between layers. They will remain fresh for up to 2 days on the counter.
- Refrigeration: For longer shelf life, wrap bars tightly in plastic wrap or foil and place them in a sealed container. Store in the fridge for up to 4 days without losing moisture.
- Freezing individual bars: Wrap each cooled bar in plastic wrap, then place in a freezer-safe bag. Freeze for up to 3 months, and thaw overnight in the refrigerator before serving.
- Partial reheating: To bring back that just-baked warmth, microwave an individual bar for 10–15 seconds or reheat in a 300°F (150°C) oven for 5–7 minutes—just enough to revive the buttery crust and apple filling.
CONCLUSION
These Apple Pie Bars with Streusel Topping have transformed a classic dessert into a convenient, crowd-pleasing format that still delivers all the flavors you love. From the flaky, buttery crust to the warmly spiced apple filling and that irresistible golden streusel, you’ve created a treat that’s perfect for busy weeknights, holiday gatherings, or any time you crave a taste of fall. At a beginner difficulty level, this recipe guides you through every step in about 20 minutes of hands-on prep and 50 minutes of baking, followed by a brief 30-minute cooling period. Each bar clocks in at around 320 calories, making it a balanced indulgence for your dessert menu. Feel free to print this article or save it to your device for easy reference—plus, don’t forget to check out the FAQ section below for quick answers on substitutions, timing tweaks, and troubleshooting tips.
I can’t wait for you to share these bars with friends and family, or to tuck a few away for yourself. If you give this recipe a try, I’d love to hear how it turned out—drop a comment with your successes, questions, or any creative twists you added along the way. Your feedback not only helps me improve but also builds a community of fellow home cooks swapping stories and tips. Whether you’re baking for a crowd or simply craving a cozy afternoon treat, these Apple Pie Bars are here to fill your kitchen with sweet, spiced joy. Happy baking!
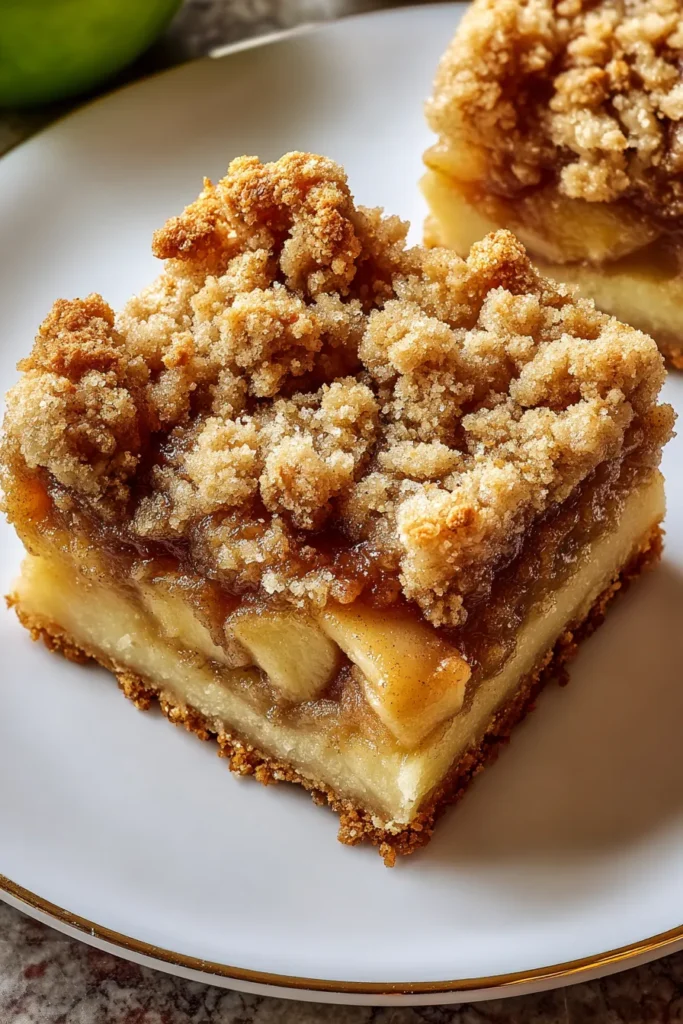

Apple Pie Bars with Streusel Topping
Description
These Apple Pie Bars boast a buttery crust and a luscious apple filling, topped with a delightful streusel that adds texture and sweetness. Perfect for sharing!
Ingredients
Instructions
-
Preheat your oven to 350°F (175°C). Grease a 9x9-inch baking pan and set aside.
-
In a medium bowl, combine 1 cup of flour, 1/4 cup of granulated sugar, 1/2 cup of softened butter, and 1/4 teaspoon of salt. Mix until the dough is crumbly. Press evenly into the bottom of the prepared baking pan.
-
Bake the crust for about 15 minutes or until it starts to lightly brown. Remove from the oven and set aside.
-
While the crust is baking, prepare the apple filling. In a large bowl, toss the sliced apples with 1/4 cup of granulated sugar, 1 teaspoon of cinnamon, 1 tablespoon of flour, 1 teaspoon of lemon juice, and 1/4 teaspoon of nutmeg. Ensure the apples are well-coated.
-
Spread the apple mixture evenly over the baked crust.
-
To make the streusel topping, combine 1/2 cup of flour, oats, brown sugar, and 1/2 teaspoon of cinnamon in a bowl. Incorporate the 1/3 cup of softened butter until the mixture becomes crumbly.
-
Sprinkle the streusel topping evenly over the apple layer.
-
Bake in the preheated oven for 30-35 minutes or until the streusel topping is golden brown and the apples are tender.
-
Remove from the oven and allow to cool completely in the pan on a wire rack. Cut into bars once cooled.
Nutrition Facts
Serving Size 12
- Amount Per Serving
- Calories 25kcal
Note
- For extra flavor, consider adding a handful of chopped walnuts or pecans to the streusel topping.
- Serve warm with a scoop of vanilla ice cream for a delicious treat.
- Granny Smith, Honeycrisp, or any firm apple variety is ideal for baking.
- Use freshly squeezed lemon juice for a fresher taste.
- These bars store well in the fridge for up to 3 days when covered.

