

When crisp apples meet a tender, buttery crust and a shower of irresistible salted caramel, you know you’re in for a treat that brings all the cozy vibes of fall straight to your kitchen. Every bite of these Salted Caramel Apple Bars is a dance of textures: that lightly crisp bottom layer gives way to juicy, cinnamon-kissed apple slices nestled in a sea of gooey caramel, before a final crumbly topping sends your tastebuds soaring. These bars are the perfect harmony of sweet, salty, and spice – a handheld dessert that feels like a warm hug on a cool day. They’re ideal for gathering around the table, passing plates to friends and family, and watching smiles spread with each deliciously sticky bite. Conversations seem to flow more freely over the caramel drizzle and warm apple flavors bursting from each square. If you’ve been searching for a show-stopping dessert that’s equal parts comforting and exciting, look no further – these bars are about to become your new kitchen hero.
With a total preparation time of just 30 minutes, 45 minutes of baking, and a two-hour rest to let everything set properly, this recipe strikes the perfect balance between efficiency and indulgence. Classified as Intermediate, these Salted Caramel Apple Bars shine as a memorable dessert for family dinners, festive gatherings, or cozy weekend brunch spreads. When you slice them into a dozen squares, each bar packs in approximately 350 calories of pure autumnal bliss. The real magic happens while the bars cool completely in the pan—this crucial rest time allows the caramel to thicken, the apples to settle into the crust, and the aroma of vanilla and spices to develop fully. By the end of your baking session, you’ll be greeted with a golden-brown masterpiece that’s sturdy enough to hold its shape but tender enough to melt on your tongue. Ready to pull on your favorite apron and bake something unforgettable? Let’s dive into everything you need to make these Salted Caramel Apple Bars a reality.
KEY INGREDIENTS IN SALTED CARAMEL APPLE BARS
Before diving into measurements and mixing bowls, it helps to know the cast of characters that make these bars so irresistible. Each ingredient plays a starring role in building layers of flavor and texture, from a rich, buttery foundation to a luscious, salted-caramel crescendo. Here’s a closer look at what you’ll need:
- Unsalted butter: Provides a rich, creamy base for both the crust and the caramel sauce, ensuring a tender bite and golden color without over-salting.
- Granulated sugar: Sweetens the dough, brightens the apple filling, and transforms into glossy caramel when heated, delivering that signature sticky sweetness.
- Light brown sugar: Introduces depth and moisture to the crust with its molasses undertones, enhancing the caramel notes and adding chewy pockets in every bite.
- Vanilla extract: Lifts the overall flavor profile with warm, aromatic hints, rounding out the sweetness of both the crust and the apple layer.
- All-purpose flour: Creates structure for the crust and topping, helping everything hold together while remaining tender under a crisp bite.
- Salt: Balances sweetness and accentuates the flavors of butter, sugar, and apples, and works in tandem with sea salt to complete the caramel.
- Apples: The star of the filling, offering natural sweetness and a touch of tartness; opt for firm varieties like Granny Smith or Honeycrisp for the best texture.
- Lemon juice: Keeps apple slices from browning and adds a subtle tang that brightens the overall taste.
- Ground cinnamon: Infuses the filling with warm spice, complementing the apples’ natural flavor and evoking classic fall treats.
- Ground nutmeg: Adds a hint of earthy warmth, deepening the spice profile without overpowering the delicate fruit.
- Heavy cream: Enriches the caramel sauce, giving it a silky texture and a luscious mouthfeel that coats each apple piece.
- Sea salt: Sprinkled into the caramel, it amplifies the sweet notes and creates that irresistible sweet-and-salty finish.
HOW TO MAKE SALTED CARAMEL APPLE BARS
Now that your ingredients are prepped, let’s walk through every step to turn pantry staples and fresh apples into a dessert you’ll want to bake again and again. Pay attention to the techniques—from stirring sugar to forming a perfect crumb—and watch the flavors come together.
1. Preheat your oven to 350°F (175°C). Grease a 9×13-inch baking pan thoroughly and line it with parchment paper to ensure the bars lift out easily after baking.
2. To make the crust: In a large bowl, combine melted butter, granulated sugar, light brown sugar, and vanilla extract. Stir in all-purpose flour and salt just until a crumbly dough forms. Set aside 1 cup of this mixture for the topping.
3. Press the remaining dough evenly across the bottom of your prepared pan, forming a uniform layer. Use the bottom of a glass or your fingers to smooth it out.
4. Bake the crust for 15 minutes, then remove it from the oven and let it cool slightly while you prep the filling.
5. For the apple filling: In a clean bowl, toss the sliced apples with lemon juice, granulated sugar, ground cinnamon, and ground nutmeg until each piece is well coated.
6. Layer the seasoned apple slices evenly over the warm crust, distributing them from edge to edge.
7. For the salted caramel sauce: In a medium saucepan, heat granulated sugar over medium heat, stirring constantly until it dissolves and transforms into a copper-colored liquid. Carefully add butter in pieces, stirring continually. Slowly pour in heavy cream and keep stirring until the mixture is smooth. Remove from heat, mix in sea salt, and let it cool slightly.
8. Drizzle half of the salted caramel sauce over the apple layer, ensuring even coverage.
9. Sprinkle the reserved crust mixture over the caramel-drenched apples, crumbling it so every bite will have a crispy top.
10. Bake for 30–35 minutes, or until the topping turns golden brown and the apples become tender when pierced.
11. Allow the bars to cool completely in the pan on a wire rack for at least 2 hours so the caramel can set.
12. Use the parchment paper to lift the entire slab from the pan. Drizzle the remaining salted caramel sauce over the cooled bars before cutting into neat squares.
SERVING SUGGESTIONS FOR SALTED CARAMEL APPLE BARS
These bars shine on their own, but with a few thoughtful touches, you can elevate them to restaurant-quality treats. Whether you’re hosting a casual brunch or celebrating a holiday feast, these serving ideas will help you present your dessert in style.
- Warm with a scoop of vanilla ice cream: Heat each bar briefly in the microwave or oven until slightly warmed, then top with a melting scoop of rich vanilla ice cream to play up the contrast between hot and cold.
- Dollops of whipped cream: Pipe or spoon a generous swirl of lightly sweetened whipped cream on top for a fluffy texture that complements the dense apple layer and crunchy crust.
- Chopped pecan or walnut sprinkle: Toast chopped nuts in a dry skillet until fragrant, then scatter them over the bars for added crunch, nutty flavor, and a beautiful finishing touch.
- Dust with powdered sugar and extra caramel: Lightly sift powdered sugar over each square, then add a final drizzle of caramel sauce to create an elegant, bakery-style presentation.
HOW TO STORE SALTED CARAMEL APPLE BARS
Storing these bars properly ensures they stay fresh and flavorful, so you can enjoy leftovers without worrying about soggy crusts or runny caramel. Follow these tips to maintain that perfect balance of textures and taste.
- Room-Temperature Storage: Place cooled bars in an airtight container and store at room temperature for up to 2 days. This keeps the crust crisp while preserving the soft apple layer.
- Refrigerator Storage: Seal the bars in a covered dish or zip-top bag and refrigerate for up to 5 days. Chilling firms up the caramel but you can let them sit at room temperature for 10 minutes before serving to soften slightly.
- Freezer Storage: Cut bars into individual squares, wrap each in plastic wrap, then place in a freezer-safe bag for up to 3 months. Thaw overnight in the refrigerator and warm briefly in the oven if you prefer them heated.
- Separate Caramel Jar: Store any leftover salted caramel sauce in a lidded jar in the fridge for up to 1 week. Gently reheat over low heat or in short microwave bursts before drizzling.
CONCLUSION
Baking the perfect batch of Salted Caramel Apple Bars is more than just following a recipe—it’s about capturing that special moment when sweet and salty converge in every bite. We’ve covered everything from building a buttery crust, crafting a spiced apple filling, to mastering the silky salted caramel that ties it all together. You’ve also learned how to serve these bars like a pro and store them for maximum freshness. Feel free to print this article for easy reference next time you’re ready to bake, and save it in your favorites so these instructions are always on hand. Don’t forget there’s a FAQ section below for quick answers to common questions about ingredient swaps, temperature tweaks, and more.
I’d love to hear how your first batch turns out, or if you’ve put your own spin on the recipe! Drop a comment with your questions, feedback, or any fun anecdotes about enjoying these bars with friends and family. Whether you’re a seasoned baker or trying this as your first intermediate-level dessert, I’m here to help troubleshoot, cheer you on, or simply celebrate your baking success. Happy baking, and may your kitchen be filled with the cozy magic of salted caramel and fresh apples!
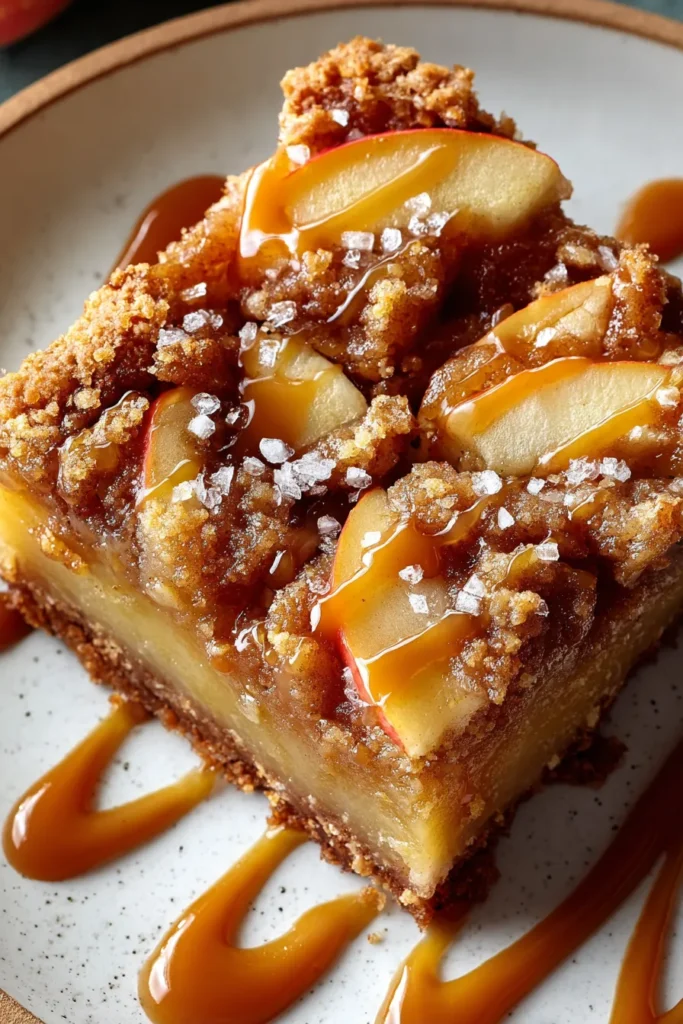

Salted Caramel Apple Bars
Description
These Salted Caramel Apple Bars offer a harmonious balance of sweet and salty flavors, with tender apples nestled in a buttery crust and a rich caramel drizzle. Perfect for any occasion!
Ingredients
Instructions
-
Preheat your oven to 350°F (175°C). Grease a 9x13-inch baking pan and line it with parchment paper.
-
To make the crust: In a large bowl, combine melted butter, granulated sugar, brown sugar, and vanilla extract. Stir in the flour and salt until a crumbly dough forms. Reserve 1 cup of the mixture for the topping.
-
Press the remaining mixture evenly into the bottom of the prepared pan to form the crust.
-
Bake the crust for 15 minutes, then allow it to cool slightly.
-
For the apple filling: In a large bowl, toss the apple slices with lemon juice, granulated sugar, cinnamon, and nutmeg until well coated.
-
Layer the apple slices evenly over the baked crust.
-
For the salted caramel sauce: In a medium saucepan, heat granulated sugar over medium heat, stirring constantly until it melts into a copper-colored liquid. Add butter carefully, stirring constantly. Slowly add heavy cream and cook, stirring until smooth. Remove from heat, stir in sea salt, and let it cool slightly.
-
Drizzle half of the salted caramel sauce over the apple layer.
-
Sprinkle the reserved crust mixture over the caramel-drenched apples, crumbling it evenly over the top.
-
Bake for 30-35 minutes or until the top is golden brown and the apples are tender.
-
Allow the bars to cool completely in the pan on a wire rack for at least 2 hours.
-
Use the parchment paper to lift the bars from the pan. Drizzle with the remaining salted caramel sauce before cutting into squares.
Nutrition Facts
Serving Size 12
- Amount Per Serving
- Calories 27kcal
Note
- For extra flavor, try using a mix of apple varieties like Granny Smith and Honeycrisp.
- These bars can be made a day ahead and stored in the refrigerator.
- For a nutty twist, consider adding chopped pecans to the topping mixture.
- The salted caramel sauce can be made separately in advance and stored in the fridge for up to a week.

