

There’s something about diving into a warm, spiced dessert that feels like wrapping yourself in a soft blanket on a crisp fall day. This Pumpkin Pie Crisp brings together creamy pumpkin filling and a crunchy oat topping in a way that feels both nostalgic and exciting. With its golden hue and flecks of cinnamon, nutmeg, and ginger, every spoonful feels like a mini celebration of autumn’s best flavors. As a beginner-friendly baked dessert, it takes just about 15 minutes to prepare, 40 minutes to bake, and another 15 minutes to rest—so you can have a show-stopping treat on the table in under an hour. Whether you’re hosting a cozy family gathering or simply craving something sweet after dinner, this easy dessert is guaranteed to delight everyone around the table.
What makes this pumpkin crisp truly shine is the marriage of textures: silky pumpkin filling infused with warm fall spices and a buttery oat crumble that crackles under your fork. The sweetened condensed milk adds a touch of richness, while the brown and granulated sugars caramelize just enough to create tempting crunchy pockets. I still remember the first time I served this at a small get-together—guests lingered in the kitchen, plate in hand, telling me how they loved the way the filling was velvety but not too heavy. And when that crisp topping went from oven to table, the room filled with cozy warmth that made everyone smile. It’s honestly one of those baked desserts that becomes the centerpiece of any autumn gathering, earning raves from even the staunchest pumpkin skeptics.
KEY INGREDIENTS IN PUMPKIN PIE CRISP
Before we dive into the step-by-step instructions, let’s take a quick look at the star players that make this dessert shine. Each ingredient has a special role, from building flavor layers to delivering that satisfying crunch in every bite.
- Pumpkin Purée
This smooth purée provides the creamy base, delivering classic pumpkin flavor and moisture. It’s the heart of the filling, giving the crisp its signature color and soft texture.
- Sweetened Condensed Milk
Adds richness and sweetness, creating a silky custard-like consistency in the pumpkin layer. It binds the spices and pumpkin purée together for a luscious finish.
- Eggs
These help set the filling while adding structure, ensuring the custard stays firm yet tender once baked.
- Vanilla Extract
Enhances the overall sweetness and rounds out the spice notes with its floral, aromatic warmth.
- Ground Cinnamon
Gives that warm, familiar spice that screams “fall.” It balances sweetness and adds depth.
- Ground Nutmeg
Offers earthy, nutty undertones that harmonize with cinnamon and ginger for a well-rounded spice profile.
- Ground Ginger
Brings a subtle heat and brightness, cutting through the sweetness and enriching the pumpkin’s flavor.
- Salt
A pinch of salt heightens all the sweet and spicy flavors, ensuring the dessert tastes balanced rather than cloying.
- Old-Fashioned Rolled Oats
Creates the hearty, crunchy texture on top, absorbing butter and sugar to form that irresistible crumble.
- All-Purpose Flour
Works with oats to bind the topping, giving it structure and helping it crisp up beautifully in the oven.
- Brown Sugar
Adds a deeper, molasses-rich sweetness to the topping, enhancing the caramelized flavors as it bakes.
- Granulated Sugar
Provides additional sweetness and helps create a golden, slightly crisp surface when combined with brown sugar.
- Unsalted Butter
Binds the topping ingredients and adds buttery richness. Melting it first ensures an even distribution and perfect crumble.
- Chopped Pecans or Walnuts (optional)
Introduce an extra crunchy element and a toasty, nutty flavor, taking your crisp from great to unforgettable.
HOW TO MAKE PUMPKIN PIE CRISP
Let’s walk through the simple, joyful steps that transform humble pantry staples into a cozy fall favorite. From preheating the oven to that golden topping, each stage builds delicious layers of flavor and texture.
1. Preheat your oven to 350°F (175°C). Grease a 9×13 inch baking dish thoroughly with butter or non-stick cooking spray to prevent sticking and ensure easy serving.
2. In a large mixing bowl, combine the pumpkin purée, sweetened condensed milk, eggs, vanilla extract, ground cinnamon, ground nutmeg, ground ginger, and salt. Use a whisk to blend everything until the mixture is completely smooth and evenly spiced.
3. Pour the pumpkin mixture into the prepared baking dish, spreading it into an even layer with a spatula so it bakes uniformly.
4. In a separate bowl, stir together old-fashioned rolled oats, all-purpose flour, brown sugar, granulated sugar, and melted butter. Mix until the topping is crumbly and thoroughly combined. If you’re using nuts, gently fold them in at this stage.
5. Sprinkle the oat mixture evenly over the pumpkin layer, covering it completely for that perfect balance of creamy filling and crisp topping.
6. Bake in the preheated oven for 35–40 minutes, or until the top turns golden brown and the pumpkin filling sets (it should no longer jiggle in the center).
7. Remove from the oven and let the Pumpkin Pie Crisp rest for about 10–15 minutes. This cooling time helps the flavors meld and makes it easier to serve. Enjoy it warm or at room temperature—either way, it’s a delicious, easy dessert.
SERVING SUGGESTIONS FOR PUMPKIN PIE CRISP
Once your Pumpkin Pie Crisp is ready, you can really elevate the experience with thoughtful pairings and garnishes. Serving this delightful dessert is all about complementing the creamy, spiced filling and crunchy topping while adding a contrasting texture or temperature. Whether you’re going for extra decadence or a lighter touch, these suggestions will help you plate like a pro and wow your family or guests.
- A dollop of whipped cream dusted with extra ground cinnamon adds airy sweetness and a pretty swirl on top, creating a silky contrast to the crisp oat layer. Use stabilized whipped cream if you need it to hold its shape.
- Serve a generous scoop of vanilla ice cream on the side (or directly on the warm slice) to introduce a cold, creamy element that melts into the Pumpkin Pie Crisp, creating a luscious sauce.
- Drizzle lightly warmed maple syrup over each serving and sprinkle with toasted pecans or walnuts for an indulgent twist that plays up the nutty flavors and adds visual interest.
- Pair each slice with a steaming mug of spiced tea (like chai or cinnamon-infused black tea) or coffee to balance sweetness with a hint of bitterness, rounding out the tasting experience for your fall gathering.
HOW TO STORE PUMPKIN PIE CRISP
Proper storage is key to keeping your Pumpkin Pie Crisp tasting its best, whether you’re prepping ahead for a party or savoring leftovers throughout the week. This section covers everything from refrigeration to freezing, with tips on how to preserve both the creamy filling and crunchy topping so you can enjoy that delicious textural contrast every time.
- Refrigeration: Once the crisp has cooled completely, cover the baking dish tightly with plastic wrap or transfer individual portions to airtight containers. Store in the refrigerator for up to 3 days. Let refrigerated servings come to room temperature or warm briefly before enjoying.
- Freezing: For longer storage, cut the crisp into individual portions, place each piece on parchment-lined trays, and freeze until firm. Then wrap each slice in aluminum foil or plastic wrap and store in a freezer-safe bag for up to 1 month. Thaw overnight in the fridge before reheating.
- Reheating: To revive that crisp topping, reheat individual servings in a preheated oven at 325°F (160°C) for about 10 minutes, or microwave on medium power for 30–45 seconds—just enough to warm through without making the topping soggy.
- Room Temperature: If you plan to serve within a few hours, cover the dish with foil or a loose lid and keep it at cool room temperature (away from direct heat or sunlight). This prevents condensation and preserves the crunch until you’re ready to slice and serve.
CONCLUSION
I hope this deep dive into Pumpkin Pie Crisp has you feeling excited to roll up your sleeves and bake one of fall’s most comforting desserts. From the simple prep—just 15 minutes of mixing and layering—to the golden-brown finale, this baked dessert combines creamy pumpkin pie vibes with the irresistible crunch of a classic crisp. Whether you’re a seasoned home cook or a complete beginner, the clear steps and accessible ingredients make it an easy dessert that’s perfect for Thanksgiving, cozy weekend gatherings, or any time you crave a taste of autumn.
Feel free to print this article or save it for later—keep it bookmarked in your recipe collection so you can revisit these fall flavors whenever pumpkin season rolls around. Below you’ll find a handy FAQ section to answer common questions and troubleshoot any hiccups you might encounter. And of course, I’d love to hear how it turns out for you. If you give this Pumpkin Pie Crisp a try, please leave a comment with your thoughts, questions, or feedback. Did you swap in seeds for a nut-free version? Add a new spice twist? Let me know—I’m always here to help you fine-tune the recipe and make it your own. Happy baking!
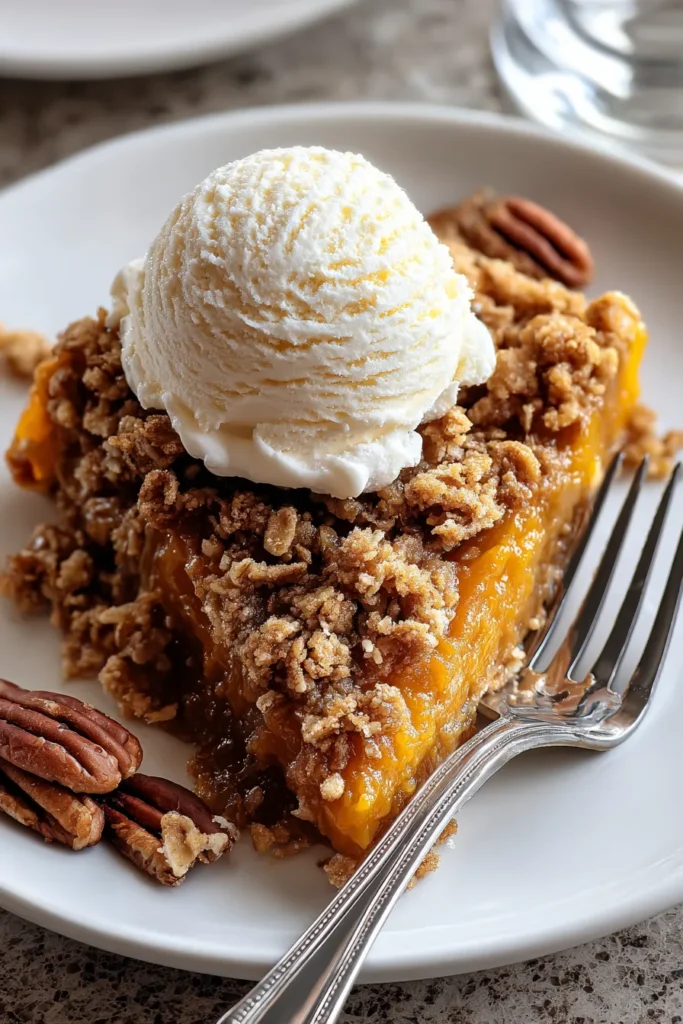

Pumpkin Pie Crisp
Description
This Pumpkin Pie Crisp combines creamy pumpkin filling with a crunchy oat topping, creating a delicious contrast in every bite. Perfect for autumn gatherings!
Ingredients
Instructions
-
Preheat your oven to 350°F (175°C). Grease a 9x13 inch baking dish with butter or non-stick cooking spray.
-
In a large mixing bowl, combine the pumpkin puree, sweetened condensed milk, eggs, vanilla extract, cinnamon, nutmeg, ginger, and salt. Whisk until the mixture is well blended and smooth.
-
Pour the pumpkin mixture into the prepared baking dish, spreading it out evenly with a spatula.
-
In another bowl, mix together the rolled oats, flour, brown sugar, granulated sugar, and melted butter. Stir until the mixture is crumbly and well combined. If using, fold in the chopped nuts.
-
Evenly sprinkle the oat mixture over the pumpkin layer in the baking dish.
-
Bake in the preheated oven for 35-40 minutes or until the top is golden brown and the pumpkin filling is set.
-
Remove from the oven and let it cool for about 10-15 minutes before serving. This can be served warm or at room temperature.
Nutrition Facts
Serving Size 12
- Amount Per Serving
- Calories 27kcal
Note
- Serve with whipped cream or vanilla ice cream for a delicious contrast.
- This recipe can be made ahead and stored in the refrigerator for up to 3 days.
- You can substitute the nuts with your favorite toasted seeds for a nut-free version.
- Feel free to experiment by adding spices like cloves or allspice for extra flavor.
- Leftovers can be easily reheated in the oven or microwave for a quick treat.

