

There’s nothing quite like biting into a crisp, buttery cookie that practically melts the moment it touches your tongue. Traditional German butter cookies have been a centerpiece of festive gatherings and cozy afternoons alike, delivering a perfect balance of richness and delicate sweetness in each nibble. The secret to their irresistible charm lies in simple, high-quality ingredients—like softened unsalted butter and real vanilla extract—that come together in a tender dough you can shape into stars, hearts, or whimsical circles. Whether you’re a novice baker or someone who thrills at rolling out homemade dough, these cookies invite you into a warm, approachable world where every batch feels like a celebration.
Beyond their tender crumb and golden edges, these German classics carry with them a sense of tradition and hominess. Each cookie slice whispers tales of snow-dusted windowsills, laughter echoing through a kitchen, and mugs of steaming coffee warming stiff fingers on a chilly morning. As a beginner-friendly dessert, they require just 20 minutes of hands-on time, a quick 12-minute bake, and a brief five-minute rest before you can indulge. Yielding approximately 24 cookies and clocking in around 720 calories per batch, they’re perfect for sharing at holiday parties, gifting in decorative tins, or simply enjoying alongside your favorite brew. Let’s dive into every buttery detail and make your kitchen smell like a festive fairytale.
KEY INGREDIENTS IN TRADITIONAL GERMAN BUTTER COOKIES
Before we dive into mixing bowls and flour clouds, let’s spotlight the essential players that make these cookies so heavenly. Understanding each component’s role will help you appreciate how they work together to create that tender, melt-in-your-mouth texture.
- Unsalted butter
Provides the rich, creamy foundation of the dough. Its high fat content ensures a tender crumb and a buttery flavor that shines through every bite. Using unsalted butter lets you control the saltiness precisely.
- Granulated sugar
Sweetens the cookies and contributes to a lightly crisp edge as it caramelizes in the oven. Creamed with butter, it also helps incorporate air, giving the dough a feathery lift.
- Vanilla extract
Adds a warm, fragrant note that enhances the overall flavor profile. A teaspoon can make a noticeable difference, turning simple dough into something truly aromatic and inviting.
- Egg
Binds the ingredients together, lending structure and a slight richness. It helps the dough hold its shape during baking and contributes to that delicate, tender crumb.
- All-purpose flour
Forms the bulk of the cookie, giving it structure. The right amount of flour keeps the cookies from spreading too thin and ensures a perfect, melt-in-your-mouth texture.
- Salt
Balances the sweetness and enhances the buttery flavor. Even a small touch of salt makes all the difference in bringing out the dough’s depth.
- Baking powder
Acts as a leavening agent, giving the cookies a gentle lift and a light, airy bite. It ensures they’re crisp at the edges but tender inside.
- Powdered sugar (optional)
Perfect for a dusting after baking, it adds a delicate snowy effect and a hint of extra sweetness without altering the cookie’s texture.
- Chocolate (optional)
Melted and drizzled or used for dipping, it creates a decadent finish that pairs beautifully with the buttery base. Dark, milk, or white chocolate all work wonderfully.
HOW TO MAKE TRADITIONAL GERMAN BUTTER COOKIES
Now that our ingredients are lined up, it’s time to turn them into mouthwatering cookies. Follow these steps closely, and don’t be afraid to have fun shaping and decorating your dough.
1. Preheat the oven to 180°C (350°F). Line a baking sheet with parchment paper to prevent sticking and make cleanup a breeze.
2. In a large mixing bowl, cream together the softened butter and granulated sugar until the mixture is light and fluffy, about 3 to 5 minutes. This step incorporates air, setting the stage for tender cookies.
3. Add the vanilla extract and the egg to the butter-sugar mixture. Mix until fully combined, ensuring the egg is well integrated and the batter looks smooth and silky.
4. In a separate bowl, whisk together the all-purpose flour, salt, and baking powder. Gradually add these dry ingredients to the wet mixture while mixing at a low speed, preventing a flour cloud in your kitchen. Mix just until the dough comes together, avoiding overmixing.
5. Once the dough is formed, transfer it to a lightly floured surface. Roll it out to about 0.5 cm (1/4 inch) thickness or load it into a cookie press for decorative designs.
6. Cut into shapes—stars, hearts, circles, or any motif you love. Place the cut-out cookies on the prepared baking sheet, leaving a little room between each for slight spreading.
7. Bake for 10 to 12 minutes, or until the edges are just beginning to turn golden. Keep a close watch, as smaller shapes may bake faster.
8. Remove the baking sheet from the oven and let the cookies cool on the sheet for 5 minutes before transferring them to a wire rack to cool completely.
9. If you like, dust with powdered sugar or dip/drizzle in melted chocolate once the cookies are cool for an extra-special touch.
SERVING SUGGESTIONS FOR TRADITIONAL GERMAN BUTTER COOKIES
Once your cookies are cool and beautifully baked, serving them becomes an art in itself. These gentle, buttery treats pair wonderfully with a variety of accompaniments—whether you’re hosting a formal gathering or enjoying a simple snack. Below are a few inspired ways to present your finished cookies, each designed to elevate both appearance and taste.
- Festive Gift Tin
Arrange cookies in a decorative tin layered with parchment or colored tissue paper. Tie a ribbon around the tin for a thoughtful, homemade gift that friends and family will adore.
- Coffee Pairing Platter
Present the cookies on a wooden board alongside small cups of strong coffee or espresso. The rich bitterness of the coffee highlights the buttery sweetness, creating a perfect afternoon pick-me-up.
- Chocolate-Dipped Display
Dip half of each cookie in melted dark or white chocolate, then place them on a cooling rack. Once set, arrange them on a clean tray for an elegant, indulgent presentation.
- Tea Party Setting
Serve the cookies on a tiered cake stand next to a pot of loose-leaf tea and small bowls of lemon curd or fruit preserves. The delicate flavors of black or herbal tea complement the tender, crisp texture of the cookies beautifully.
HOW TO STORE TRADITIONAL GERMAN BUTTER COOKIES
Storing these cookies properly ensures they stay delightfully crisp and flavorful for days—perfect for making ahead during busy holiday seasons or batch-baking for weekly treats. Here are the best methods to keep your butter cookies in prime condition:
- Airtight Container at Room Temperature
Place fully cooled cookies in a single layer or separated by wax paper in a sealed container. Keep away from direct sunlight or heat to maintain their crisp edges and tender centers. They’ll stay fresh for up to a week.
- Refrigeration for Extended Freshness
If you live in a warm or humid climate, store cookies in an airtight container in the fridge. The cooler environment helps preserve texture, though allow cookies to come to room temperature before serving to regain that melt-in-your-mouth quality.
- Freezing Dough Logs
Roll the dough into logs, wrap them tightly in plastic wrap, and store in a freezer-safe bag. When you’re ready to bake, slice frozen logs directly into cookies—adding a minute or two to the baking time. Dough can be frozen for up to three months.
- Freezing Baked Cookies
Layer baked and fully cooled cookies between sheets of parchment in a freezer-safe container. Thaw at room temperature for about 10–15 minutes before serving. This method preserves both flavor and crispness for several weeks.
CONCLUSION
From the moment you gather your softened butter and sugar to the triumphant reveal of perfectly golden edges, these Traditional German Butter Cookies deliver a baking experience that’s as heartwarming as the final taste. We explored how simple ingredients—unsalted butter, vanilla extract, and a whisper of baking powder—come together to form that iconic melt-in-your-mouth texture. You learned to cream, roll, shape, and bake with precision, then elevate your presentation with dustings of powdered sugar or decadent drizzles of chocolate. Whether you’re gifting them in a festive tin, pairing them with a bold espresso, or layering them on a tiered stand at a tea party, these cookies know how to steal the show.
With a baking time of just 10 to 12 minutes, a total hands-on effort of around 20 minutes, and a brief rest, you’ll have approximately 24 cookies ready to delight friends and family. The batch clocks in at about 720 calories total, making it an ideal treat without overwhelming your holiday spread. Feel free to print and save this article for easy reference whenever the urge for festive baking strikes. Below you’ll also find a helpful FAQ section to troubleshoot any questions you might have. If you give these cookies a try, I’d love to hear about your shaping adventures, flavor variations, or any tips you’ve discovered along the way. Please drop your comments, questions, or feedback—it’s always a joy to connect with fellow home bakers and share the warmth of a freshly baked batch.
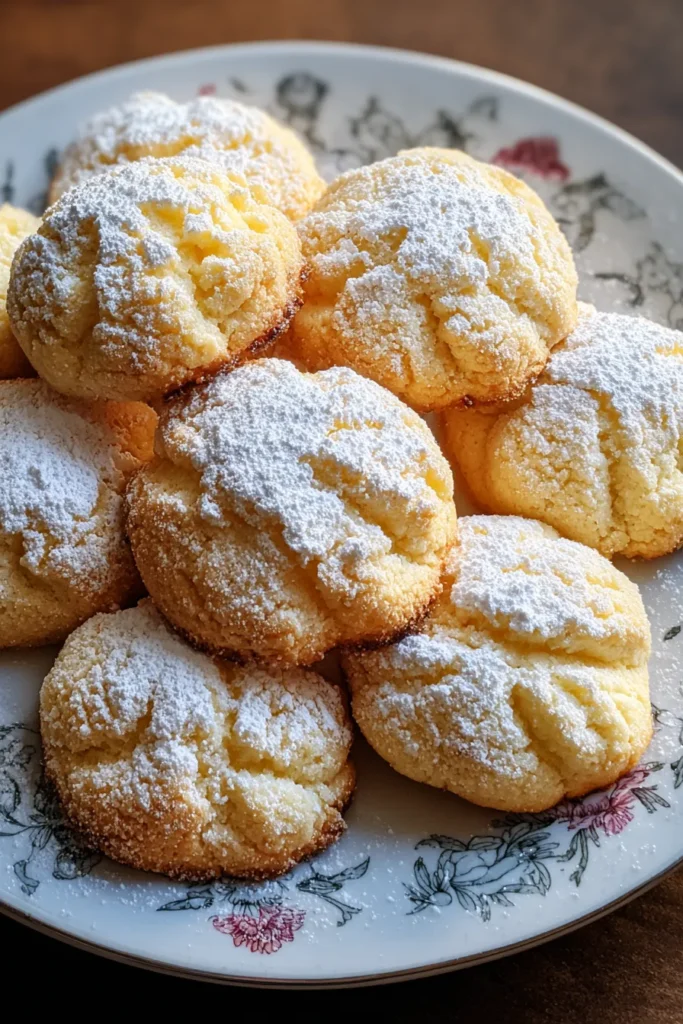

Traditional German Butter Cookies
Description
These traditional German butter cookies are rich, buttery, and delightfully crispy! Perfect for gifting or enjoying with coffee, they capture the essence of festive baking.
Ingredients
Instructions
-
Begin by preheating your oven to 180°C (350°F). Prepare a baking sheet by lining it with parchment paper to prevent sticking.
-
In a large mixing bowl, cream together the softened butter and granulated sugar until the mixture is light and fluffy. This process should take about 3 to 5 minutes.
-
Add the vanilla extract and the egg to the butter-sugar mixture. Mix until fully combined, ensuring the egg is well integrated into the batter.
-
In a separate bowl, whisk together the all-purpose flour, salt, and baking powder. Gradually add the dry ingredients to the wet mixture while mixing at a low speed to avoid flour flying everywhere. Mix just until the dough comes together.
-
Once the dough is formed, you can either roll it out onto a floured surface to cut shapes or use a cookie press for decorative cookies. If rolling out, aim for a thickness of about 0.5 cm (1/4 inch).
-
Cut the dough into desired shapes—classic options include stars, hearts, or circles. Place the cut-out cookies onto the prepared baking sheet, leaving some space between each cookie as they will spread slightly.
-
Bake the cookies in the preheated oven for about 10 to 12 minutes, or until the edges are just starting to turn golden. Keep an eye on them as baking times can vary based on the size of the cookies.
-
Once done, remove the baking sheet from the oven and let the cookies cool on the sheet for 5 minutes before transferring them to a wire rack to cool completely.
-
If desired, once the cookies are cool, you can dust them with powdered sugar or dip/drizzle them in melted chocolate for an additional treat.
Nutrition Facts
Serving Size 24
- Amount Per Serving
- Calories 30kcal
Note
- These cookies can be stored in an airtight container at room temperature for up to a week.
- For variation, feel free to add lemon zest or almond extract to enhance the flavor.
- These cookies make great gifts during the holiday season when decorated or packaged nicely.
- You can roll the dough into logs, chill, and then slice for a different presentation.

