

There is honestly nothing that screams "holiday celebration" quite like slicing into this vibrant, two-tone beauty. I remember the first time I brought this dessert to a potluck; everyone thought I had spent hours in a professional bakery, yet it was just me in my pajamas listening to carols and mixing batter in my home kitchen. This recipe combines the moist, cocoa-kissed goodness of a classic red velvet cake with a rich, tangy cheesecake layer, all crowned with a cloud of fresh whipped cream. It is the ultimate festive treat that balances sweetness with that signature buttermilk tang, creating a centerpiece that tastes even better than it looks.
Key Ingredients
To create this showstopper, we are using pantry staples that transform into something magical when combined. It is amazing how simple ingredients like cocoa and buttermilk can create such a complex flavor profile that defines the holiday season.
- 1 and 1/2 cups all-purpose flour: Provides the essential structure for the cake base, ensuring it is tender yet sturdy enough to hold the cheesecake layer.
- 1 cup granulated sugar: Adds the perfect amount of sweetness to balance the cocoa and tangy buttermilk in the cake layer.
- 1/2 cup unsweetened cocoa powder: Gives the red velvet layer its subtle chocolate flavor and contributes to the deep, rich color.
- 1 tsp baking soda: Acts as the leavening agent to help the cake rise and become fluffy.
- 1/2 tsp salt: Enhances all the flavors and balances the sweetness of the sugar and frosting.
- 1 and 1/2 cups vegetable oil: Ensures the cake remains incredibly moist and soft for days.
- 1 cup buttermilk, at room temperature: Crucial for that classic red velvet tang and tender crumb; using it at room temperature helps it mix evenly.
- 3 large eggs: Binds the batter together and adds richness to the cake structure.
- 2 tbsp red food coloring: Creates that iconic, festive bright red hue that makes this dessert so visually striking.
- 1 tsp vanilla extract: Adds a warm, aromatic flavor background to the red velvet cake.
- 1 package (8 oz) cream cheese, softened: The star of the cheesecake layer, providing that beloved creamy texture and tangy flavor.
- 1/2 cup powdered sugar: Sweetens the cream cheese layer smoothly without adding grit.
- 1/4 cup sour cream: Adds extra creaminess and a slight tang to the cheesecake layer for a luxurious mouthfeel.
- 1 tsp vanilla extract (for the cheesecake layer): flavors the cheesecake portion to complement the cake beneath it.
- 1 cup heavy whipping cream: Whipped into soft peaks to create a light, airy topping that balances the dense layers below.
- Optional: festive sprinkles or chocolate curls for decoration: Adds a final touch of holiday cheer and visual texture to the finished dessert.
How To Make Christmas Red Velvet Cheesecake
Don't let the idea of layering intimidate you; this recipe is actually quite forgiving and incredibly rewarding. You are essentially making a cake and then adding a simple cheesecake batter right on top before a second bake. The key here is patience—letting the cake cool before adding the cheesecake layer ensures distinct, beautiful layers, and allowing the final product to chill sets everything into a dense, creamy dream.
1. Preheat your oven to 350°F (175°C). Grease the bottom and sides of a 9-inch springform pan and set aside.
2. In a large mixing bowl, combine the flour, granulated sugar, cocoa powder, baking soda, and salt. Whisk until thoroughly mixed.
3. In another bowl, add the vegetable oil, buttermilk, eggs, red food coloring, and 1 tsp of vanilla extract. Whisk until smooth and well-combined.
4. Gradually add the wet ingredients to the dry ingredients, mixing until just combined. Be careful not to overmix.
5. Pour the red velvet batter into the prepared springform pan, smoothing the top with a spatula.
6. Bake in the preheated oven for 25-30 minutes, or until a toothpick inserted in the center comes out clean. Remove from the oven and allow to cool completely in the pan.
7. While the cake bakes, prepare the cheesecake layer. In a mixing bowl, beat the softened cream cheese until creamy and smooth.
8. Add the powdered sugar, sour cream, and 1 tsp of vanilla extract to the cream cheese. Mix until well combined and smooth.
9. Once the red velvet cake has cooled, pour the cheesecake batter over the top of the cake in the springform pan, spreading it out evenly.
10. Bake the cheesecake layer for an additional 30-35 minutes, or until it is set but slightly jiggly in the center. Remove from the oven and let it cool at room temperature, then refrigerate for at least 4 hours (or overnight) to fully set.
11. Before serving, whip the heavy cream in a separate bowl until soft peaks form. Spread the whipped cream over the top of the chilled cheesecake for a luxurious finish.
12. Decorate with festive sprinkles or chocolate curls if desired.
Serving Suggestions
When you bring this dessert to the table, you want to ensure the presentation matches the incredible flavor. Because this is a rich, layered dessert, the way you slice and serve it can make a big difference in the eating experience. Here are a few ways to elevate your serving game and make every slice look picture-perfect.
- Chill Before Serving: Always serve this cheesecake thoroughly chilled. The cold temperature keeps the cream cheese layer firm and creates a refreshing contrast to the dense cake, making every bite satisfying.
- The Clean Cut: To get those professional-looking smooth layers, dip your knife in hot water and wipe it dry before every single slice. This prevents the cheesecake filling from smearing onto the beautiful red velvet cake.
- Plating Contrast: Serve on white or gold dessert plates to make the vibrant red color of the cake pop. The visual contrast makes the dessert look even more appetizing and festive.
- Beverage Pairing: As noted in the recipe details, consider pairing a slice with a sweet dessert wine. The sweetness of the wine complements the tangy cream cheese beautifully for a sophisticated finish to your meal.
Tips For Perfect Christmas Red Velvet Cheesecake
I want your holiday baking to be stress-free and successful, so here are a few specific pointers to ensure this recipe turns out flawless every time. Since we are dealing with two different textures—cake and cheesecake—timing and temperature are your best friends. These little notes from the recipe are golden rules that will take your dessert from "good" to "absolutely unforgettable."
- Plan Ahead: This cheesecake is actually best made a day ahead. This resting period allows the flavors of the cocoa and tangy cream cheese to meld together beautifully, and it ensures the texture sets perfectly for neat slicing.
- Color Variations: feel free to experiment with different types of food coloring. While red is traditional for the holidays, swapping it out can give you a unique twist for other occasions without changing the flavor.
- Storage Smarts: If you somehow have leftovers, remember that leftover cheesecake can be stored in the refrigerator for up to five days. It holds up remarkably well, so you can enjoy a slice all week long.
- Elevate the Experience: For a truly special holiday treat, don't skip the suggestion to pair with a sweet dessert wine. It turns a simple slice of cake into a full sensory experience.
How To Store It
Since this recipe relies heavily on dairy products like cream cheese, sour cream, and heavy whipping cream, proper storage is non-negotiable to keep it safe and delicious. You want to preserve that creamy texture and prevent the cake from drying out.
- Refrigeration is Key: Because of the cream cheese and whipped cream, you must keep this cake in the fridge. Never leave it out on the counter for more than an hour or two while serving.
- Air-Tight Protection: Store the cake in an airtight container or a cake carrier. If you don't have one, gently press plastic wrap against the cut sides of the cake to prevent them from drying out and absorbing fridge odors.
- Five-Day Window: As mentioned in the notes, you can store this in the refrigerator for up to five days. The flavors often get better on day two, but after day five, the texture may start to change.
- Whipped Cream Caution: If you plan to store it for several days, it is best to add the whipped cream fresh right before serving each time, or store the whipped cream topping separately so it doesn't weep or deflate over the cheesecake layer.
Frequently Asked Questions
I know baking cheesecake can bring up a few questions, especially when it involves layers! Here are the answers to the most common things you might be wondering about this specific recipe.
- Q: How do I determine when the cheesecake layer is properly baked?
A: The cheesecake layer should be baked for 30 to 35 minutes. You will know it is ready when the edges are set but the center remains slightly jiggly. After removing it from the oven, it must cool at room temperature and then be refrigerated for at least 4 hours or overnight to fully set.
- Q: Can I prepare this Christmas Red Velvet Cheesecake in advance?
A: Yes, the recipe notes state that this cheesecake is actually best made a day ahead. This extra time allows the flavors to meld together and ensures the texture sets perfectly.
- Q: What is the best way to store leftovers and how long will they keep?
A: Leftover cheesecake can be stored in the refrigerator for up to five days. Ensure it is kept cold to maintain its quality and safety.
- Q: How should I mix the red velvet batter to ensure the best texture?
A: When adding the wet ingredients to the dry ingredients, you should mix until just combined. The instructions emphasize being careful not to overmix the batter, as this ensures the cake remains tender.
- Q: Do any of the ingredients require specific temperature preparation before starting?
A: Yes, the recipe specifies that the buttermilk should be at room temperature and the cream cheese must be softened before mixing. This ensures that the batter and the cheesecake filling become creamy, smooth, and well-combined.
- Q: When should I add the whipped cream topping to the cheesecake?
A: You should whip the heavy cream until soft peaks form and spread it over the chilled cheesecake immediately before serving. This provides a luxurious finish alongside any optional festive sprinkles or chocolate curls.
What Makes This Special
This recipe works because it marries the best parts of two legendary desserts into one spectacular bite. You get the moist, tender crumb of a red velvet cake that serves as a sturdy base for the smooth, tangy richness of the cream cheese layer. It is a holiday showstopper that looks incredibly impressive but is surprisingly achievable for home cooks of an intermediate level. If you manage not to eat the entire thing in one sitting (good luck with that!), make sure to save this page or print it out for your holiday recipe binder. I would love to hear how it turned out for you, so please leave a comment below if you give it a try or have any questions about the process!
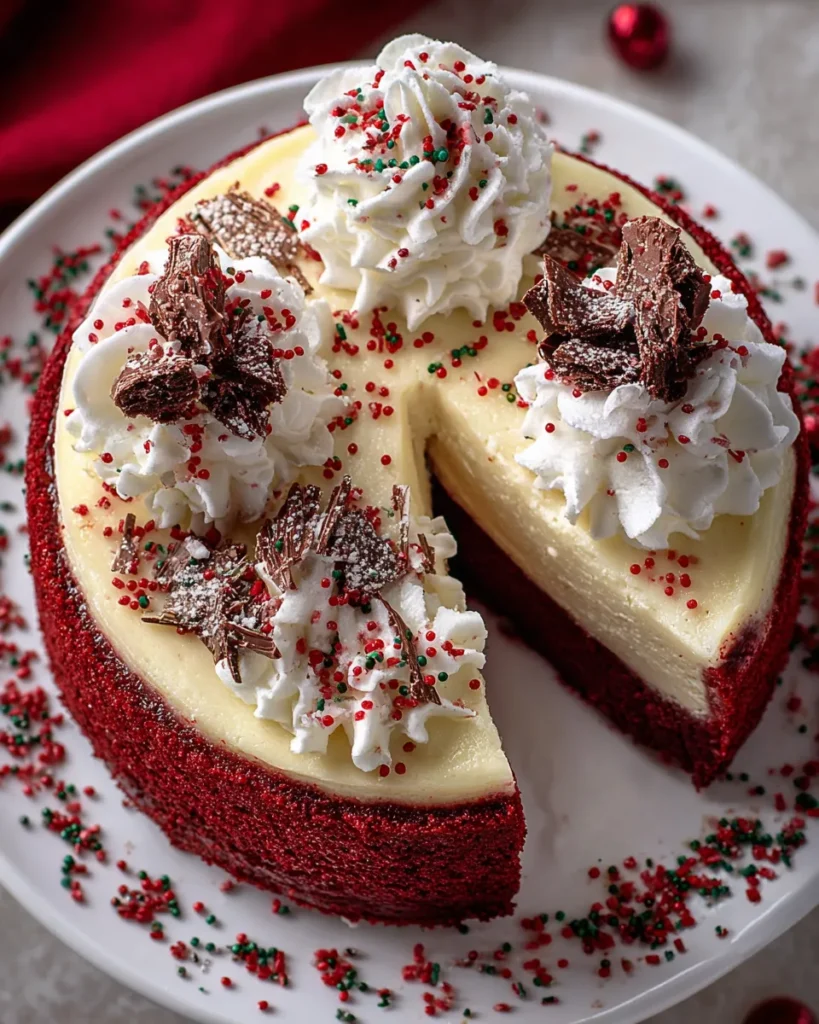

Christmas Red Velvet Cheesecake
Description
Moist red velvet cake serves as the base for a smooth, tangy cream cheese layer. Topped with fluffy whipped cream, it’s a striking centerpiece for your festive table.
Ingredients
Instructions
-
Preheat your oven to 350°F (175°C). Grease the bottom and sides of a 9-inch springform pan and set aside.
-
In a large mixing bowl, combine the flour, granulated sugar, cocoa powder, baking soda, and salt. Whisk until thoroughly mixed.
-
In another bowl, add the vegetable oil, buttermilk, eggs, red food coloring, and 1 tsp of vanilla extract. Whisk until smooth and well-combined.
-
Gradually add the wet ingredients to the dry ingredients, mixing until just combined. Be careful not to overmix.
-
Pour the red velvet batter into the prepared springform pan, smoothing the top with a spatula.
-
Bake in the preheated oven for 25-30 minutes, or until a toothpick inserted in the center comes out clean. Remove from the oven and allow to cool completely in the pan.
-
While the cake bakes, prepare the cheesecake layer. In a mixing bowl, beat the softened cream cheese until creamy and smooth.
-
Add the powdered sugar, sour cream, and 1 tsp of vanilla extract to the cream cheese. Mix until well combined and smooth.
-
Once the red velvet cake has cooled, pour the cheesecake batter over the top of the cake in the springform pan, spreading it out evenly.
-
Bake the cheesecake layer for an additional 30-35 minutes, or until it is set but slightly jiggly in the center. Remove from the oven and let it cool at room temperature, then refrigerate for at least 4 hours (or overnight) to fully set.
-
Before serving, whip the heavy cream in a separate bowl until soft peaks form. Spread the whipped cream over the top of the chilled cheesecake for a luxurious finish.
-
Decorate with festive sprinkles or chocolate curls if desired.
Nutrition Facts
Serving Size 12
- Amount Per Serving
- Calories 46kcal
Note
- This cheesecake is best made a day ahead to allow the flavors to meld and the texture to set perfectly.
- Experiment with different types of food coloring for a unique twist.
- Leftover cheesecake can be stored in the refrigerator for up to five days.
- Consider pairing with a sweet dessert wine for a special holiday treat.

