

There is truly nothing better than filling your kitchen with the scent of vanilla and sugar during the holidays. If you are looking for a dessert that delivers maximum festive cheer with minimal effort, you have found the right recipe. These thick, chewy blondies are absolutely bursting with melting white chocolate pockets and crunchy red and green M&M's. They are the perfect tray bake for busy schedules, offering golden edges and a delightfully soft, buttery center that everyone loves. Let's get baking so you can see why this is an instant holiday hit!
Key Ingredients
To achieve that perfect chewy texture and festive look, we need just the right balance of pantry staples and holiday treats. Here is everything you need to gather before we start mixing to create this delicious tray bake.
- 2½ cups all-purpose flour: Provides the necessary structure to hold all those heavy mix-ins while keeping the bars sturdy yet tender.
- 1 teaspoon baking powder: Helps the dough rise just enough to create a soft, cake-like crumb rather than a dense brick.
- ½ teaspoon baking soda: Works with the sugars to encourage browning and adds a slight lift to the texture.
- ½ teaspoon salt: Balances the sweetness of the white chocolate and sugars, making the flavor profile pop.
- 1 cup unsalted butter, softened: The creamy base that gives these bars their rich, melt-in-your-mouth consistency and buttery flavor.
- 1 cup granulated sugar: Adds sweetness and helps create those slightly crisp, golden edges we all fight over.
- 1 cup packed brown sugar: Brings moisture and a deep, molasses-like richness that makes the bars incredibly chewy.
- 2 large eggs: Act as the binding agent to hold the dough together and add richness to the batter.
- 2 teaspoons vanilla extract: Infuses the blondie base with a classic, aromatic warmth that screams comfort food.
- 1 cup holiday-themed sprinkles: Adds a fun pop of color and festive flair that makes these bars picture-perfect for Christmas.
- 1 cup white chocolate chips: Creates pockets of creamy sweetness that contrast beautifully with the crunchy candy.
- 1 cup red and green M&M's (or similar holiday candy): Provides the signature holiday look and a satisfying chocolate crunch in every bite.
How To Make Christmas Cookie Bars
Making these bars is honestly a breeze, which is why I turn to this recipe every single December. It is essentially a one-bowl method that saves you time on cleanup, leaving you more time to wrap gifts or watch your favorite holiday movies. We are aiming for a batter that is thick and rich, similar to cookie dough but spreadable. The magic happens when we cream the butter and sugars properly, so don't rush that step! Once it is in the oven, your house is going to smell amazing. Here is exactly how to pull these together.
1. Start by getting things ready. Preheat your oven to 350°F (175°C). To ensure you can lift the bars out easily later, grease a 9×13 inch baking pan thoroughly or, even better, line it with parchment paper for easy removal.
2. Grab a medium bowl and whisk together the flour, baking powder, baking soda, and salt. Make sure there are no clumps, then set this mixture aside for when we need the dry ingredients.
3. In a large mixing bowl, take your electric mixer and cream together the softened butter, granulated sugar, and brown sugar. You want to beat this until the mixture becomes light and fluffy, which usually takes about 2-3 minutes.
4. Next, add the eggs, one at a time, making sure you are mixing well after each addition to fully incorporate them. Once the eggs are in, stir in the vanilla extract until everything is well combined and fragrant.
5. Turn your mixer to low speed and gradually add the dry ingredients to the butter mixture. Mix only until the flour is just incorporated. Be very careful to do not overmix, or the bars might turn out tough.
6. Now for the fun part! Fold in the holiday sprinkles, white chocolate chips, and M&M's gently using a spatula. Keep folding until all those festive goodies are evenly distributed throughout the batter.
7. Spread the cookie mixture evenly into your prepared baking pan. Since the dough is thick, you might need to use a spatula for smoothing the top so it bakes evenly.
8. Place the pan in your preheated oven and bake for 25-30 minutes. You are looking for the edges to be golden brown and for a toothpick inserted into the center to come out clean.
9. Once done, remove the baking pan from the oven. Let the cookie bars cool in the pan for about 15 minutes to set up. After that, carefully transfer them to a wire rack to cool completely.
10. Finally, once cooled, take a sharp knife to cut the bars into squares and get ready to serve them. All that is left to do is Enjoy!
Serving Suggestions
These bars are stunning on their own, but half the fun of holiday baking is the presentation. Whether you are hosting a cozy family gathering or heading to a potluck, there are so many ways to elevate this simple dessert. I love playing around with temperature and pairings to really make the flavors shine. Since the base is a classic blondie, it pairs beautifully with creamy and warm elements. Here are a few of my favorite ways to serve these up to guests.
- Warm à la Mode: For an indulgent dessert, gently warm a square in the microwave for ten seconds and top it with a scoop of vanilla bean ice cream, letting it melt into the chocolate pockets.
- Festive Platter Garnish: Arrange the cut squares on a white platter and dust them lightly with powdered sugar to create a snowy effect that looks elegant and wintry on any holiday table.
- Hot Cocoa Companion: Serve these bars on the side of a steaming mug of hot chocolate topped with marshmallows, dipping the edge of the bar into the cocoa for a cozy, melting bite.
- Gift Wrapped Stacks: Stack two or three bars and tie them with red and green ribbon, placing them in clear cellophane bags for an adorable, edible party favor or teacher gift.
Tips For Perfect Christmas Cookie Bars
I want to make sure these turn out absolutely perfect for you on the first try. Baking during the holidays can be stressful enough without worrying about a recipe failing! The beauty of this tray bake is how forgiving it is, but a few small details can make the difference between a good cookie and a great one. I always tell my friends that the best part about this recipe is its versatility. You don't have to feel stuck if you are missing one specific mix-in. Here are the key things to keep in mind to ensure success.
- Customize Your Mix-ins: Don't feel limited to just candy; these bars can be customized with your favorite mix-ins like crunchy nuts, tart dried fruits, or different types of chocolate chunks to suit your taste.
- Proper Storage: To keep them tasting fresh, make sure to store the cookie bars in an airtight container at room temperature, where they will stay delicious for up to one week.
- Versatile Occasions: Remember that these are perfect for holiday parties, gifting, or simply enjoying a quiet night in with a warm cup of cocoa!
How To Store It
If you somehow manage not to eat the entire pan in one sitting (which is a challenge, believe me), you will want to store these properly to keep that chewy texture intact. Nobody likes a stale cookie bar! Thankfully, these blondies hold up remarkably well, making them an excellent make-ahead option for the busy Christmas season. Whether you are saving them for next week's party or freezing them for later, here is the best way to handle your leftovers.
- Room Temperature: Place the completely cooled bars in an airtight container or a ziplock bag, keeping them on the counter to maintain softness and freshness for up to one week.
- Layering with Parchment: If you need to stack the bars inside your container to save space, place a sheet of parchment paper between the layers to prevent them from sticking together.
- Freezing for Later: For long-term storage, wrap individual bars in plastic wrap and place them in a freezer-safe bag where they can be frozen for up to three months; just thaw on the counter before eating.
Frequently Asked Questions
I know questions often pop up when you are in the middle of baking, so I have gathered the most common inquiries I get about this recipe. Here is everything you need to know to troubleshoot and bake with confidence!
- Q: How do I know when the Christmas Cookie Bars are finished baking?
A: You should bake the bars in a preheated oven at 350°F (175°C) for 25 to 30 minutes. You will know they are done when the edges have turned golden brown and a toothpick inserted into the center of the pan comes out clean.
- Q: Can I substitute the candy and chocolate chips for other ingredients?
A: Yes, the recipe notes state that these bars are customizable. While the instructions specifically call for holiday-themed sprinkles, white chocolate chips, and M&M's, you can replace them with your favorite mix-ins, such as nuts, dried fruits, or different types of chocolate.
- Q: What is the best way to store the leftover bars?
A: After the bars have cooled completely and been cut into squares, you should place them in an airtight container. Keep the container at room temperature, and the bars will remain fresh for up to one week.
- Q: Why is it important not to overmix the batter in step 5?
A: The instructions specify to mix on low speed just until the flour is incorporated to avoid overworking the dough. Overmixing can lead to a tough texture, whereas mixing gently ensures the bars remain tender.
- Q: Do I need to line the baking pan with parchment paper?
A: While it is not strictly required, the instructions recommend either greasing the 9×13 inch baking pan or lining it with parchment paper. Using parchment paper is suggested for easier removal of the bars once they are baked.
- Q: What should the texture of the butter and sugar mixture look like before adding the eggs?
A: According to step 3, you should cream the softened butter, granulated sugar, and brown sugar together for about 2-3 minutes. The mixture should become light and fluffy before you proceed to add the eggs and vanilla extract.
What Makes This Special
Honestly, what makes this recipe a total winner is that it delivers all the joy of a batch of cookies without the hassle of scooping out individual dough balls. It is a lazy baker's dream come true! You get that chewy, buttery vanilla dough loaded with red and green M&M's in every single bite. It is officially time to put on your favorite ugly Christmas sweater and get this tray bake in the oven. Don't forget to print this article or save it for later because you are definitely going to want to make these again. If you try them out, please drop a comment or question below; I would love to hear how they turned out for you!
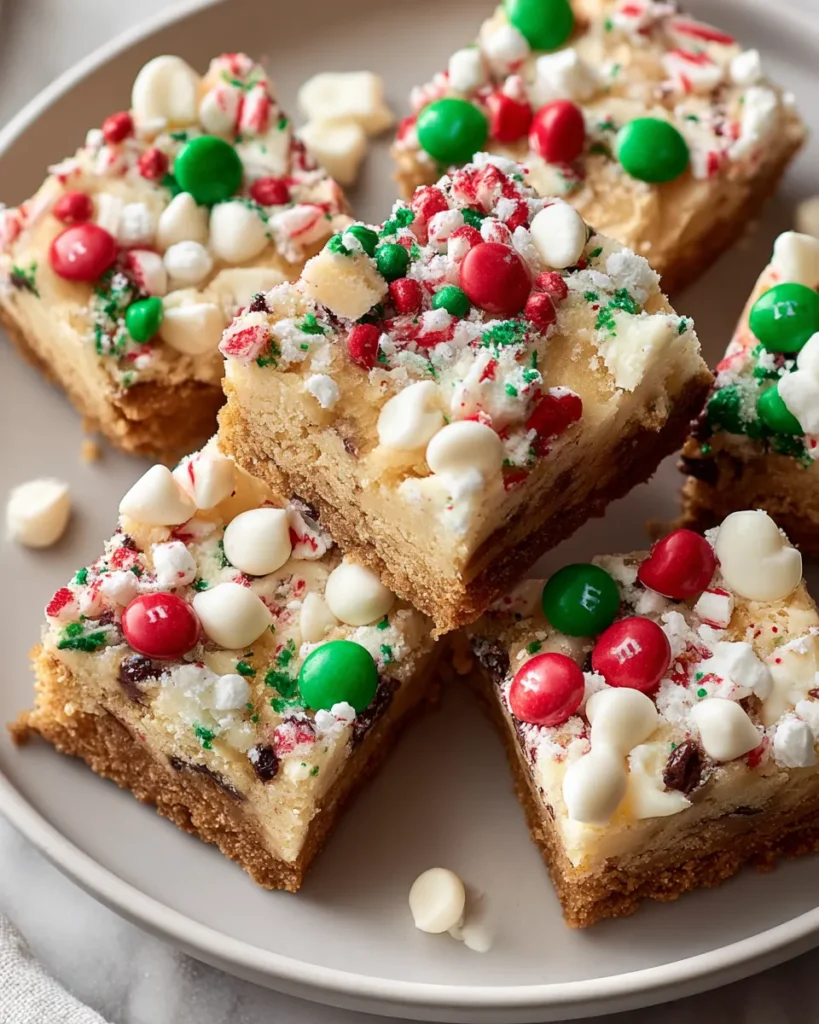

Christmas Cookie Bars
Description
Thick and chewy blondies bursting with festive sprinkles and melting white chocolate pockets. The golden edges offer a slight crunch, while the center remains delightfully soft and buttery.
Ingredients
Instructions
-
Preheat your oven to 350°F (175°C). Grease a 9x13 inch baking pan or line it with parchment paper for easy removal.
-
In a medium bowl, whisk together the flour, baking powder, baking soda, and salt. Set this mixture aside.
-
In a large mixing bowl, using an electric mixer, cream together the softened butter, granulated sugar, and brown sugar until the mixture becomes light and fluffy, about 2-3 minutes.
-
Add the eggs, one at a time, mixing well after each addition. Then stir in the vanilla extract until well combined.
-
Gradually add the dry ingredients to the butter mixture, mixing on low speed until the flour is just incorporated. Do not overmix.
-
Fold in the holiday sprinkles, white chocolate chips, and M&M's with a spatula until evenly distributed throughout the batter.
-
Spread the cookie mixture evenly into the prepared baking pan, smoothing the top with a spatula.
-
Bake in the preheated oven for 25-30 minutes, or until the edges are golden brown and a toothpick inserted into the center comes out clean.
-
Remove the baking pan from the oven and allow the cookie bars to cool in the pan for about 15 minutes. Then, transfer them to a wire rack to cool completely.
-
Once cooled, cut the bars into squares and serve them. Enjoy!
Nutrition Facts
Serving Size 24
- Amount Per Serving
- Calories 12kcal
Note
- These bars can be customized with your favorite mix-ins like nuts, dried fruits, or different types of chocolate.
- Store the cookie bars in an airtight container at room temperature for up to one week.
- These are perfect for holiday parties, gifting, or simply enjoying with a warm cup of cocoa!

