

These Christmas Cherry Bars are your holiday baking game-changer: festive cherry-studded bars with a buttery crust and sweet almond-scented glaze that bring a burst of cheer to every bite. Velvety cherry filling meets a tender golden base, then gets topped with an irresistible smooth icing—perfect for gifting, sharing, or sneaking a few extra squares!
Key Ingredients
Gathering the right ingredients ensures these cherry bars come out perfectly tender, balanced, and bursting with flavor. Here’s what you’ll need:
- 1 cup unsalted butter, softened: Provides a rich, tender crust that melts in your mouth.
- 1 cup granulated sugar: Sweetens the dough and helps create a light, airy texture.
- 1 cup brown sugar, packed: Adds a hint of molasses flavor and moisture to keep bars soft.
- 4 large eggs: Bind the ingredients and contribute to the bars’ structure and richness.
- 2 teaspoons vanilla extract: Infuses a warm, sweet aroma that enhances the overall flavor.
- 3 cups all-purpose flour: Forms the base of the dough for that classic buttery crust.
- 1 teaspoon baking powder: Leavens the bars slightly for a light, tender crumb.
- 1/2 teaspoon salt: Balances sweetness and enhances all the flavors in the recipe.
- 1 can (21 ounces) cherry pie filling: Delivers vibrant, juicy cherry pockets in every bite.
- 1 cup powdered sugar: Used for the smooth glaze to add a sweet finishing touch.
- 2 tablespoons milk: Thins the icing to the perfect drizzling consistency.
- 1/2 teaspoon almond extract: Gives a delicate, nutty note to the sweet glaze.
- 1/2 cup chopped pecans or walnuts (optional): Adds a crunchy contrast and nutty flavor.
How To Make Christmas Cherry Bars
Turning these simple ingredients into cherry-studded bars is easier than you might think. With a few mixing bowls, a trusty spatula, and careful attention to each step—especially when creaming, layering, and baking—you’ll end up with bars that boast a perfectly golden crust, pockets of cherry filling, and a glossy almond-scented glaze. Let’s dive into the step-by-step magic:
1. Preheat your oven to 350°F (175°C) and prepare a 9×13-inch baking pan by greasing and flouring it or lining it with parchment paper. This ensures the bars release cleanly once baked.
2. In a large mixing bowl, cream together the softened butter, granulated sugar, and brown sugar until the mixture is light and fluffy, about 3–4 minutes using a hand or stand mixer.
3. Add the eggs one at a time, mixing well after each addition to incorporate air and prevent curdling. Then stir in the vanilla extract until fully combined.
4. In a separate bowl, whisk together the all-purpose flour, baking powder, and salt, ensuring even distribution. Gradually add the dry ingredients to the wet mixture, mixing just until combined—avoid overmixing to keep bars tender.
5. Reserve about 1 cup of batter for the topping. Spread the remaining batter evenly into the prepared pan to form a uniform crust.
6. Spoon the cherry pie filling over the crust, spreading it with a spatula for even coverage. If you like extra crunch, sprinkle the chopped nuts on top of the cherries.
7. Dollop the reserved batter over the cherry layer and gently spread with a spatula so that some cherries still peek through, creating a rustic marbled effect.
8. Bake for 30–35 minutes, or until the top is golden brown and a toothpick inserted into the center comes out with a few moist crumbs.
9. Remove from the oven and let the bars cool in the pan for about 15 minutes, then transfer to a wire rack to cool completely, which helps the glaze adhere properly.
10. In a small bowl, whisk together the powdered sugar, milk, and almond extract until smooth and pourable. Drizzle the glaze over the cooled bars, allow it to set, and then slice into squares.
Serving Suggestions
These Christmas Cherry Bars shine on any holiday spread and can be dressed up to suit your gathering. Whether you’re aiming for a cozy family dessert or a festive party treat, presentation and pairing matter. Here are four fun ways to serve:
- Serve warm with ice cream: Reheat a bar for 10–15 seconds in the microwave and top with a scoop of vanilla ice cream for a melty, cozy dessert.
- Offer chilled with fresh berries: Chill the bars in the fridge for at least an hour, then plate with raspberries or strawberries for a refreshing contrast.
- Pair with hot beverages: Enjoy a slice alongside a mug of spiced hot chocolate or mulled wine to balance the sweet cherry flavor.
- Garnish for festive flair: Drizzle extra glaze and sprinkle red and green sugar pearls or chopped nuts to match your holiday décor.
Tips For Perfect Christmas Cherry Bars
Getting these bars just right is all about small details: use room-temperature butter for easier creaming, measure flour carefully to avoid a dense crust, and resist the urge to overmix once you add the dry ingredients. Let the bars cool well before glazing so the icing sets smoothly. If you’re customizing with nuts or sprinkles, add them right after baking so they stick. Here are a few extra tips to keep in mind:
- These bars can be stored in an airtight container at room temperature for up to a week.
- Feel free to substitute the cherry pie filling with any fruit filling of your choice, such as blueberry or apple.
- These Christmas Cherry Bars can be served warm for a gooey treat or chilled for a refreshing flavor.
- Consider adding a sprinkle of festive red and green sprinkles on top of the icing for a holiday touch.
How To Store It
Keeping your cherry bars fresh and delicious is simple with the right storage methods. Whether you want them at room temperature for easy snacking, chilled for a firmer bite, or frozen for long-term enjoyment, here’s how to maintain that perfect texture and flavor:
- At room temperature: Store completely cooled bars in an airtight container on the counter for up to one week.
- In the refrigerator: Place bars in a sealed container to keep them fresh for 7–10 days and prevent the icing from melting.
- For freezing: Wrap individual squares tightly in plastic wrap, then place them in a freezer-safe bag for up to three months.
- To reheat: Warm individual bars in the microwave for 10 seconds or in a preheated 300°F oven for 5 minutes to restore a fresh-baked taste.
Frequently Asked Questions
Here are some common questions you might have about these cherry bars:
- How long does it take to prepare and bake these Christmas Cherry Bars?
Preparing the batter and assembling the bars takes about 15–20 minutes, including measuring ingredients and preheating the oven. Baking requires 30–35 minutes, and you should allow another 15 minutes for the bars to cool in the pan before transferring to a rack. Allow additional time for icing and final cooling if desired.
- Can I store these bars, and how long will they stay fresh?
Yes. Once completely cooled, place the bars in an airtight container at room temperature for up to one week. For longer storage, wrap individual squares tightly in plastic wrap and freeze for up to three months. Thaw at room temperature before serving.
- What substitutions can I make if I don’t have cherry pie filling?
You can swap the cherry pie filling for any fruit pie filling such as blueberry, apple-cinnamon, peach, or mixed berry. If your filling is very runny, drain excess syrup or reduce any added liquid to prevent a soggy crust.
- My reserved batter layer keeps sinking into the filling. How can I prevent this?
To minimize sinking, dollop the reserved batter on top rather than spreading it too thinly. Avoid overmixing the batter—the gluten will become tough and heavy. If the batter still spreads into the filling, chill it briefly before dolloping, which helps it hold its shape.
- How can I achieve clean, neat slices when serving these bars?
For the best cuts, cool the bars completely, or even chill them in the refrigerator for 30 minutes. Use a sharp, serrated knife or bench scraper, wiping the blade clean between cuts to avoid dragging filling and crumbs.
- Is it possible to make these Christmas Cherry Bars in advance?
Absolutely. Bake and cool the bars 1–2 days ahead, store airtight at room temperature, and prepare the icing just before serving to keep it fresh. This approach preserves the glaze’s smooth texture and prevents it from absorbing moisture overnight.
- I have nut allergies. Can I omit the chopped pecans or walnuts without affecting the recipe?
Yes. The nuts are entirely optional and used for crunch and flavor contrast. Simply leave them out, or if you’d like a different texture, sprinkle toasted coconut flakes or granola on top of the cherry layer instead.
What Makes This Special
These Christmas Cherry Bars hit all the festive high notes: a buttery, golden crust, pockets of juicy cherry filling, and a silky almond-scented glaze that ties it all together. The recipe’s straightforward steps make even intermediate bakers feel like holiday heroes, and its customizable nut topping and filling swaps let you make it your own. Print this article to keep the magic at your fingertips, then share your baking tales or questions below—because nothing says holiday cheer like swapping stories over cherry-studded squares!
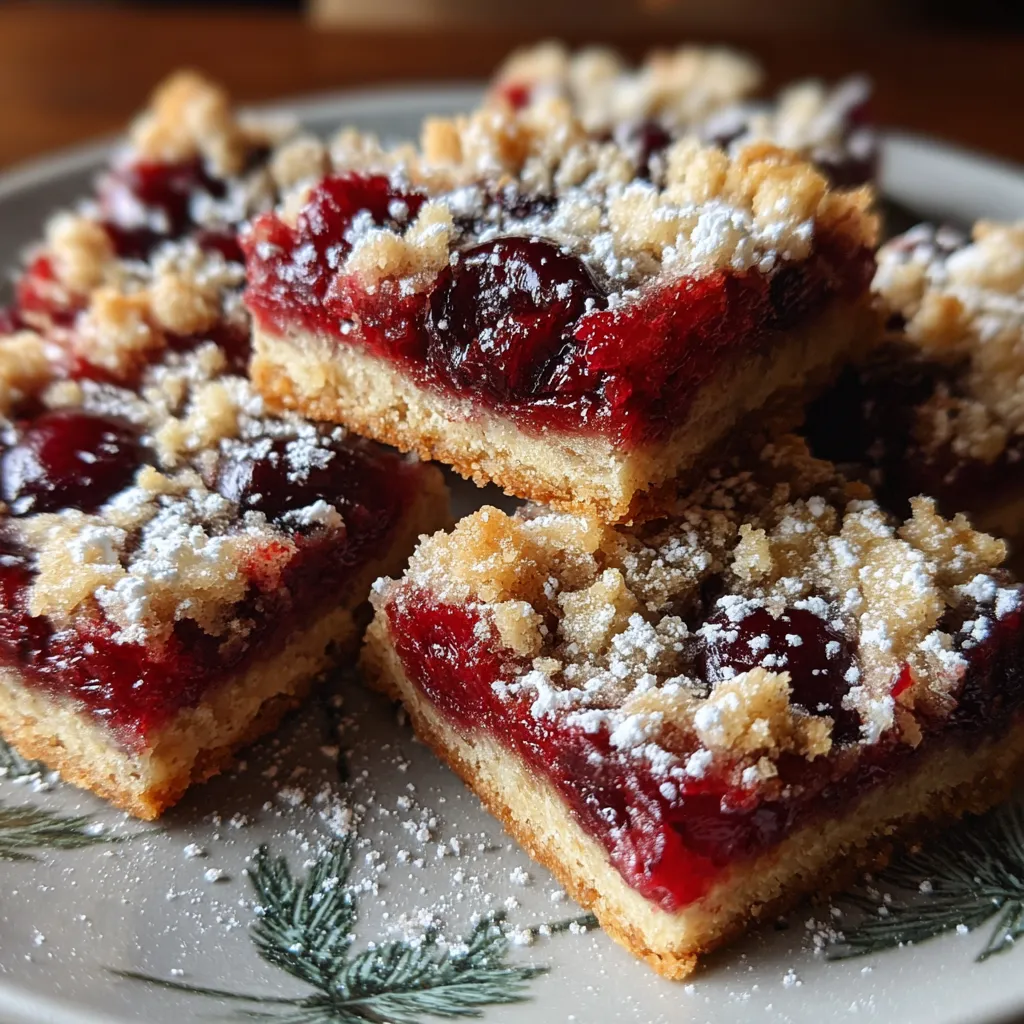

Christmas Cherry Bars
Description
These bars layer velvety cherry filling over a tender, golden crust, then finish with a smooth almond-scented icing. Each bite blends sweet cherries, rich butter, and a hint of almond for a festive treat.
Ingredients
Instructions
-
Preheat your oven to 350°F (175°C). Grease and flour a 9x13-inch baking pan or line it with parchment paper for easy removal.
-
In a large mixing bowl, cream together the softened butter, granulated sugar, and brown sugar until light and fluffy.
-
Add the eggs, one at a time, mixing well after each addition. Then stir in the vanilla extract until fully combined.
-
In a separate bowl, whisk together the flour, baking powder, and salt. Gradually add the dry ingredients to the wet ingredients, mixing until just combined. Be careful not to overmix.
-
Reserve about 1 cup of the batter to use as topping. Spread the remaining batter evenly into the prepared baking pan.
-
Spoon the cherry pie filling over the layer of batter in the pan, spreading it evenly across the surface. If you'd like, sprinkle the chopped nuts on top of the cherry filling for added crunch.
-
Take the reserved batter and dollop it over the cherry filling. Use a spatula to spread it gently, but some of the cherry filling should still be visible.
-
Bake in the preheated oven for 30-35 minutes or until the top is golden brown and a toothpick inserted into the center comes out clean.
-
Once baked, remove from the oven and allow the bars to cool in the pan for about 15 minutes. Then transfer them to a wire rack to cool completely.
-
For the icing, whisk together the powdered sugar, milk, and almond extract in a small bowl until smooth. Drizzle over the cooled bars before slicing into squares.
Nutrition Facts
Serving Size 24
- Amount Per Serving
- Calories 11kcal
Note
- These bars can be stored in an airtight container at room temperature for up to a week.
- Feel free to substitute the cherry pie filling with any fruit filling of your choice, such as blueberry or apple.
- These Christmas Cherry Bars can be served warm for a gooey treat or chilled for a refreshing flavor.
- Consider adding a sprinkle of festive red and green sprinkles on top of the icing for a holiday touch.

