

Tired of the same old chicken salad? This Italian Grinder Chicken Salad brings together tender chicken, crunchy bell peppers, tangy olives, and grated Parmesan tossed in a creamy mayo and Greek yogurt dressing with a zing of red wine vinegar and Italian seasoning. After a quick chill to let the flavors mingle, you pile it into crusty Italian rolls for a bright, zesty lunch that feels like a party in every bite.
Key Ingredients
Before you get started, gather these fresh, flavorful components that make this salad sing:
- 2 cups cooked chicken breast, shredded or chopped: Tender protein that soaks up the creamy dressing and zesty seasonings.
- 1/2 cup mayonnaise: Provides rich, silky texture as the creamy base.
- 1/4 cup plain Greek yogurt: Adds tangy creaminess and lightens up the mayo.
- 1 tablespoon red wine vinegar: Delivers bright acidity to balance the richness.
- 1 tablespoon Italian seasoning: Blends oregano, basil, and herbs for classic Mediterranean flavor.
- 1/4 teaspoon garlic powder: Lends gentle garlic notes without overwhelming the mix.
- Salt and pepper to taste: Essential seasonings that bring out every ingredient’s best.
- 1 cup diced bell peppers (mixed colors): Offers crisp crunch and a burst of vibrant hues.
- 1/2 cup diced red onion: Contributes sharp bite and sweet undertones.
- 1/2 cup sliced black olives: Imparts briny depth and soft texture.
- 1/2 cup grated Parmesan cheese: Sprinkles nutty, salty goodness throughout.
- 1 cup chopped fresh parsley: Brightens flavors with fresh herbal notes.
- 1/2 cup sliced pepperoncini peppers (optional): Kicks up the tangy heat for extra zing.
- 1 loaf Italian bread or hoagie rolls for serving: The sturdy vessel that holds all the delicious filling.
How To Make Italian Grinder Chicken Salad
Bringing this Italian-inspired chicken salad together is a breeze. With just a handful of ingredients and some easy mixing, you’ll have a vibrant, flavor-packed filling in under an hour (including chill time). Here’s how to turn your cooked chicken and crunchy veggies into the zesty Italian Grinder Chicken Salad you’ll want to scoop into every roll in sight.
1. In a large mixing bowl, combine shredded or chopped chicken, mayonnaise, Greek yogurt, and red wine vinegar. Use a spatula or wooden spoon to mix thoroughly until every piece of chicken is evenly coated.
2. Stir in the Italian seasoning and garlic powder, then season with salt and pepper to taste. Adjust flavor by tasting a small spoonful and adding more seasoning if desired.
3. Add the diced bell peppers, red onion, black olives, grated Parmesan cheese, and chopped parsley to the bowl. Gently fold these ingredients together, being careful not to bruise the veggies.
4. If you’d like an extra tangy kick, mix in the sliced pepperoncini peppers, distributing their juice and slices evenly.
5. Cover the salad with plastic wrap or a lid and refrigerate for at least 30 minutes. This chilling step allows all the flavors to meld and intensify.
6. When you’re ready to serve, slice the Italian bread or hoagie rolls in half lengthwise, creating a sturdy base for the filling.
7. Spoon a generous portion of the chilled chicken salad onto the bottom half of each roll, spreading it out evenly for consistent flavor in every bite.
8. Place the top half of the bread over the filling, press down gently, then cut into individual sandwiches. Serve immediately or wrap them up for a delightful picnic treat.
Serving Suggestions
This Italian Grinder Chicken Salad is versatile and brings a burst of flavor in so many situations—whether you’re throwing together a quick lunch, planning a picnic, or hosting friends for an informal gathering. It’s all about letting that tangy, creamy filling shine in the style that suits you best.
- Classic Roll-Up: Scoop the salad into soft Italian rolls, layer on extra pepperoncini slices if you like, and press gently for an indulgent sandwich that holds together perfectly.
- Lettuce Cups: Spoon the chicken salad into crisp lettuce leaves, fold them over, and enjoy a grain-free, handheld snack with a satisfying crunch.
- Salad Bowl Upgrade: Arrange mixed greens on a platter, pile the chicken salad in the center, then drizzle with a little extra olive oil and red wine vinegar for a hearty, low-carb dinner.
- Packable Picnic: Divide the salad and bread into seal-tight containers or wrap each sandwich in foil, then toss into your cooler—ideal for beach days or park adventures.
Tips For Perfect Italian Grinder Chicken Salad
Nailing the balance of creamy, tangy, and crunchy elements is what makes this chicken salad shine. A few friendly pointers will ensure every batch turns out just right and keeps you excited about leftovers. Don’t be afraid to tweak the textures or spice level to suit your mood—the recipe is designed for easy customization and maximum enjoyment.
- This chicken salad can be made a day in advance for even better flavor development.
- Feel free to substitute or add your favorite vegetables like cucumbers or tomatoes for a personal touch.
- The salad can also be enjoyed on a bed of greens for a lighter, low-carb option.
- If you prefer a spicier version, try adding a few slices of jalapeños or a dash of hot sauce.
How To Store It
Proper storage keeps your Italian Grinder Chicken Salad tasting freshly tossed and prevents ingredients from wilting or the bread from going soggy. Follow these simple guidelines to maintain peak flavor and texture throughout the week.
- Refrigerate in an airtight container: Transfer leftovers to a sealed container and chill for up to 4 days to preserve creaminess and freshness.
- Keep bread separate: Store the salad filling on its own and assemble sandwiches just before eating to avoid soggy rolls.
- Portion into individual servings: Divide the salad into smaller containers for convenient grab-and-go lunches or snack portions.
- Freeze for longer storage: Place the salad in a freezer-safe container for up to 2 months; thaw overnight in the refrigerator and stir gently before serving (texture may lighten slightly).
Frequently Asked Questions
Here are some quick answers to the most common questions about this tangy, zesty chicken salad:
- How long does it take to prepare this Italian Grinder Chicken Salad?
It takes about 15 minutes to assemble the ingredients and mix everything together, plus at least 30 minutes of refrigeration to allow the flavors to meld. In total, plan for around 45 minutes from start to finish.
- Can I use store-bought rotisserie chicken instead of cooking my own chicken breast?
Absolutely. Shredded or chopped rotisserie chicken works perfectly and can save you time. Just be sure to remove the skin and any excess fat before combining with the dressing ingredients.
- How should I store leftovers, and how long will they keep?
Store the salad in an airtight container in the refrigerator for up to 3–4 days. If you’ve already built sandwiches, wrap them tightly in plastic wrap or foil and consume within 24 hours to prevent the bread from becoming soggy.
- What can I substitute if I don’t have Greek yogurt or mayonnaise?
You can replace the mayonnaise with an equal amount of sour cream or plain full-fat yogurt. If you need a dairy-free option, use dairy-free mayonnaise and coconut-based yogurt or extra olive oil with a squeeze of lemon juice to maintain the creaminess.
- How can I adjust the spice level or tanginess of this chicken salad?
For more heat, add sliced jalapeños, a pinch of red pepper flakes, or a dash of your favorite hot sauce. To boost tanginess, increase the red wine vinegar by an extra teaspoon or stir in more pepperoncini juice from the jar.
- Are there any recommended vegetable additions or substitutions?
Yes. Feel free to customize with diced cucumbers, halved cherry tomatoes, shredded carrots, or chopped celery. Just be sure to pat any watery vegetables dry to keep the salad from becoming too liquidy.
- Can I make this recipe gluten-free or low-carb?
To serve gluten-free or low-carb, omit the Italian bread and pile the chicken salad onto lettuce leaves, collard greens, or gluten-free rolls. You can also enjoy it over a bed of mixed greens for a lighter meal.
- What’s the best way to prevent the salad from tasting bland after refrigeration?
Before chilling, taste the salad and slightly over-season with salt, pepper, and Italian seasoning, since flavors can mellow in the fridge. After the chill, give it another quick stir and adjust seasoning if needed before serving.
What Makes This Special
This Italian Grinder Chicken Salad is a flavor-packed mashup of creamy, tangy, and crunchy elements that works every time—whether you’re feeding a crowd or treating yourself to an easy weeknight dinner. The combination of mayonnaise and Greek yogurt keeps things rich yet bright, while the chill time lets the zesty seasonings and veggies mingle into one harmonious filling. Feel free to print this article and save it for later; you’ll want a copy whenever you need a fast, festive lunch. Tried it, tweaked it, or have questions? Drop your stories or ask away—I’m here to help and eager to hear how your sandwiches turned out!
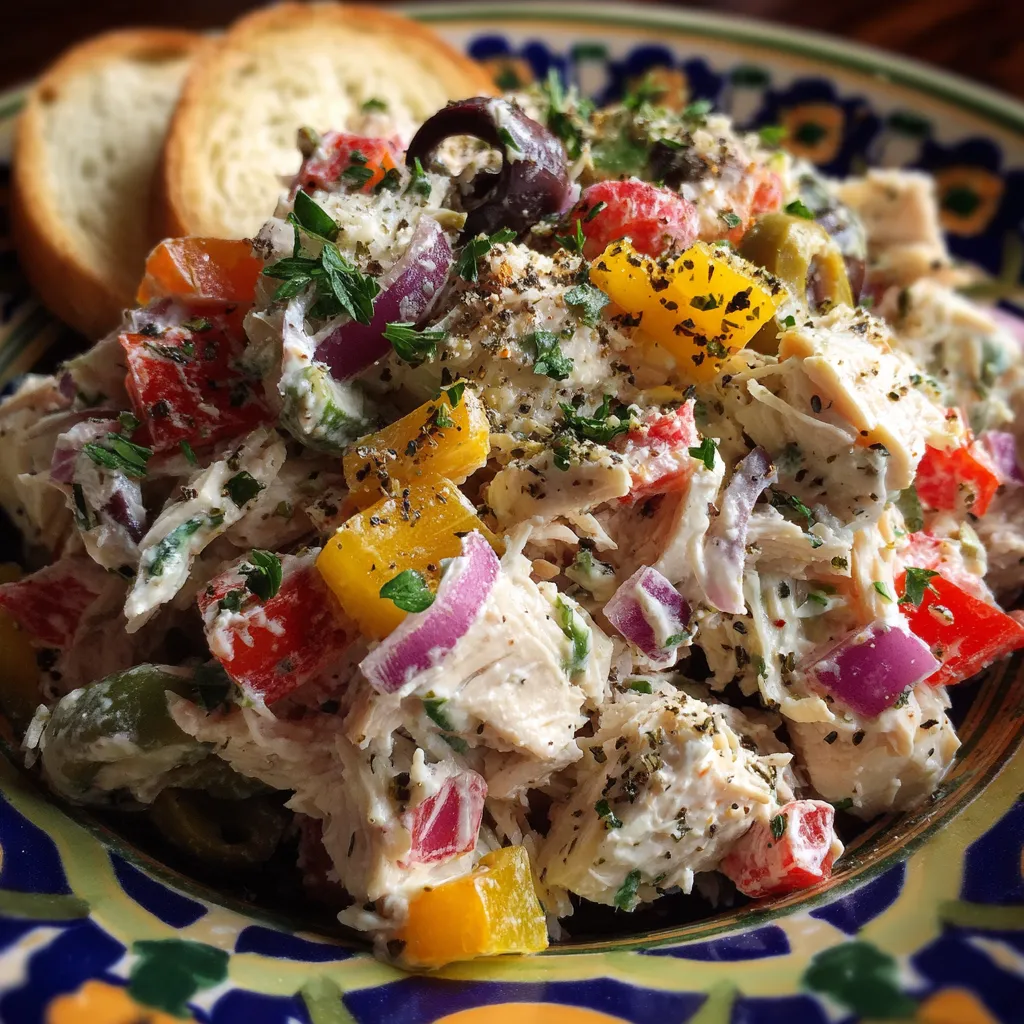

Italian Grinder Chicken Salad
Description
Tender chicken mingles with creamy mayo and Greek yogurt, tossed with vibrant peppers, olives, and Parmesan. Chill to meld flavors, then pile into crusty Italian rolls for a bright, tangy sandwich.
Ingredients
Instructions
-
In a large mixing bowl, combine the shredded or chopped chicken, mayonnaise, Greek yogurt, and red wine vinegar. Mix well until the chicken is evenly coated.
-
Stir in the Italian seasoning, garlic powder, and season with salt and pepper to taste. Adjust the seasoning according to your preference.
-
Add the diced bell peppers, red onion, black olives, grated Parmesan cheese, and chopped parsley to the chicken mixture. Gently fold in the ingredients until everything is well incorporated.
-
If you’re using pepperoncini peppers, mix them in at this stage for an extra tangy kick.
-
Once the salad is well-mixed, cover the bowl with plastic wrap or a lid and refrigerate for at least 30 minutes to allow the flavors to meld together.
-
When ready to serve, slice the Italian bread or hoagie rolls in half lengthwise. Spoon a generous amount of the Italian Grinder Chicken Salad onto the bottom half of the bread.
-
Place the top half of the bread over the filling, press down gently, and cut into individual sandwiches.
-
Serve immediately or wrap them up for a delightful picnic treat.
Nutrition Facts
Serving Size 4
- Amount Per Serving
- Calories 153kcal
Note
- This chicken salad can be made a day in advance for even better flavor development.
- Feel free to substitute or add your favorite vegetables like cucumbers or tomatoes for a personal touch.
- The salad can also be enjoyed on a bed of greens for a lighter, low-carb option.
- If you prefer a spicier version, try adding a few slices of jalapenos or a dash of hot sauce.

