

Red Velvet Whoopie Pies are playful, bite-sized treats that bring a pop of color and flavor to any dessert spread. Soft crimson cake rounds hug a dreamy, tangy cream cheese frosting, creating a moist sponge bursting with deep cocoa notes. Whether you’re craving an afternoon pick-me-up or gearing up for a party, these homemade whoopie pies deliver the perfect balance of sweet, tangy, and chocolate-y goodness. Dive in and discover your new favorite sweet snack!
Key Ingredients
Before you start mixing, gather these essentials to ensure everything comes together perfectly:
- 2 cups all-purpose flour: Provides the structural base for tender, moist cakes.
- 3 tablespoons unsweetened cocoa powder: Adds rich chocolate flavor and depth to the red velvet batter.
- 1 teaspoon baking soda: Acts as a leavening agent to help the cakes rise and become fluffy.
- 1/2 teaspoon salt: Enhances overall flavor and balances sweetness.
- 1 cup granulated sugar: Sweetens and tenderizes the cake crumb.
- 1/2 cup unsalted butter, softened: Contributes smooth richness and moisture to the batter.
- 1 large egg: Binds ingredients and adds structure for light, airy cakes.
- 1 teaspoon vanilla extract: Infuses warm, aromatic flavor into the red velvet sponge.
- 1 tablespoon red food coloring: Delivers the signature vibrant crimson hue.
- 1 cup buttermilk: Provides tang and moisture, reacting with baking soda for lift.
- 1 teaspoon apple cider vinegar: Enhances tang and reacts with buttermilk for a fluffier texture.
- 1/2 cup unsalted butter, softened: (for filling) Adds creamy richness to the frosting.
- 8 ounces cream cheese, softened: Creates tangy, smooth base for the frosting.
- 2 cups powdered sugar: Sweetens and thickens the cream cheese frosting to pipeable consistency.
- 1 teaspoon vanilla extract: Lifts the frosting with fragrant warmth.
- 1 pinch salt: Balances sweetness and elevates flavors in the filling.
How To Make Red Velvet Whoopie Pies
Let’s walk through the step-by-step magic of turning simple ingredients into vibrant, tender cakes and pillowy frosting. You’ll begin by preheating your oven and lining baking sheets, then whisk together the dry ingredients for uniform texture. Next, you’ll cream butter and sugar until light and airy, blend in the egg, vanilla, and food coloring, and alternately add dry ingredients and buttermilk to keep the batter tender. After baking and cooling, whip up the tangy cream cheese filling until fluffy. Finally, assemble each whoopie pie by piping or spreading the frosting between cake rounds.
1. Preheat the oven to 350°F and line two baking sheets with parchment paper for easy removal.
2. In a bowl whisk together the flour, cocoa powder, baking soda, and salt until evenly combined.
3. In a separate bowl beat the granulated sugar and 1/2 cup butter until the mixture is light and creamy.
4. Add the egg, vanilla extract, and red food coloring to the butter mixture and mix until smooth and uniformly tinted.
5. Alternately add the dry ingredients and buttermilk to the wet batter—begin and end with the flour mixture—mixing until just combined to avoid overworking the batter.
6. Stir in the apple cider vinegar until fully incorporated, enhancing the tang and lift.
7. Drop tablespoon-sized mounds of batter about 2 inches apart on the prepared sheets to allow room for spreading.
8. Bake for 10 to 12 minutes, or until the tops spring back when lightly touched; transfer cakes to a wire rack and let them cool completely.
9. While the whoopie pies cool, beat the remaining 1/2 cup butter and softened cream cheese until the mixture is smooth and lump-free.
10. Gradually add the powdered sugar, vanilla extract, and salt, beating on medium speed until the frosting is light and fluffy.
11. Spread or pipe the filling onto the flat side of half the cakes, then top with the remaining cakes to form classic whoopie pie sandwiches.
Serving Suggestions
These Red Velvet Whoopie Pies are as versatile as they are delicious. Whether you’re aiming for a casual snack or an elegant dessert display, here are some tasty ways to present them:
- Plate with fresh berries: Add a pop of color by arranging raspberries or strawberries alongside each pie, balancing sweetness with bright fruit acidity.
- Dust with cocoa powder: Lightly sift unsweetened cocoa over the tops for a professional, velvety finish.
- Pair with cold milk: Serve each whoopie pie with a glass of chilled milk to complement the creamy filling and rich cake.
- Chill before serving: Place assembled pies in the fridge for 30 minutes so the frosting firms up and flavors meld, making them even easier to slice.
Tips For Perfect Red Velvet Whoopie Pies
Nailing the perfect whoopie pie is all about these small details that make a big difference in texture and flavor. From ingredient temps to assembly tricks, these tips will have you baking like a pro in no time!
- Use room temperature ingredients for a smoother batter and frosting.
- Measure flour by spooning it into the cup and leveling off to avoid dense cakes.
- Store assembled whoopie pies in an airtight container in the refrigerator for up to 3 days.
- You can freeze unfilled cakes for up to one month and fill them when ready to serve.
How To Store It
Keeping your Red Velvet Whoopie Pies fresh ensures every bite stays as delightful as the first. Whether you want to prep in advance or save leftovers, here’s how to maintain their flavor and texture:
- Refrigerate assembled pies: Transfer fully assembled whoopie pies to an airtight container and chill for up to 3 days to keep frosting firm and cakes moist.
- Freeze unfilled cake rounds: Arrange cooled, unfilled cakes in a single layer in a freezer-safe bag for up to one month; thaw completely before piping fresh filling.
Frequently Asked Questions
Here are answers to some common questions to help you bake with confidence:
- How long does it take to prepare and bake the Red Velvet Whoopie Pies?
A: It takes about 15 minutes to assemble ingredients, 10 minutes to mix the batter, and 10 to 12 minutes to bake each batch. Allow an additional 20 minutes for the cakes to cool completely and another 10 minutes to whip up and pipe the filling, for a total time of roughly 55 minutes.
- Can I substitute the buttermilk if I don’t have any on hand?
A: Yes. For each cup of buttermilk, combine 1 cup of milk with 1 tablespoon of vinegar or lemon juice. Let it sit for 5 minutes until it thickens slightly, then use it in place of the buttermilk in the recipe.
- My whoopie cakes turn out dense—what might be causing this and how can I fix it?
A: Dense cakes often result from packing too much flour into the measuring cup or overmixing the batter. To avoid this, spoon the flour into the cup and level it off with a knife, and mix the dry and wet ingredients only until just combined.
- How do I prevent the whoopie pies from spreading too much or merging on the baking sheet?
A: Use a tablespoon to drop uniform mounds of batter about 2 inches apart on parchment-lined baking sheets. Avoid flattening the batter with the spoon and maintain a chilled baking sheet if your kitchen is warm to help the mounds hold their shape.
- What’s the best way to achieve a smooth, fluffy filling for these whoopie pies?
A: Ensure the butter and cream cheese are at room temperature, then beat them until completely smooth before adding powdered sugar. Add the sugar gradually and beat on medium speed until the filling is light and fluffy, scraping down the bowl as needed.
- How should I store and freeze the whoopie pies to keep them fresh?
A: Store assembled whoopie pies in an airtight container in the refrigerator for up to 3 days. You can freeze the baked, unfilled cakes in a single layer on a baking sheet for up to one month, then thaw and fill just before serving.
- Can I prepare any components of this recipe in advance?
A: Yes. You can bake the whoopie cakes up to two days in advance and store them in an airtight container at room temperature. Prepare the filling on the day you plan to assemble to ensure maximum fluffiness, then pipe it between cake halves just before serving.
What Makes This Special
These Red Velvet Whoopie Pies work because soft, crimson sponge rounds perfectly balance a tangy cream cheese filling with just a hint of cocoa—each bite feels like a mini celebration. The vibrant color, tender crumb, and creamy frosting come together for a dessert that’s as fun to eat as it is to share. Feel free to print this article and tuck it into your collection for later. If you whip up a batch, I’d love to hear how they turned out—drop a comment below with your thoughts or any questions!
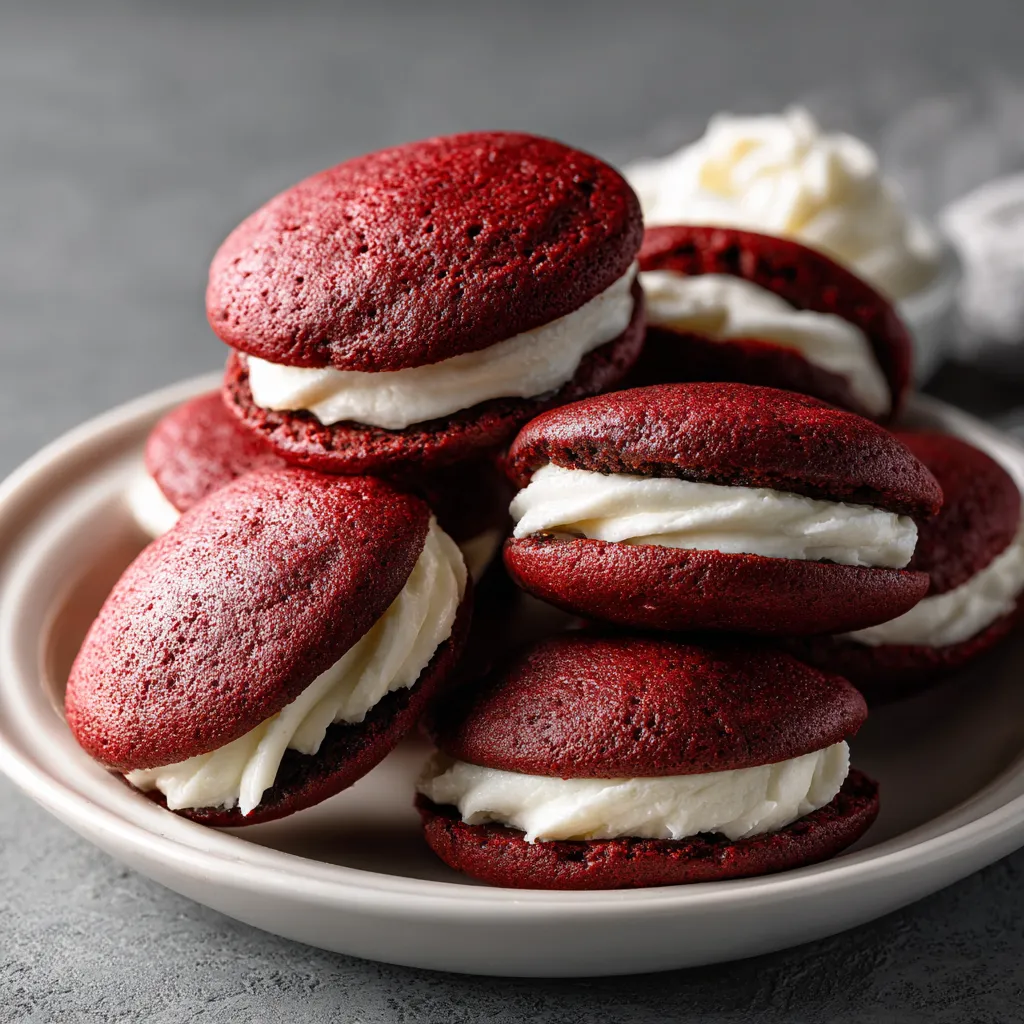

Red Velvet Whoopie Pies
Description
Velvety red sponge cakes bake up tender and moist, then hug a dreamy cream cheese frosting. Each whoopie pie bursts with cocoa notes, smooth frosting, and a hint of tang—perfect for parties or a sweet afternoon pick-me-up.
Ingredients
Instructions
-
Preheat the oven to 350°F and line two baking sheets with parchment paper.
-
In a bowl whisk together the flour, cocoa powder, baking soda, and salt.
-
In a separate bowl beat the sugar and 1/2 cup butter until light and creamy.
-
Add the egg, vanilla extract, and red food coloring to the butter mixture and mix until smooth.
-
Alternately add the dry ingredients and buttermilk to the wet batter, beginning and ending with the dry mixture, mixing until just combined.
-
Stir in the apple cider vinegar until incorporated.
-
Drop tablespoon-sized mounds of batter about 2 inches apart on the prepared baking sheets.
-
Bake for 10 to 12 minutes or until the tops spring back when lightly touched; transfer to a wire rack to cool completely.
-
While the whoopie pies cool, beat the remaining 1/2 cup butter and the cream cheese until smooth.
-
Gradually add the powdered sugar, vanilla extract, and salt, beating until light and fluffy.
-
Spread or pipe the filling onto the flat side of half of the cakes, then top with the remaining cakes to form sandwiches.
Nutrition Facts
Serving Size 12
- Amount Per Serving
- Calories 29kcal
Note
- Use room temperature ingredients for a smoother batter and frosting.
- Measure flour by spooning it into the cup and leveling off to avoid dense cakes.
- Store assembled whoopie pies in an airtight container in the refrigerator for up to 3 days.
- You can freeze unfilled cakes for up to one month and fill them when ready to serve.

