

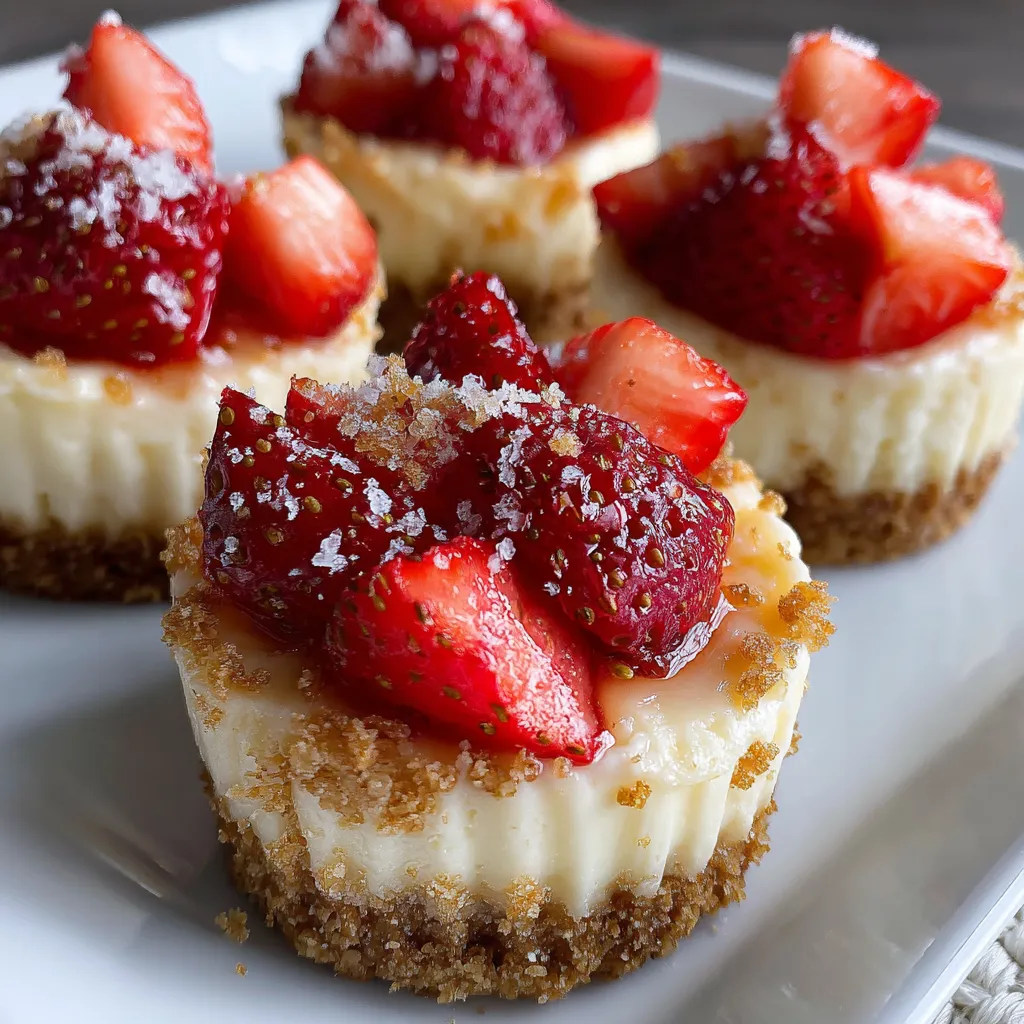
Mini Strawberry Cheesecake Cups combine tiny layers of crunchy graham crust and whipped cream cheese crowned with bright, macerated strawberries in a no-bake, beginner-friendly dessert you’ll want to make again and again. Silky cheesecake filling melts against your tongue, nestled in a buttery graham crust and topped with sweet, lemon-kissed strawberries that shimmer with their own syrupy juice. Grab your muffin tin and let’s dive into these adorable, single-serve treats!
Key Ingredients
To whip up these Mini Strawberry Cheesecake Cups, gather the following simple ingredients. Each plays a crucial role in creating layers of flavor and texture you’ll love.
- 1 1/2 cups graham cracker crumbs: Provides the crunchy, buttery base that holds your cheesecake cups together.
- 2 tablespoons granulated sugar: Sweetens the crust and helps the crumbs bind.
- 4 tablespoons unsalted butter, melted: Binds the graham crumbs for a sturdy crust.
- 8 ounces cream cheese, softened: The creamy foundation of the cheesecake filling.
- 1/3 cup granulated sugar: Sweetens the filling for that perfect balance.
- 1 teaspoon vanilla extract: Adds warm, aromatic flavor to the cheesecake layer.
- 1/4 cup heavy cream: Whips into the filling for a light, fluffy texture.
- 1 cup strawberries, diced: Provides the fresh, fruity topping with natural sweetness.
- 1 tablespoon granulated sugar: Macerates the strawberries, creating a syrupy finish.
- 1 teaspoon lemon juice: Brightens the fruit topping with a zesty note.
How To Make Mini Strawberry Cheesecake Cups
Creating these Mini Strawberry Cheesecake Cups is straightforward and fun. You’ll start by crafting a buttery graham crust in a muffin tin, then whip up a silky cream cheese filling that you’ll pipe or spoon on top. After a brief chill, you’ll macerate juicy strawberries in sugar and lemon juice before adding that glossy, fruity crown. Follow each step carefully for gorgeous, individual desserts that look as impressive as they taste!
1. Line a 12-cup muffin tin with paper liners or silicone cups to prevent sticking and make removal easy.
2. In a medium bowl, combine graham cracker crumbs, 2 tablespoons sugar, and melted butter. Stir until the mixture holds together when pressed, forming the base for each cheesecake cup.
3. Press about 1 tablespoon of the crumb mixture into the bottom of each lined cup, ensuring an even layer for a firm, flavorful crust.
4. Chill the crusts in the refrigerator while you prepare the cream cheese filling; this helps them set and prevents sogginess.
5. In a large bowl, beat cream cheese, 1/3 cup sugar, and vanilla extract using an electric mixer until the mixture is smooth and creamy, with no visible lumps.
6. Slowly pour in heavy cream and continue beating until the filling becomes light, fluffy, and easily holds its shape when scooped.
7. Spoon or pipe the cream cheese filling over each chilled crust, filling almost to the top for a generous cheesecake layer.
8. Return the filled cups to the refrigerator and chill for at least 2 hours, or until set, so the filling firms up perfectly.
9. In a small bowl, toss diced strawberries with 1 tablespoon sugar and lemon juice. Let them macerate for 10 minutes to draw out natural juices and intensify sweetness.
10. Top each cheesecake cup with a spoonful of the macerated strawberries just before serving to keep the crust crisp and the filling firm.
Serving Suggestions
These Mini Strawberry Cheesecake Cups are versatile, so you can dress them up for any occasion. Whether it’s a casual family gathering or a fancy dinner party, these tips will help you serve them like a pro.
- Serve on a decorative platter lined with fresh mint leaves for a pop of color and extra freshness.
- Pair each cup with a hot espresso or iced latte to balance the sweetness and enhance the creamy filling.
- Garnish with a light dusting of powdered sugar right before serving for an elegant, bakery-style finish.
- Offer alongside sparkling lemon water or a light rosé to complement the bright strawberry topping.
Tips For Perfect Mini Strawberry Cheesecake Cups
Nailing these mini cheesecakes is all about a few simple tricks. From ingredient prep to chilling times, these friendly pointers will help you achieve picture-perfect results every time!
- Make sure the cream cheese is fully softened to avoid lumps in the filling.
- You can swap graham cracker crumbs for crushed vanilla wafers or chocolate cookies if you’re feeling adventurous.
- For firmer cups, chill overnight; if short on time, freeze for 30 minutes before adding the topping.
- Store leftover cups in an airtight container in the refrigerator for up to 3 days.
How To Store It
Keeping your Mini Strawberry Cheesecake Cups fresh and delicious is easy when you follow these storage methods. Proper handling ensures that each bite tastes just as good as the first.
- Refrigerate in an airtight container: Place the finished cheesecake cups in a sealed container to maintain freshness for up to 3 days.
- Freeze for quick firming: If you need the cups firmer in a hurry, freeze them for 30 minutes before adding strawberries.
- Bulk freeze for longer storage: Store untopped cups in the freezer for up to one week. Thaw overnight in the fridge before adding the fruit.
- Separate fruit topping: Keep macerated strawberries in a separate, sealed container and add just before serving to prevent soggy crusts.
Frequently Asked Questions
Here are some quick answers to common questions about Mini Strawberry Cheesecake Cups:
- How long does it take to prepare and fully set these Mini Strawberry Cheesecake Cups?
Prep time is about 20 minutes to make the crust and filling, plus 10 minutes to macerate the strawberries. You’ll need to chill the cups for at least 2 hours to set, bringing the total to roughly 2 hours and 30 minutes. If you’re short on time, you can freeze the filled cups for 30 minutes before topping, or chill overnight for a firmer texture.
- What can I do if my cream cheese filling is lumpy?
To avoid lumps, make sure the cream cheese is completely softened at room temperature for 30–60 minutes before beating. Use an electric mixer and scrape down the bowl frequently. Beat cream cheese, sugar, and vanilla until very smooth before adding heavy cream gradually. Overbeating can cause a grainy texture, so stop once the mixture is light and fluffy.
- Can I substitute the graham cracker crust with something else?
Yes. You can swap graham cracker crumbs for crushed vanilla wafers, chocolate sandwich cookies, or gluten-free crackers in a 1:1 ratio by volume. Mix with 2 tablespoons of sugar and 4 tablespoons melted butter, then press into cups as directed. Chilling helps all crumbs bind together properly.
- How do I prevent my strawberry topping from making the cheesecake cups soggy?
Macerate the diced strawberries with sugar and lemon juice for only 10 minutes to draw out juices without creating too much liquid. Spoon off any excess syrup or pat the strawberries lightly with a paper towel before topping. Add strawberries just before serving to keep the crust crisp and the filling firm.
- What’s the best way to store leftover cheesecake cups, and how long will they last?
Store the cups in an airtight container in the refrigerator for up to 3 days. If you prefer a quicker set or want to maintain maximum freshness, freeze them for 30 minutes before adding the fruit topping and then refrigerate. Avoid leaving them at room temperature for more than 2 hours to prevent spoilage.
- Can I make these cheesecake cups ahead of time for a party?
Absolutely. Prepare the crusts and filling up to one day in advance. After filling and chilling, keep the cups covered in the fridge. Macerate and add the strawberries just before guests arrive to preserve texture. If you need more lead time, freeze the filled cups (without topping) for up to one week, defrost overnight in the fridge, then top and serve.
- How can I double or halve the recipe accurately?
To double, simply use twice the amounts of each ingredient and fill two muffin tins. For half the recipe, halve every measurement and fill six cups. Keep ingredient ratios identical, and maintain the same chilling and maceration times. Equipment size can remain the same; you’ll just end up with more or fewer cups.
What Makes This Special
These Mini Strawberry Cheesecake Cups work because they marry a buttery graham crust with a fluffy, dreamy cheesecake layer and sparkling macerated strawberries—tiny delights that taste as good as they look. The no-bake process means you can whip them up in a flash, and the individual cups make portion control a breeze. Go ahead and print this page to save for later, then come back to share your feedback or ask questions about your cheesecake adventures!

Mini Strawberry Cheesecake Cups
Description
Silky cheesecake filling melts against your tongue, nestled in a buttery graham crust and topped with sweet, lemon-kissed strawberries that shimmer with their own syrupy juice.
Ingredients
Instructions
-
Line a 12-cup muffin tin with paper liners or silicone cups.
-
In a medium bowl combine graham cracker crumbs, 2 tablespoons sugar, and melted butter until the mixture holds together when pressed.
-
Press about 1 tablespoon of the crumb mixture into the bottom of each cup to form the crust.
-
Chill the crusts in the refrigerator while preparing the filling.
-
In a large bowl beat cream cheese, 1/3 cup sugar, and vanilla extract until smooth and creamy.
-
Slowly pour in heavy cream and continue beating until the mixture becomes light and fluffy.
-
Spoon or pipe the cream cheese filling over each chilled crust, filling almost to the top.
-
Return the filled cups to the refrigerator and chill for at least 2 hours or until set.
-
In a small bowl toss diced strawberries with 1 tablespoon sugar and lemon juice; let macerate for 10 minutes.
-
Top each cheesecake cup with a spoonful of the macerated strawberries just before serving.
Nutrition Facts
Serving Size 12
- Amount Per Serving
- Calories 14kcal
Note
- Make sure the cream cheese is fully softened to avoid lumps in the filling.
- You can swap graham cracker crumbs for crushed vanilla wafers or chocolate cookies.
- For firmer cups, chill overnight; if short on time, freeze for 30 minutes before adding the topping.
- Store leftover cups in an airtight container in the refrigerator for up to 3 days.

