

Bright Pink Pickled Ginger brings vibrant-hued ginger pickled in tangy rice vinegar and rose-red shiso for crunchy, zingy slices that brighten sushi and salads. Thin slices of young ginger soak in a sweet-and-sour pink brine, releasing a crisp bite and floral aroma as the shiso dye infuses every piece with rosy hue and tangy depth. This easy beginner-friendly recipe will elevate your dinner table with a pop of color and flavor—give it a try!
Key Ingredients
Gather these fresh, everyday ingredients to create your Bright Pink Pickled Ginger. Each component plays a key role in building that perfect sweet, sour, and blush-pink pickle.
- 2 pounds young ginger: Aromatic, tender slices that provide the crisp, slightly spicy base for pickling.
- 1 tablespoon salt: Draws out excess moisture to concentrate ginger flavor and ensure a firm texture.
- 1 cup rice vinegar: Creates the tangy backbone of the brine that preserves and flavors the ginger.
- 1/2 cup sugar: Balances acidity with a hint of sweetness, rounding out the brine’s flavor.
- 1 cup red shiso leaves: Infuses a rose-red pigment and subtle herbal note, giving the ginger its signature bright pink hue.
How To Make Bright Pink Pickled Ginger
Now that you have all your ingredients prepped, let’s dive into the simple, step-by-step process to transform fresh ginger into your own Bright Pink Pickled Ginger. You’ll master techniques like slicing ultra-thin, salting to draw out moisture, and simmering a flavorful rice vinegar brine with red shiso to create that vibrant color and tangy depth. Follow these detailed steps for guaranteed crunchy, rosy slices that will liven up any meal.
1. Peel the ginger using a spoon or vegetable peeler to remove skin without losing too much flesh, then slice as thinly as possible (about 1 mm) using a sharp knife or mandoline for uniform, paper-thin pieces.
2. Place the ginger slices in a large bowl and toss them thoroughly with the salt. Let the salted ginger rest for 30 minutes; this draws out excess moisture and intensifies the ginger’s natural flavor.
3. Rinse the ginger under cold running water to remove excess salt, then drain in a colander. Pat the slices dry with clean paper towels to ensure the brine adheres properly.
4. In a small saucepan, combine the rice vinegar and sugar. Heat over medium-low, stirring occasionally until the sugar fully dissolves and the mixture reaches a gentle simmer.
5. Add the red shiso leaves to the simmering brine and cook for 2 minutes, stirring lightly. This step releases the deep pink pigment and infuses the brine with subtle herbal notes.
6. Remove the saucepan from the heat. Transfer the drained ginger slices and shiso leaves into a clean, sterilized glass jar (optional but recommended for longer shelf life).
7. Carefully pour the hot brine over the ginger and shiso in the jar, making sure every slice is fully submerged to guarantee even coloring and pickling.
8. Allow the jar to cool on the counter to room temperature, then seal with a lid and refrigerate for at least 24 hours. This resting time lets the flavors meld and the color deepen.
Serving Suggestions
Bright Pink Pickled Ginger isn’t just for sushi! Its crisp texture and tangy-sweet profile can elevate all sorts of dishes. Whether you’re pairing it with Japanese classics or experimenting with fusion plates, these serving suggestions will help you make the most of that signature blush hue and zingy bite. Here are a few of my favorite ways to showcase your homemade pink pickles.
- Sushi Sidekick: Place a small mound alongside your favorite sushi rolls or sashimi to cleanse the palate between each bite and add a crunchy, vinegary pop.
- Salad Accent: Scatter slices over green or noodle salads for an unexpected zingy crunch and splash of color that ties together fresh herbs and vegetables.
- Rice Bowl Topping: Layer over donburi or grain bowls with avocado, pickled veggies, and a drizzle of spicy mayo for a balanced medley of textures and flavors.
- Cocktail Garnish: Thread a few ginger slices onto cocktail picks and rest on the rim of a gin or vodka drink to add a floral note and striking pink finish.
Tips For Perfect Bright Pink Pickled Ginger
Getting perfectly vibrant and crunchy pickled ginger is all about small details and timing. Pay attention to your ginger’s age, salt-maceration time, and the temperature of the brine to ensure those blush-pink slices come out tender and flavorful. These friendly tips will help you nail every batch—whether you’re an absolute beginner or a pickling enthusiast looking to refine your skills. Let’s dial in that color and texture for unforgettable ginger garnishes!
- Use young, tender ginger for the best texture and flavor.
- The pink color will deepen as the ginger sits in the brine.
- Red shiso leaves can be substituted with a few thin beet slices for color.
- Store in the refrigerator and consume within four weeks.
How To Store It
Proper storage is key to maintaining the crisp texture and bright color of your pickled ginger. Keep it chilled, submerged, and sealed to preserve that fresh, tangy-sweet bite for weeks. Whether you’re bulking up for parties or just making a small batch for nightly rice bowls, follow these simple storage methods to extend the life and flavor of your vibrant pickles.
- Refrigerate in a sealed glass jar to prevent air exposure and slow down oxidation.
- Ensure the ginger is fully submerged in brine; top up with a little extra vinegar if needed.
- Store in the coldest part of your refrigerator (not the door) to keep a consistent chill.
- Label the jar with the pickling date and consume within four weeks for optimal taste and color.
Frequently Asked Questions
Have questions about pickling your ginger? Here are answers to the most common curiosities.
- Q: How thin should I slice the ginger for Bright Pink Pickled Ginger?
A: You should slice the ginger as thinly as possible—ideally around 1 mm thick—using a sharp knife or a mandoline. Thin slices absorb the brine quickly and result in the characteristic tender, slightly crisp bite.
- Q: Why do I need to toss the ginger with salt and let it sit for 30 minutes?
A: Tossing with salt draws out excess moisture from the ginger, concentrating its flavor and ensuring a firmer texture. The 30-minute rest also helps the ginger absorb the pickling brine more evenly once combined.
- Q: Can I use mature ginger instead of young ginger, and how will it affect the recipe?
A: Young ginger has a milder, more tender profile, producing the classic texture of pickled ginger. Mature ginger can be used, but it will be fibrous, spicier, and tougher. If you must use mature ginger, slice it extra thin and increase the simmer time in the brine by a minute or two.
- Q: What can I substitute for red shiso leaves if they’re unavailable?
A: You can substitute a few thin beet slices for color. Beets will yield a rosy hue but add an earthy flavor. Alternatively, a small pinch of powdered beet juice or pink food-grade coloring can help deepen the pink tone without altering taste significantly.
- Q: How long should I wait before serving the pickled ginger, and how long does it keep?
A: Seal and refrigerate the ginger for at least 24 hours before serving to allow full flavor development and coloring. Stored in a sealed jar in the fridge, it will maintain peak quality for up to four weeks.
- Q: Do I need to sterilize the glass jar before adding the ginger and brine?
A: While not strictly required, sterilizing the jar by washing it in hot, soapy water and rinsing with boiling water helps prevent spoilage and ensures your pickled ginger stays fresh longer.
- Q: Can I adjust the sweetness or acidity of the brine?
A: Yes. For a tarter brine, reduce the sugar by 1–2 tablespoons or increase vinegar by 2–3 tablespoons. For a sweeter profile, add up to an extra 2 tablespoons of sugar. Always taste the warmed brine before pouring it over the ginger to balance sweetness and acidity to your preference.
What Makes This Special
Bright Pink Pickled Ginger works its magic by marrying crisp, ultra-thin young ginger with a sweet-tangy rice vinegar brine that’s colored naturally by red shiso leaves. It’s beginner-friendly yet sophisticated enough to impress dinner guests or jazz up everyday meals. Once you taste that crunchy, floral-tinged zing, you’ll want to print this article and save it for later—trust me, you’ll come back to it again and again. Leave a comment below if you whip up a batch, have questions, or just want to share your colorful creations!
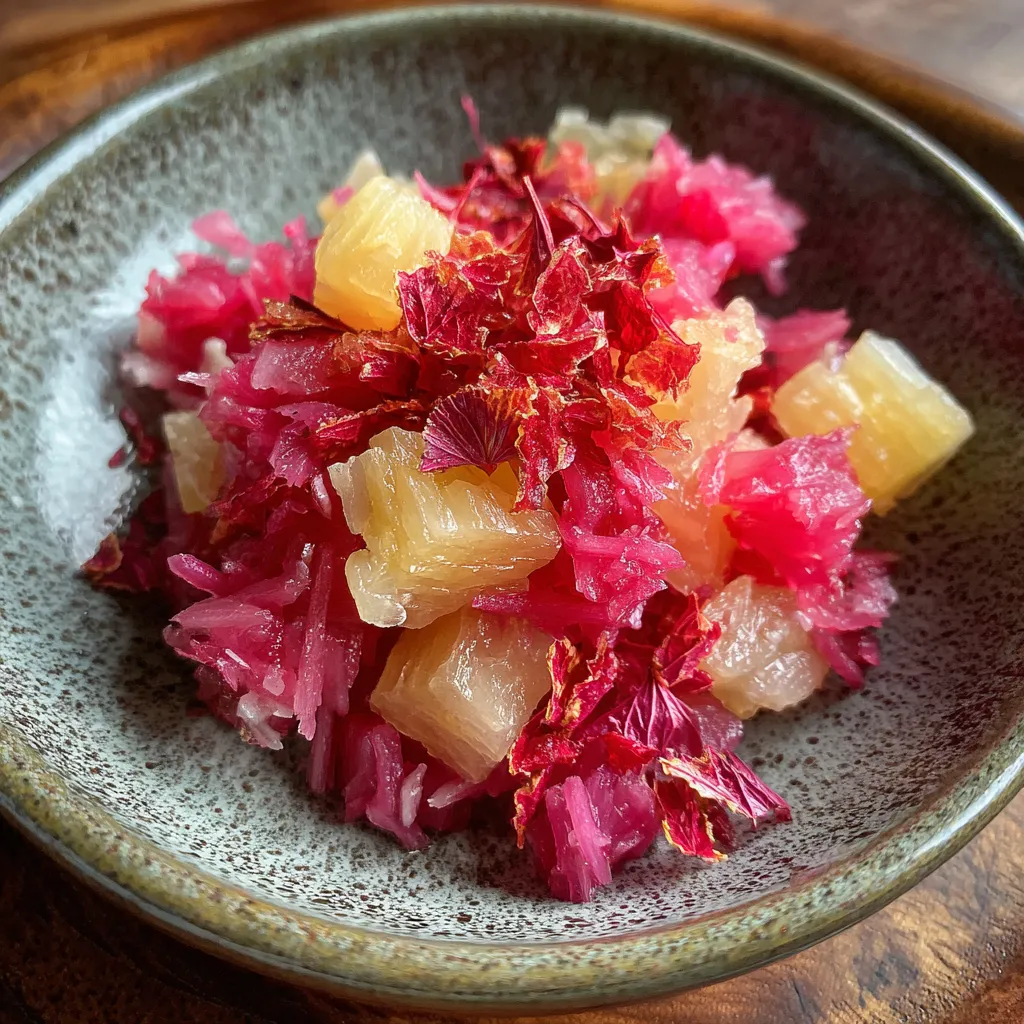

Bright Pink Pickled Ginger
Description
Thin slices of young ginger soak in a sweet-and-sour pink brine, releasing a crisp bite and floral aroma as the shiso dye infuses every piece with rosy hue and tangy depth.
Ingredients
Instructions
-
Peel the ginger using a spoon or peeler and slice it as thinly as possible with a knife or mandoline.
-
Place the ginger slices in a bowl and toss with the salt. Let sit for 30 minutes to draw out moisture.
-
Rinse the ginger under cold water and drain well, patting dry with paper towels.
-
In a small saucepan combine the rice vinegar and sugar and bring to a gentle simmer, stirring until the sugar dissolves.
-
Add the red shiso leaves to the simmering brine and cook for 2 minutes to release the pink pigment.
-
Remove the saucepan from heat. Transfer the drained ginger and shiso leaves to a clean glass jar.
-
Pour the hot brine over the ginger and shiso, ensuring all pieces are submerged.
-
Allow the jar to cool to room temperature, then seal with a lid and refrigerate for at least 24 hours before serving.
Nutrition Facts
Serving Size 8
- Amount Per Serving
- Calories 18kcal
Note
- Use young, tender ginger for the best texture and flavor.
- The pink color will deepen as the ginger sits in the brine.
- Red shiso leaves can be substituted with a few thin beet slices for color.
- Store in the refrigerator and consume within four weeks.

