Nutrition Facts
Serving Size 16
- Amount Per Serving
- Calories 13kcal

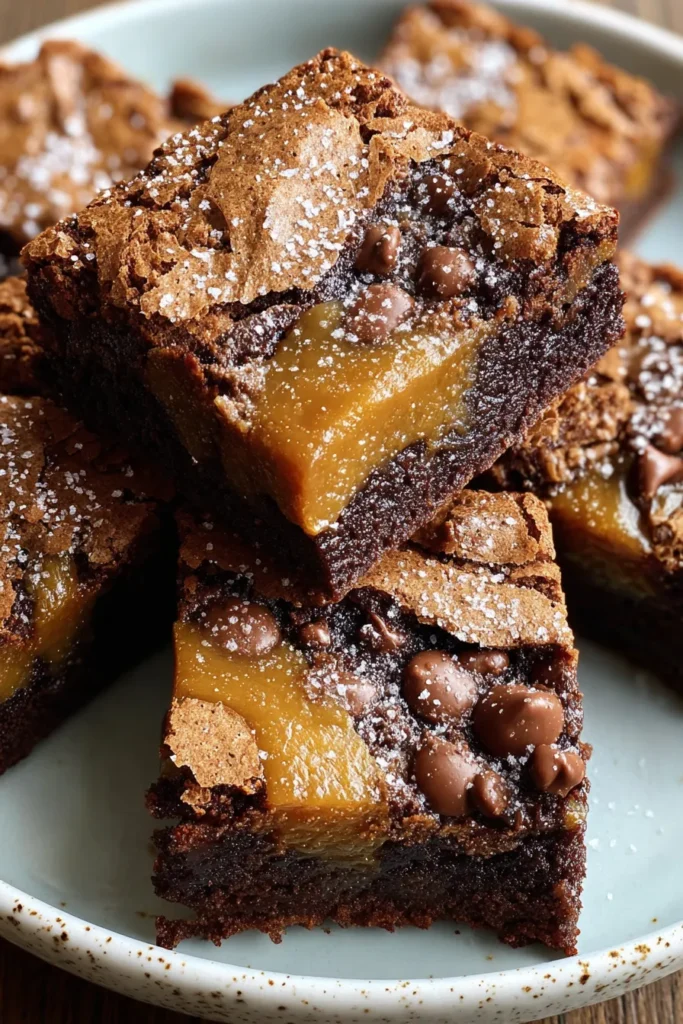
If you’ve ever found yourself debating between a chewy chocolate chip cookie and a fudgy brownie, you’re in for a treat. Brown Butter Brookies bring the best of both worlds into a single pan, giving your taste buds a joyous roller coaster ride. The magic starts when we brown unsalted butter, coaxing out that deep, nutty essence that elevates a simple dough into something luxuriously complex. Then, we fold in layers of cookie dough and silky brownie batter, creating contrasting textures that play off each other beautifully. Every bite offers a bit of crisp edge, a tender crumb, and a molten core all at once—like a miniature celebration in your mouth.
I remember the first time I made these at home: I was craving something special for a small weekend gathering, and the idea of merging two favorite treats felt like the perfect solution. As the pan baked, rich notes of caramelized butter and chocolate filled the kitchen, and guests hovered around the oven for just a peek. When I finally served those warm brookies, everyone’s eyes lit up, forks dove in, and not a single crumb was left behind. Whether you’re baking for a crowd or treating yourself, these brookies strike a delightful balance of sweetness, texture, and comfort that you’ll want to recreate again and again. With just 15 minutes of prep, 30 minutes in the oven, and a brief cooling period, you’ll have an impressive dessert that feels gourmet without requiring hours in the kitchen.
Before diving into the mixing bowls, it helps to know why each ingredient is so important. From the star of the show—browned butter—to the classic brownie mix that keeps things simple, every component has a role in crafting that signature flavor and texture combination. Let’s explore what makes these brookies so irresistible.
Now that we’ve gathered all our ingredients, it’s time to layer those rich flavors and textures to perfection. This recipe walks you through each step, from browning the butter for that signature nuttiness to building the cookie and brownie layers for maximum indulgence.
1. In a small saucepan over medium heat, melt the unsalted butter, stirring often to prevent burning. Continue to cook until you see flecks of brown and catch that nutty scent—this is your brown butter. Remove from heat and let it cool to room temperature.
2. Preheat your oven to 350°F (175°C). Generously spray an 8x8-inch baking pan with cooking spray and set it aside.
3. In a large mixing bowl, combine the cooled brown butter with both granulated and brown sugars. Mix until the mixture is smooth, creamy, and darker in color.
4. Beat in the egg and vanilla extract until the batter is silky and homogenous.
5. In a separate bowl, whisk together the all-purpose flour, baking soda, and salt. Gradually add this dry mix to the butter-sugar mixture, taking care not to overmix—stir just until you no longer see streaks of flour.
6. Gently fold in the chocolate chips so you get pockets of melted chocolate throughout your cookie dough.
7. Prepare the brownie mix according to the package instructions in its own bowl, giving it a smooth consistency.
8. Layer half of the cookie dough evenly in the bottom of your prepared pan, pressing it gently to form a flat base.
9. Pour the brownie batter over the cookie layer, spreading it out so it covers every corner.
10. Drop spoonfuls of the remaining cookie dough over the top of the brownie batter, then lightly spread them out so you get a marbled, patchwork effect.
11. Bake for 25–30 minutes, or until a toothpick inserted in the center comes out with a few moist crumbs but no raw batter.
12. Allow the brookies to cool completely in the pan on a wire rack. Once cooled, slice into squares and serve.
When these brookies come out of the oven, they’re begging to be enjoyed immediately—or saved for later, if you can resist! Their gooey centers and tender cookie edges make them versatile for any occasion, whether it’s a casual afternoon snack, an elegant dessert spread, or a sweet surprise in a packed lunch. Here are a few ways to elevate your presentation and delight your guests (or yourself!).
After the initial rush to devour fresh-baked brookies, you might wonder how to keep them tasting as incredible as the day they came out of the oven. Proper storage ensures that those chewy edges stay tender and the gooey centers remain luscious. Here’s the lowdown on preserving your brookies so you can enjoy them over the next few days—or even weeks.
We’ve journeyed through the irresistible combination of cookie and brownie in our Brown Butter Brookies recipe, exploring every stage from that magical brown butter to the final, sunken pockets of molten chocolate. Along the way, we covered key ingredients, step-by-step baking instructions, inspiring serving ideas, and foolproof storage tips to keep your brookies tasting like they just came out of the oven. Whether you’re an experienced baker or someone who’s just learning to wield a whisk, this recipe strikes the perfect balance between comfort and creativity. Keep this article handy—you can print it or save it for future baking sessions, and refer to it whenever you need that extra bit of sweet inspiration. You’ll also find a FAQ section below to answer any lingering questions without flipping through endless pages.
If you give these brookies a try, I’d love to hear how they turned out! Did your oven reward you with gooey centers and crackly edges? Have you experimented with different chocolate chip varieties or added a sprinkle of sea salt on top? Drop your comments, questions, or feedback below so we can all share tips and celebrate the wonderful world of baking together. Happy baking, and here’s to many delicious moments ahead with these chewy, decadent Brown Butter Brookies!
Rich brown butter lends a nutty flavor to these soft brookies, blending the classic cookie crunch and gooey brownie bliss. Perfect for any occasion!
Serving Size 16

Hey there! I’m Noah Blake, and welcome to RecipesDive.com — a blog for anyone who’s ready to dive headfirst into real cooking without the intimidation.