Nutrition Facts
Serving Size 8
- Amount Per Serving
- Calories 38kcal

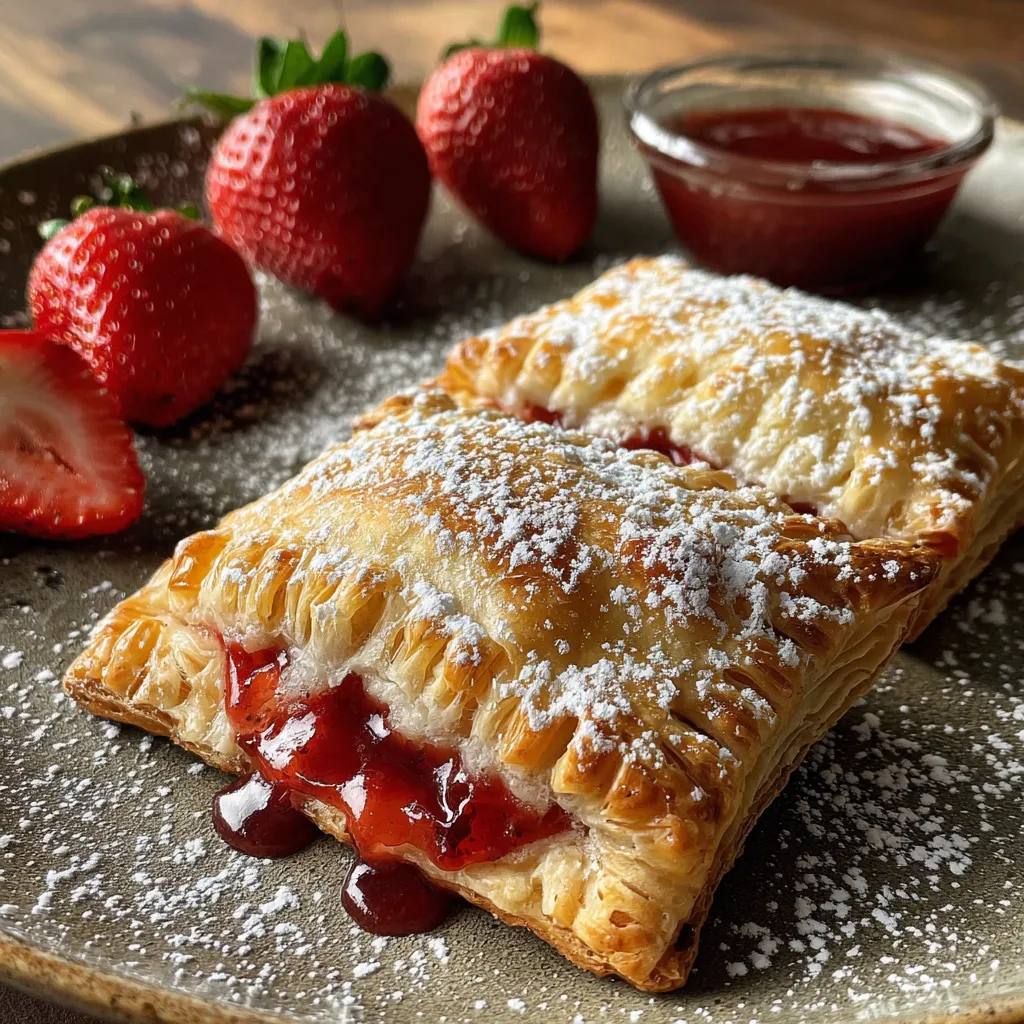
These Buttery Flaky Homemade Strawberry Pop-Tarts bring crisp golden layers hiding a sweet strawberry jam core, all brushed with glossy vanilla icing. Light, buttery layers shatter with each bite, revealing a ribbon of tart jam beneath a silky glaze that sets into a tender, melt-in-your-mouth crust. Perfect for an intermediate home cook looking to elevate breakfast pastries, these pop-tarts blend nostalgia and homemade goodness in every flaky fold. Grab your ingredients, preheat your oven, and get ready to transform your kitchen into a pastry paradise!
To create these irresistible pop-tarts, you’ll need simple pantry staples and a pat of cold butter to achieve that signature flakiness:
These pop-tarts come together with a few simple techniques—whisking, cutting in butter, chilling, and rolling—so you can enjoy perfectly flaky layers and a jam-stuffed center. Follow each step carefully to keep your ingredients cold and your dough tender, then finish with a shiny vanilla glaze that sets beautifully.
1. In a large bowl, whisk together the all-purpose flour, granulated sugar, and salt until evenly combined.
2. Add the cold, cubed unsalted butter. Use a pastry cutter or two knives to cut the butter into the flour until only pea-sized pieces remain.
3. Pour in the cold heavy cream and stir gently with a spatula until the dough just comes together, being careful not to overmix.
4. Shape the dough into a flat rectangle, wrap tightly in plastic wrap, and refrigerate for at least one hour to firm up.
5. On a lightly floured surface, roll the chilled dough into a 12×9-inch rectangle about 1/8 inch thick, keeping edges square.
6. Cut the dough into sixteen 3×2-inch rectangles, dividing evenly into eight tops and eight bottoms.
7. Place the eight bottom pieces on a parchment-lined baking sheet. Spoon about one tablespoon of strawberry jam onto the center of each, leaving a small border around the edges.
8. Lightly brush the border of each jam-filled piece with water or a beaten egg to help seal.
9. Top with the remaining eight dough rectangles. Gently press around the edges and crimp with a fork to seal completely.
10. Beat the egg and brush it over the tops of each pop-tart. Use a fork or toothpick to prick a few vent holes on top.
11. Preheat the oven to 375°F. Bake pop-tarts for about 20 minutes, or until the tops are golden brown.
12. Remove from the oven and let cool on the baking sheet for 10 minutes before transferring to a wire rack.
13. In a small bowl, whisk together powdered sugar, whole milk, and vanilla extract until smooth.
14. Drizzle the icing over the cooled pop-tarts and allow it to set before serving.
These homemade strawberry pop-tarts are perfect on their own, but here are fun ideas to take your breakfast or snack game up a notch:
Getting these Pop-Tarts just right is all about keeping things cold and handling the dough gently. Here are my go-to tricks for buttery, flaky layers every time.
To keep your pop-tarts fresh and flaky, proper storage is key. Follow these methods to maintain that tender crust and sweet filling:
Here are some quick answers to common queries when making homemade pop-tarts:
A: Active prep time is about 30 minutes for mixing, rolling, and assembling. The dough then chills for at least one hour, followed by a 20-minute bake and 10 minutes of cooling on the sheet before icing. Plan for approximately two hours total, including chilling and cooling time.
A: Keep your butter and heavy cream refrigerated until you’re ready to use them. Cut the butter into pea-sized pieces and handle the dough as little as possible. Work on a cool surface, roll the dough quickly, and immediately return it to the fridge before baking. Chilling the shaped dough for at least an hour helps maintain those distinct flaky layers.
A: Yes. After cutting and shaping the dough into a rectangle, wrap it tightly in plastic and refrigerate for up to 24 hours. When you’re ready, roll it out, assemble the Pop-Tarts, and bake as directed. If you need longer storage, freeze the wrapped dough for up to one month and thaw overnight in the fridge before rolling.
A: You can swap in any fruit preserves—raspberry, apricot, or blueberry work well—or use Nutella for a chocolate-hazelnut twist. For thicker fillings like Nutella, you might need a slightly thinner layer so the pastry still seals properly; add a pinch of cornstarch to loose jams to prevent seepage.
A: Pricking three to five small holes on the top layer allows steam to escape during baking. This prevents the pastry from puffing unevenly or bursting at the seams, helping to keep a flat, classic Pop-Tart appearance.
A: Let the dough sit at room temperature for 5 to 10 minutes to soften slightly, then gently press the cracks together with your fingers. Lightly dust your work surface and rolling pin with flour and roll with even pressure, starting from the center outward. Keep the dough chilled again before cutting and filling.
A: For a thinner glaze, add an extra teaspoon of milk at a time until you reach the desired drizzling consistency. If the icing is too runny to hold shape, sift in additional powdered sugar one tablespoon at a time until it thickens but is still spreadable.
A: Store cooled Pop-Tarts in an airtight container at room temperature for up to two days. To keep them longer, freeze individually wrapped for up to one month. Reheat in a 350°F oven for about 5–7 minutes or pop in a toaster on low until warmed through, then enjoy.
These pop-tarts stand out because of crisp, golden pastry layers that shatter delightfully, giving way to bright strawberry jam and a silky vanilla glaze that sets just right. The secret is in keeping everything cold and folding the dough gently, ensuring a tender, buttery crust in every bite. Save or print this article for easy reference, and don’t be shy—drop a comment or question if you give these homemade beauties a try. I can’t wait to hear about your flaky, fruity creations!
Light, buttery layers shatter with each bite, revealing a ribbon of tart strawberry jam beneath silky vanilla glaze that sets into a tender, melt-in-your-mouth crust.
Serving Size 8

Hey there! I’m Noah Blake, and welcome to RecipesDive.com — a blog for anyone who’s ready to dive headfirst into real cooking without the intimidation.