Nutrition Facts
Serving Size 10
- Amount Per Serving
- Calories 30kcal

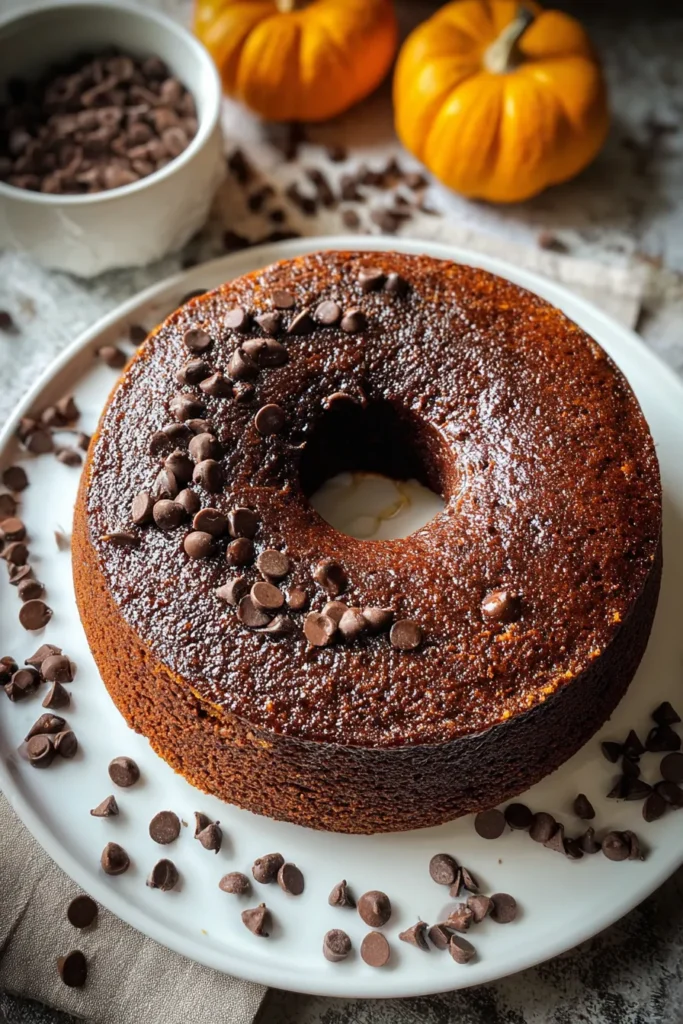
There’s something undeniably comforting about sinking your teeth into a slice of cake that marries the deep, bittersweet notes of chocolate with the mellow warmth of pumpkin spices. This Chocolate Pumpkin Cake is exactly that—a tender, moist loaf that feels like a cozy hug on a chilly afternoon. From the moment you scoop rich cocoa powder into the mixing bowl to the final swirl of batter in a greased pan, you’re on a flavor journey that’s equal parts indulgent and homey. It’s the kind of dessert that brings people together, whether you’re hosting a fall baking party or simply craving a decadent treat after a long day.
When I first whipped up this loaf, I couldn’t help but marvel at how the earthy sweetness of pumpkin puree transformed an ordinary chocolate cake into something extraordinary. You’ll catch hints of cinnamon and nutmeg dancing around in every bite, making it perfect for those pumpkin dessert cravings. Best of all, this recipe is a total beginner-friendly marvel: you can go from prep to oven in just 15 minutes, then let it bake for 50 to 60 minutes before enjoying a cooling rest of 10 minutes. It’s a dessert course winner that clocks in at about 250 calories per slice (assuming 12 servings) and smiles big on the “easy recipe” meter, ticking off both “fall baking” and “moist cake” on your list of must-try dessert ideas.
Before diving into the mixing bowls, let’s talk about the hero ingredients that make this loaf so irresistible. Each component plays an important role, from giving structure to infusing that signature pumpkin-spice charm and, of course, delivering waves of rich chocolate flavor.
This pantry staple provides the structure and stability your cake needs, ensuring a tender crumb without being too dense or heavy.
Sweetens the batter evenly, helping to balance the deep cocoa flavor and the subtle earthiness of pumpkin.
Brings the intense chocolate taste and a touch of richness that pairs beautifully with warm spices.
Acts as a leavening agent to help the cake rise, giving it that light, springy texture.
Works with acidic ingredients to create air bubbles, contributing to the cake’s moist, airy interior.
Enhances all the flavors, cutting through sweetness and bringing out the cocoa’s depth.
Infuses the batter with a classic fall spice note that complements both chocolate and pumpkin.
Adds a warm, nutty aroma that rounds out the spice profile in subtle yet impactful ways.
Delivers that signature pumpkin flavor and contributes moisture, keeping each slice soft and tender.
Provides acidity and moisture, helping to tenderize the crumb and add a slight tang.
Locks in moisture to keep the cake rich and soft, even days after baking.
Bind all the ingredients together, adding structure and richness that enhance the overall texture.
Rounds out the flavors with a sweet, floral note that lifts both the cocoa and pumpkin spices.
Melt into pockets of gooey chocolate throughout the loaf, delivering melty bites of chocolate heaven.
Now that you’ve gathered your ingredients, let’s walk through the steps to whip up this delightful loaf. From preheating your oven to the final cool-down on a wire rack, every detail counts toward achieving that perfect balance of chocolate and pumpkin.
1. Preheat your oven to 350°F (175°C) and prepare a 9x5-inch loaf pan by greasing it lightly and dusting with flour to prevent sticking. Ensuring your oven is fully heated before baking is key to an even rise.
2. In a large bowl, whisk together the all-purpose flour, granulated sugar, unsweetened cocoa powder, baking powder, baking soda, salt, ground cinnamon, and ground nutmeg until the mixture is uniform in color. This helps distribute the leavening agents and spices evenly.
3. In another bowl, mix the canned pumpkin puree, buttermilk, vegetable oil, eggs, and vanilla extract until completely smooth. The goal is a silky wet mixture that will blend effortlessly with the dry ingredients.
4. Gradually add the wet ingredients to the dry ingredients, stirring with a spatula until just combined. Be careful not to overmix, as this can lead to a tougher crumb. A few streaks of flour are okay.
5. Fold in the semisweet chocolate chips, distributing them evenly through the batter without deflating the air you’ve incorporated.
6. Pour the batter into the prepared loaf pan, then use a spatula to smooth the top for an even bake.
7. Bake for 50 to 60 minutes, or until a toothpick inserted into the center comes out clean or with just a few moist crumbs attached.
8. Allow the cake to cool in the pan for about 10 minutes so it firms up slightly.
9. Transfer the loaf to a wire rack to cool completely before slicing, ensuring clean cuts and the perfect texture in every slice.
When it comes to serving this cake, you have so many delicious options that can elevate every gathering or cozy night in. Whether you’re hosting a fall-themed brunch or looking for a sweet after-dinner treat, these suggestions will help you plate each slice with style and taste.
Gently reheat individual slices in the microwave for 10 seconds, then sprinkle lightly with powdered sugar to highlight the loaf’s ridges and bring out its sweet, spiced aroma.
Lightly sweeten freshly whipped cream with a hint of vanilla, then pipe a swirl on top of each slice. The airy creaminess pairs perfectly with the cake’s moist crumb.
Scoop a generous portion of vanilla bean ice cream on the side. The cold, creamy texture contrasts beautifully with the warm, tender cake—pure dessert bliss.
Warm a thick caramel sauce and add a pinch of flaky sea salt. Drizzle over slices to introduce a buttery sweetness that cuts through the chocolate’s richness.
Keeping your cake fresh and flavorful means paying attention to how you store it once the last crumb has been sliced. This loaf holds up beautifully, whether you’re planning to enjoy it over a couple of days or freeze it for later indulgence.
Place cooled slices in an airtight container lined with parchment paper and store on the countertop. It will stay tender for up to three days.
If you prefer a slightly firmer texture or need increased shelf life, store slices in a sealed container in the fridge for up to five days. Allow them to come to room temperature before serving.
Wrap individual slices tightly in plastic wrap, then place them in a zip-top freezer bag. Freeze for up to two months. Thaw overnight in the refrigerator or at room temperature for a quick treat.
Bake the loaf, cool completely, then wrap the entire cake in plastic wrap followed by aluminum foil. Freeze the whole thing, then thaw and slice when you’re ready for a crowd-pleasing dessert.
This Chocolate Pumpkin Cake truly brings together the best of both worlds: the velvety richness of chocolate cake and the cozy, autumnal charm of pumpkin dessert. Whether you’re a beginner baker or a seasoned pro looking for a new twist on fall baking, this easy recipe delivers a moist cake that’s perfect for dessert ideas any time of year. From the simplicity of whisking dry ingredients and mixing wet ones to the delightful pockets of semisweet chocolate chips, each slice is a testament to how wonderful simple ingredients can taste when they’re combined with a little enthusiasm and care. Be sure to print this article or save it to your favorite recipe collection for an easy printing experience, and keep it handy for those spontaneous gatherings or afternoon pick-me-ups. You can find a FAQ below to answer any lingering questions you might have once you start mixing and baking.
If you give this loaf a try, I’d love to hear how it turns out in your kitchen! Leave a comment with your thoughts, or let me know if you have any questions about making or storing your Chocolate Pumpkin Cake. Your feedback not only helps me but also inspires other home cooks to enjoy the rich blend of chocolate and pumpkin in a delightful, moist cake. Happy baking!
This Chocolate Pumpkin Cake combines rich chocolate flavor with the warmth of pumpkin spices, creating a moist, delightful treat. Perfect for cozy gatherings or a sweet pick-me-up.
Serving Size 10

Hey there! I’m Noah Blake, and welcome to RecipesDive.com — a blog for anyone who’s ready to dive headfirst into real cooking without the intimidation.