Nutrition Facts
Serving Size 36
- Amount Per Serving
- Calories 3kcal

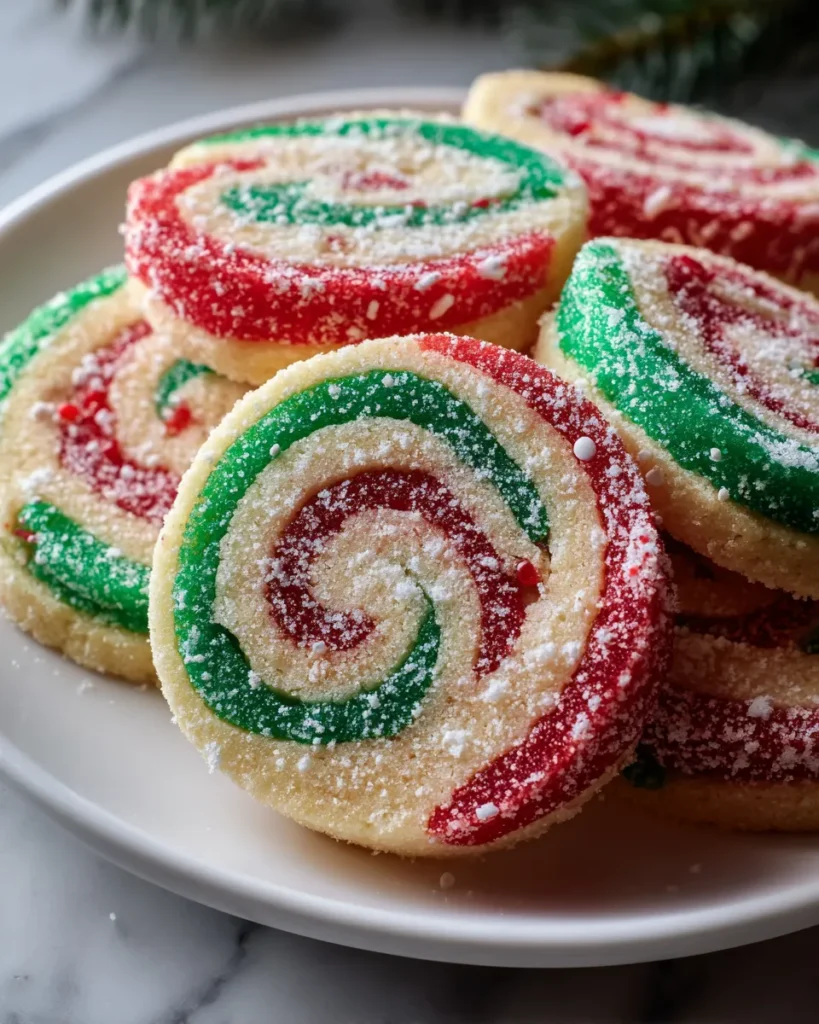
There is something undeniably magical about slicing into a chilled log of dough to reveal a perfect, colorful spiral. These Christmas Pinwheel Cookies are the ultimate festive treat, bringing together crisp edges and soft, buttery vanilla-almond centers in a way that just screams holiday cheer. Whether you are building a cookie box for neighbors or just want something bright on your dessert table, these swirled beauties are easier to make than they look. I can't wait for you to experience the fun of rolling these up and seeing that mesmerizing pattern emerge in your own kitchen!
Every great cookie starts with a solid foundation, and this recipe relies on pantry staples to create a dough that is easy to handle and delicious to eat. We are using a classic sugar cookie base enriched with two types of extracts for a depth of flavor that goes beyond just sweet.
Don't be intimidated by the fancy spiral look; this recipe is essentially a fun arts-and-crafts project that you can eat! The process involves making a simple, reliable sugar cookie dough, dividing it up, and letting your creativity shine with the colors. The most crucial part is the chilling time, which allows the butter to firm up so your beautiful swirls stay sharp during baking. It is a bit of a labor of love with the rolling and stacking, but trust me, slicing that log is so satisfying. Just follow these steps, take your time rolling the log tight, and you will have show-stopping treats in no time.
1. Begin by preheating your oven to 350°F (175°C) and line two baking sheets with parchment paper.
2. In a medium bowl, whisk together the flour, baking powder, and salt. Set this mix aside.
3. In a large bowl, cream the softened butter and granulated sugar together using an electric mixer until the mixture is light and fluffy, about 3-4 minutes.
4. Add the egg, vanilla extract, and almond extract to the butter mixture and beat until well combined.
5. Gradually add the dry flour mixture to the wet ingredients, mixing just until combined. The dough should be thick and slightly sticky.
6. Divide the dough into three equal portions. Leave one portion plain, then to one portion, add the red food coloring and mix until the color is evenly distributed. To the other portion, add the green food coloring and mix until evenly colored.
7. On a lightly floured surface, roll out each colored portion of the dough into rectangles about 1/4 inch thick. Aim for similar sizes for all three rectangles.
8. Layer the colored doughs on top of each other in this order: plain, red, and green. Start with the plain dough on the bottom and place the red dough on top of it, followed by the green dough.
9. Using the parchment paper as a guide, roll the layered dough tightly from one long end to the other, forming a log. Make sure to roll it smoothly so the colors stay intact. Wrap the log in plastic wrap and chill in the refrigerator for at least two hours, or until firm.
10. Once chilled, remove the log from the refrigerator and slice it into 1/4 inch thick rounds. Place the cookies cut-side down onto the lined baking sheets, spacing them about 2 inches apart.
11. Bake in the preheated oven for 10-12 minutes, or until the edges are just lightly golden. Keep an eye on them to avoid over-baking.
12. Allow the cookies to cool on the baking sheets for about 5 minutes before transferring them to wire racks to cool completely.
13. Once cooled, dust the cookies with confectioners' sugar before serving.
When it comes to serving these festive treats, presentation is everything. The bright spirals do most of the heavy lifting, but how you display them can really elevate the holiday spirit. I love seeing these cookies as the star of the show at winter gatherings. Because they are sturdy yet tender, they travel exceptionally well, making them ideal for passing around at parties or tucking into festive tins. Whether you are setting up a cozy hot cocoa station or a grand dessert buffet, here are a few ways to serve these colorful rounds to your guests.
Making these pinwheels is honestly one of my favorite holiday traditions, but I know that working with colored dough can sometimes feel a little tricky. Don't worry, though! I have gathered some helpful insights to ensure your batch turns out absolutely perfect. The key here is patience, especially with chilling the dough, and having fun with the process. If your spiral isn't geometrically perfect, it just adds to the homemade charm. I want you to feel confident in the kitchen, so keep these little nuggets of wisdom in mind as you mix and roll. These simple tweaks and ideas will help you customize the experience and ensure everyone reaches for seconds.
One of the best things about these slice-and-bake cookies is that they keep beautifully, meaning you can enjoy the fruits of your labor long after the baking is done. Proper storage is essential to maintain that lovely crisp edge and soft vanilla center. Nobody wants a stale cookie during the holidays! Whether you have baked a massive batch for a party or just want to save a few for a late-night snack, keeping them fresh is straightforward. Here are the best ways to ensure your pinwheels stay delicious and ready to eat whenever the craving strikes.
I know you might have a few questions before you start flouring your counter, so here are some quick answers to help you bake with confidence!
A: According to the instructions, you should wrap the rolled dough log in plastic wrap and chill it in the refrigerator for at least two hours, or until it is firm enough to slice.
A: You should layer the rectangular dough portions with the plain dough on the bottom, followed by the red dough on top of the plain layer, and finally place the green dough on top.
A: The cookies should be baked at 350°F (175°C) for 10-12 minutes; they are done when the edges become just lightly golden, and care should be taken to avoid over-baking them.
A: Yes, the notes section suggests that you can mix crushed nuts or chocolate chips into the dough to provide added texture to the cookies.
A: Allow the cookies to cool on the baking sheets for about 5 minutes before transferring them to wire racks to cool completely, then dust them with confectioners' sugar before serving.
Why This Recipe Works? Well, simply put, it's the edible equivalent of a festive ornament! These cookies combine the nostalgic comfort of a buttery vanilla-almond sugar cookie with a visual "wow" factor that makes you look like a pastry pro, even if you just rolled dough in your pajamas. The mesmerizing spiral of red, green, and plain dough creates a holiday magic that plain cookies just can't compete with. So, grab your apron and give this a whirl—literally! Don't forget to print this article or save it for your next baking marathon. If you try this recipe or get tangled up in your dough layers, drop a comment below; I’d love to hear how your pinwheels turned out!
Crisp edges meet soft centers in these buttery vanilla-almond rounds featuring eye-catching spirals of red and green dough.
Serving Size 36

Hey there! I’m Noah Blake, and welcome to RecipesDive.com — a blog for anyone who’s ready to dive headfirst into real cooking without the intimidation.