Nutrition Facts
Serving Size 4
- Amount Per Serving
- Calories 150kcal

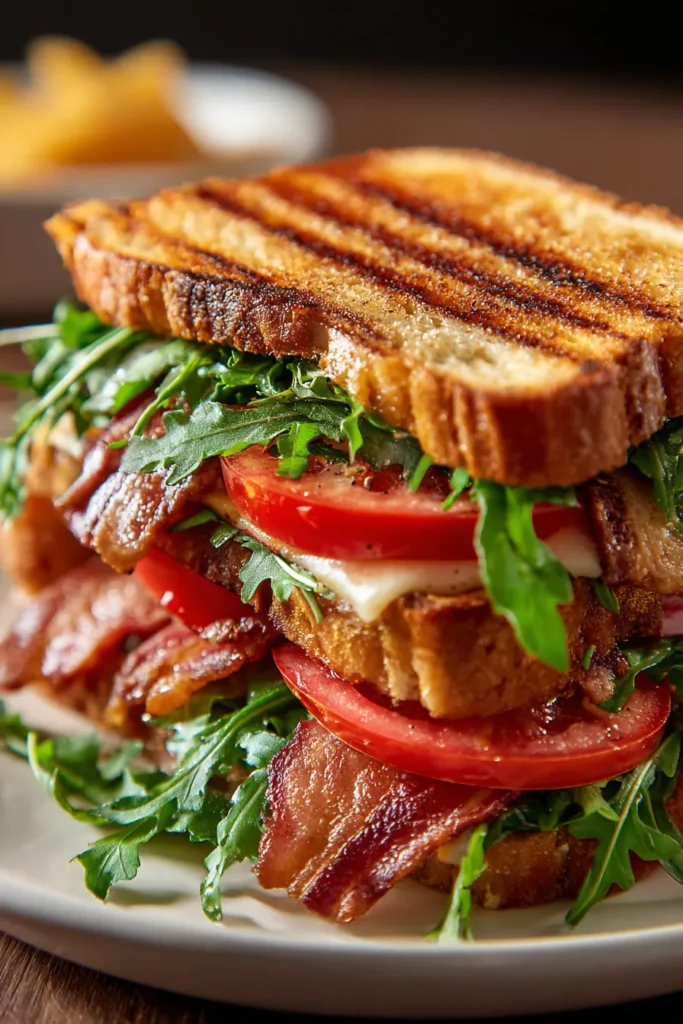
Every bite of this Crispy Grilled Bacon Sandwich with Savory Flavors delivers a symphony of textures and tastes that your taste buds will thank you for. Thick-cut bacon, baked to golden-brown perfection, brings smoky richness and satisfying crunch, while slices of sourdough bread achieve a buttery, crispy exterior thanks to a garlic-infused butter spread. Inside, gooey cheddar cheese stretches with every mouthful, balancing the saltiness of bacon with creamy depth. Fresh, peppery arugula or tender baby spinach adds a vibrant contrast, and juicy tomato slices introduce a pop of freshness. A touch of Dijon mustard on the inside of the top bread slices brings a subtle tang that ties all the elements together, creating a sandwich that is as much about harmony as it is about indulgence.
This sandwich isn’t just a meal—it’s a mini celebration of home cooking that’s accessible even for kitchen newbies. Whether you’re whipping this up for a leisurely weekend brunch or sneaking in a decadent midday lunch, the process is straightforward and feels surprisingly luxurious. From preheating the oven to assembling those perfectly layered slices, you’ll find joy in the simplicity of each step. As the cheese melts and the bread crisps right before your eyes, you’ll realize that some of the best comfort foods come from playing with bold flavors and letting quality ingredients shine. Get ready to savor every mouthwatering layer of this ultimate grilled bacon sandwich.
Before diving into the cooking magic, let’s take a look at the stars of our show. Each component plays a crucial role in building the perfect symphony of savory, tangy, and fresh flavors. Whether you’re a devoted home cook or a beginner looking to try something exciting, knowing these ingredients and their purposes will make your sandwich turn out absolutely irresistible.
Delivers a hearty, smoky crunch and rich, savory fat that crisps beautifully in the oven.
Brings a tangy flavor and sturdy structure to hold all those fillings without sogging.
Softened and mixed with garlic powder, it creates a fragrant, golden crust on the bread.
Spreads smoothly for extra creaminess and helps achieve a crispy, golden exterior when grilled.
Offers a fresh, peppery bite or tender green contrast that brightens each layer.
Adds juicy sweetness and acidity, cutting through the richness of bacon and cheese.
Melts to gooey perfection, providing a sharp, creamy counterpoint to the smoky bacon.
Contributes a tangy kick and depth of flavor, enhancing the overall savory profile.
Infused into the butter for subtle aromatic warmth and extra zest.
Essential seasonings to round out flavors and elevate each ingredient’s natural taste.
Now that we’ve assembled our culinary lineup, it’s time to transform these ingredients into a mouthwatering masterpiece. Follow these step-by-step instructions, and don’t skip any of the bolded techniques—they’re the secret to that perfect crisp and melt.
1. Preheat your oven to 400°F (200°C). Line a baking sheet with aluminum foil and lay the bacon slices flat. Bake in the oven for 15–20 minutes or until crispy. Remove and place on a paper towel to drain excess fat.
2. While the bacon is cooking, prepare the bread by spreading mayonnaise on one side of each slice. This helps achieve a crispy, golden exterior when grilled.
3. In a small bowl, mix the softened butter with garlic powder and a pinch of salt. Spread this garlic butter on the un-mayonnaise side of the bread slices for extra flavor.
4. Heat a large skillet or griddle over medium heat. Place the bread, butter side down, on the skillet. Add a slice of cheddar cheese on four of the bread slices so it can start melting right away.
5. Layer with crispy bacon, sliced tomatoes, and a handful of arugula on top of the cheese. Spread Dijon mustard on the remaining four slices of bread, then close the sandwiches, mayonnaise side up.
6. Grill the sandwiches until the bread is golden and the cheese has completely melted, about 3–4 minutes per side. Use a spatula to press down gently for an even melt and extra crunch.
7. Remove the sandwiches from the skillet and let them cool slightly before slicing in half. Serve warm and enjoy that perfect balance of textures and flavors.
Once your sandwiches are hot off the skillet, you’ve got a world of serving possibilities to elevate the experience. Whether you’re hosting brunch guests or enjoying a cozy meal for one, these ideas will help you present your creation like a seasoned chef. Use fresh garnishes or thoughtful pairings to turn a simple sandwich into a memorable feast.
Toss mixed greens with a lemon vinaigrette, cherry tomatoes, and thinly sliced red onion. The bright acidity of the salad cuts through the sandwich’s richness, creating a well-rounded plate.
Ladle a warm bowl of velvety tomato soup alongside your sandwich. Dip each half into the soup for a nostalgic and comforting combo that’s perfect for cooler afternoons.
Mash ripe avocado with a squeeze of lime juice, a pinch of salt, and freshly ground pepper. Serve alongside as a creamy, zesty dip that complements the bacon’s smokiness and the cheddar’s sharpness.
Arrange sliced fresh fruit, scrambled eggs, and crispy home fries on a large platter. Position the bacon sandwiches in the center for a visually appealing and crowd-pleasing brunch spread.
Storing this sandwich properly ensures that you can enjoy delicious leftovers without losing that satisfying crunch or fresh flavor. Whether you plan to refrigerate for next-day lunches or freeze for a quick meal later, these tips will help maintain quality and taste.
Place cooled sandwiches in a container lined with a paper towel to absorb moisture. Seal tightly and store in the fridge for up to 2 days. Reheat in a skillet over medium heat to restore crispy edges.
For grab-and-go convenience, wrap each sandwich in aluminum foil before refrigerating. This helps retain warmth and prevents soggy bread. To reheat, pop it in a preheated oven at 350°F (175°C) for about 10 minutes.
If you want to freeze, assemble sandwiches without the fresh arugula or tomatoes. Wrap each tightly in plastic wrap, then place in a freezer bag. Freeze for up to 1 month. Thaw in the fridge overnight and reheat in a skillet or oven.
No matter the storage method, always reheat in a skillet or toaster oven rather than a microwave. This will help revitalize the crispy bread and melt the cheese without making the sandwich soggy.
This Crispy Grilled Bacon Sandwich with Savory Flavors has been your roadmap to home-cooked indulgence, from layering thick-cut bacon and melted cheddar to mastering that golden, buttery crust. We’ve explored key ingredients, step-by-step instructions, and creative serving ideas that turn a simple sandwich into a flavor-packed experience. By following these tips—like spreading garlic butter for extra zest and pressing the sandwich gently in the skillet—you’ll consistently achieve that perfect balance of crunchy, gooey, and fresh. Don’t forget the handy storage advice for enjoying this sandwich on busy mornings or lazy weekends, and if you want to make it even more special, consider adding avocado, caramelized onions, or swapping in grilled veggies.
Feel free to print this article and save it for later use when you crave a delicious lunch or brunch treat. Scroll down to the FAQ section below for answers to any lingering questions about ingredient swaps, prep times, or reheating methods. If you give this recipe a try, I’d love to hear how it turns out! Leave your comments, questions, or feedback—I’m here to help you fine-tune your cooking process and celebrate every sizzling, cheesy, bacon-packed bite. Happy grilling!
This sandwich features crispy bacon, melted cheddar, and fresh veggies, all perfectly grilled for a golden crust. Each bite is a savory explosion of flavors that delights your taste buds.
Serving Size 4

Hey there! I’m Noah Blake, and welcome to RecipesDive.com — a blog for anyone who’s ready to dive headfirst into real cooking without the intimidation.