Nutrition Facts
Serving Size 16
- Amount Per Serving
- Calories 16kcal

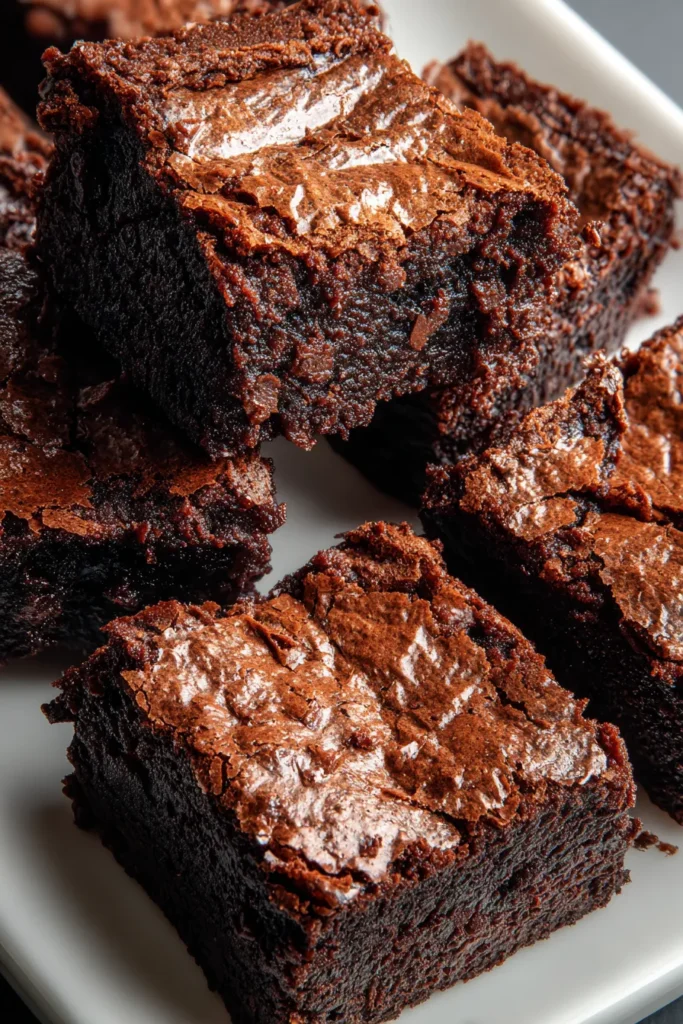
There’s something undeniably special about biting into a warm, fudgy brownie that makes your day instantly better. These decadent gluten-free chocolate brownies bring that magic to your kitchen without any gluten woes. Rich, dark cocoa swirls together with glossy pools of melted chocolate, creating a tender crumb that practically melts on your tongue. You’ll notice the way the edges crisp just enough to hold a slight chew, while the center stays luxuriously gooey—exactly the balance every chocolate lover dreams of. Whether you’re new to gluten-free baking or a seasoned pro, this recipe delivers brilliant results with simple pantry staples and straightforward steps.
From the first crackle of your oven door opening to reveal a glossy surface dotted with chunks of semi-sweet chocolate, to that moment when you slice into perfect squares and the aroma wafts through your home—it’s pure joy. The sweetness of granulated sugar, the warmth of pure vanilla, and the intensity of cocoa blend into a symphony of flavors that remind you why brownies are a timeless classic. I still remember baking my very first batch of gluten-free brownies for a friend with celiac disease—her eyes lit up at the first bite, and I knew I’d struck gold. Now I can’t wait for you to experience this same delight, whether you’re enjoying them fresh from the pan or sharing with family and friends. Let’s dive into the magic behind these rich, fudgy squares!
Every ingredient in this recipe plays a vital role in creating that irresistible brownie texture and flavor. From the base of melted butter to the finishing touch of melty chocolate chips, each element contributes to the rich, fudgy experience we crave.
Brings decadent richness and moisture to the batter. Melting it with chocolate creates a smooth, glossy base that holds the brownies together.
Adds the perfect level of sweetness and helps to create a tender crumb by trapping air when whisked with the eggs.
Infuses a warm, aromatic undertone that enhances the chocolate flavor and rounds out the sweetness.
Provide structure and lift, ensuring the brownies have just enough rise while remaining dense and fudgy.
Acts as the framework for the brownies, giving them structure without any gluten. Look for a blend with xanthan gum included for best results.
Delivers deep chocolate intensity. Sifting it in helps avoid lumps and ensures an even distribution throughout the batter.
Offers a gentle lift, preventing the brownies from becoming too dense or cakey.
Balances sweetness and enhances all the chocolatey notes, making each bite more vibrant.
Create pockets of molten chocolate that ooze as you bite. Mixing them into the batter and sprinkling on top gives a luscious finish.
Optional, but highly recommended for added crunch and a toasty contrast to the fudgy center.
This recipe guides you from melting rich chocolate to folding in just the right amount of ingredients for the ultimate fudgy brownie. Follow these steps closely, and you’ll be rewarded with moist, chewy edges and a gooey center every time.
1. Preheat your oven to 350°F (175°C). Line an 8x8 inch baking dish with parchment paper, leaving a couple of inches of overhang on each side. This makes lifting the brownies out a breeze once they’re baked.
2. In a microwave-safe bowl, combine the butter and half of the chocolate chips. Microwave in 20-second intervals, stirring well between each burst, until the mixture is completely melted and smooth. This creates a silky chocolate base.
3. In a large mixing bowl, whisk together the sugar, vanilla extract, and eggs until the mixture is light and fluffy. This incorporates air, lending a tender crumb to the brownies.
4. Slowly pour the melted chocolate mixture into the egg mixture, whisking continuously to ensure a seamless blend without scrambling the eggs.
5. Sift in the gluten-free flour, cocoa powder, baking powder, and salt. Gently fold the dry ingredients into the wet batter using a spatula until no streaks of flour remain.
6. Fold in the remaining chocolate chips and the optional chopped nuts, being careful not to overmix. Those chunks will give your brownies gooey pockets of chocolate.
7. Pour the batter into the prepared baking dish, using a spatula to spread it evenly so that it bakes uniformly.
8. Bake for 25–30 minutes, or until a toothpick inserted into the center comes out with a few moist crumbs attached. Overbaking will yield a drier, more cake-like texture, so watch closely.
9. Let the brownies cool in the pan for about 10 minutes. This brief rest helps set the edges and makes removal easier.
10. Use the parchment overhang to lift the brownie slab out of the pan and place it on a wire rack to cool completely. Once cooled, slice into squares and serve.
When it comes to serving these brownies, creativity is your best friend. Whether you’re hosting a casual get-together or simply treating yourself, these suggestions will elevate every square to a memorable dessert experience. From bright bursts of fruit to indulgent swirls of cream, there’s no limit to how you can present these decadent, gluten-free delights. Trust me, the right garnish or accompaniment can transform a simple brownie into a showstopper. Grab your favorite serving dish, arrange the brownies thoughtfully, and let each element shine. Let’s turn those fudgy layers into an unforgettable moment on the plate!
Place a slightly warmed brownie on a dessert plate, top with a generous scoop of cold vanilla ice cream, and drizzle with chocolate or caramel sauce for a classic hot-and-cold contrast. The melting ice cream seeps into every crevice, amplifying that fudgy goodness.
For an elegant touch, use a fine mesh sieve to dust the brownies with a light veil of powdered sugar. Arrange fresh raspberries, strawberries, or blueberries alongside to add a tangy pop and vibrant color.
Prepare a simple ganache by heating equal parts heavy cream and chopped dark chocolate until smooth. Let it cool slightly, then use a spoon to drizzle over cut brownies. This adds an extra layer of chocolate luxury.
Crumble brownies into pieces and layer them in small glasses with whipped cream and berry compote or cherry pie filling. Repeat layers for visual appeal and serve with a small spoon for a delightful, bite-sized treat.
Storing these brownies properly ensures they stay as moist and flavorful as the day you baked them. Whether you want to enjoy them over several days or keep a stash in the freezer for anytime cravings, understanding the best storage methods is key. Always let the brownies cool completely before storing to avoid trapping steam, which can make them soggy. Keeping them in an airtight container is crucial for retaining moisture and preventing them from drying out. Follow these tips to maintain that fudgy texture and full chocolate flavor, no matter how long you store them.
Stack cooled brownies in a single or double layer, separated by parchment paper, in an airtight container. Store at room temperature for up to 3 days for optimal softness.
Place the container in the fridge, ensuring a tight seal to prevent absorption of other odors. Chilled brownies develop a firmer texture and can be served cold or warmed briefly before eating.
Wrap each brownie square tightly in plastic wrap, then place them in a resealable freezer bag. Freeze for up to 3 months. Thaw overnight in the refrigerator or warm for a few seconds in the microwave.
For serious brownie hoarders, vacuum-sealing removes air and extends freshness in the freezer. Label the package with the date and enjoy perfectly preserved brownies any time.
What a delicious journey we’ve taken together, from mixing the first spoonfuls of melted chocolate to slicing those perfectly fudgy squares. These gluten-free brownies prove that life without gluten doesn’t mean sacrificing flavor or texture. Every ingredient—from the buttery richness of melted butter to the deep notes of unsweetened cocoa—works in harmony to create a dessert that feels both indulgent and comforting. By following clear steps like sifting your cocoa, folding in the dry mix gently, and avoiding overbaking, you ensure a batch of brownies that are crisp around the edges and luxuriously gooey in the center. Remember, you can tweak this recipe by using dark chocolate for even richer results or adding a pinch of espresso powder to amplify those chocolatey notes. Feel free to experiment, share your results, or stick to the classic version—that’s the beauty of home baking.
Don’t let these tips and tricks get lost in cyberspace! Print this article and save it in your recipe binder for easy access whenever a chocolate craving strikes. You’ll also find a handy FAQ section below to troubleshoot any baking questions you might have. If you give these brownies a try, please drop a comment to let me know how they turned out. Share your favorite serving style or ask any questions if you need guidance on substitutions or technique. Baking is all about community and sharing, so I’d love to hear your feedback, stories, or any twists you bring to this gluten-free chocoholic dream. Happy baking!
These decadent brownies are a chocolate lover's dream, with a rich, fudgy texture and melty chocolate chips in every bite. Perfectly sweet and irresistibly delicious!
Serving Size 16

Hey there! I’m Noah Blake, and welcome to RecipesDive.com — a blog for anyone who’s ready to dive headfirst into real cooking without the intimidation.