Nutrition Facts
Serving Size 12
- Amount Per Serving
- Calories 15kcal

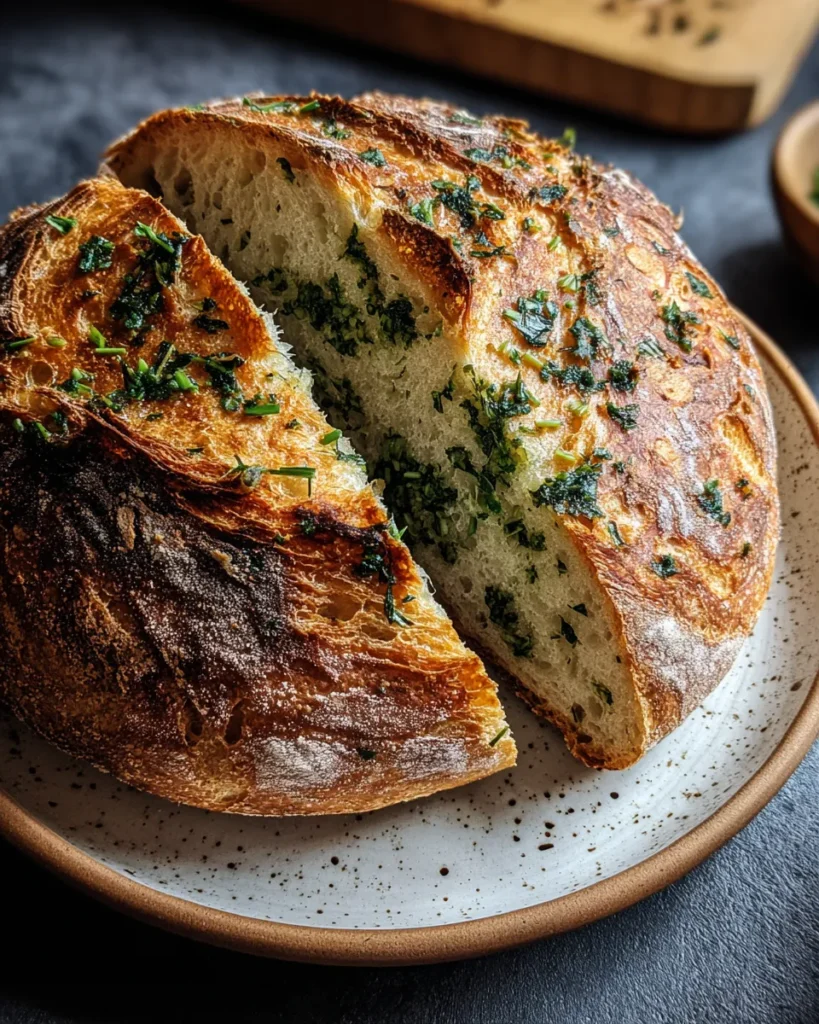
If you love the smell of a bakery, wait until you make this loaf in your own kitchen. There is something incredibly satisfying about mixing fresh rosemary, thyme, and parsley with pungent garlic and watching it transform into a crusty, golden masterpiece. This intermediate-level project is perfect for lunch or a cozy dinner side, bringing that rustic, artisan feel right to your table. I promise, once you pull this aromatic loaf from the oven, you’ll wonder why you ever bought flavored bread from the store. Let's get baking!
To achieve that perfect artisan texture and flavor, we need to start with high-quality components. This recipe relies on a strong bread flour for structure and a vibrant starter for that signature tang, while the fresh add-ins provide the savory character. Here is exactly what you will need to get started on your dough.
Making sourdough is a rhythm, not a race. This process is where the magic happens, turning simple ingredients into a complex, flavor-packed loaf. Don't be intimidated by the kneading or the waiting; those quiet moments are when the flavor develops. We are going to mix our wet and dry ingredients, incorporate those savory add-ins, and give the dough plenty of time to rise. Whether you use a Dutch oven or a baking stone, the result will be a beautifully crusty loaf. Just remember to be patient during the rising times—it makes all the difference in the texture!
1. In a large mixing bowl, combine the bread flour and salt, stirring to mix well.
2. In another bowl, combine the active sourdough starter and lukewarm water, stirring until fully dissolved.
3. Slowly add the starter mixture to the flour mixture, mixing with a wooden spoon or your hands until a shaggy dough forms.
4. Add the minced garlic, chopped herbs, and olive oil to the dough. Mix well to ensure the garlic and herbs are evenly distributed.
5. Knead the dough on a floured surface for about 10 minutes until it becomes smooth and elastic. If the dough is too sticky, sprinkle a little extra flour as needed.
6. Place the dough in a lightly greased bowl, cover with a damp kitchen towel or plastic wrap, and let it rest at room temperature for about 4 to 6 hours, or until it has doubled in size.
7. After the first rise, gently deflate the dough and transfer it to a floured surface. Shape it into a round loaf or a batard (oval shape).
8. Place the shaped dough onto a parchment-lined baking sheet, cover it with a kitchen towel, and let it rise for another 1 to 2 hours, until puffy.
9. Preheat your oven to 230°C (450°F). Place a Dutch oven or a baking stone inside to preheat as well.
10. Once the dough has risen, use a sharp knife to make a few shallow slashes on the top of the loaf for decoration and to help it expand during baking.
11. Carefully transfer the dough to the preheated Dutch oven or onto the hot baking stone. If using a Dutch oven, cover it with the lid for the first 20 minutes of baking.
12. Bake the bread for 25-30 minutes total, removing the lid after 20 minutes to allow the crust to become golden brown.
13. When the bread is done, it should sound hollow when tapped on the bottom. Remove it from the oven and let it cool on a wire rack before slicing.
This loaf is a showstopper all on its own, but pairing it with the right accompaniments elevates it to a whole new level. Because the garlic and herbs are already so flavorful, you don't need to overcomplicate things. I love serving this warm right off the rack, but it also holds up incredibly well for meals throughout the day. Whether you are looking for a simple snack or a sturdy side for a heavy meal, here are a few of my favorite ways to enjoy this rustic creation.
Sourdough can sometimes feel a bit like a science experiment, but with a few insider tricks, you can ensure consistent success every time. Over the years, I have learned that the small details, like the activity level of your starter or how long you let the flavors meld, really dictate the quality of your final loaf. This garlic and herb version is forgiving, but paying attention to these nuances will take it from good to bakery-quality. Here are the specific things I keep in mind whenever I bake this recipe to ensure that tangy, chewy perfection.
Since home-baked bread lacks the preservatives found in store-bought loaves, storing it correctly is vital to keep it from going stale too quickly. However, because this recipe uses olive oil, it stays moist a bit longer than a standard lean sourdough. I hate seeing hard work go to waste, so I always treat my leftover bread with care. Whether you plan to eat it all within two days or want to save some for next week, here is how to keep that crust crunchy and the inside soft.
I know diving into sourdough can bring up a lot of questions, especially when adding mix-ins like garlic and herbs. Here are the answers to the most common questions I get asked to help you troubleshoot and bake with confidence.
A: For the best results, the sourdough starter must be active and bubbly. You will need to measure out 100g of this active starter and dissolve it into 350ml of lukewarm water before combining it with the dry ingredients.
A: Yes, the recipe encourages you to experiment with different herbs based on your specific taste preferences or what you have available. Regardless of the type chosen, you should use 2 tablespoons of mixed fresh herbs and ensure they are finely chopped.
A: You are instructed to knead the dough on a floured surface for about 10 minutes until it is smooth and elastic. If you find the dough is too sticky during this process, you should sprinkle a little extra flour as needed to achieve the right consistency.
A: While a Dutch oven is a recommended method, it is not strictly required. You can place the dough into a preheated Dutch oven, keeping the lid on for the first 20 minutes, or you can transfer the dough onto a preheated baking stone to bake.
A: The total baking time is between 25 and 30 minutes at 230°C (450°F). The bread is done when the crust has become golden brown (make sure to remove the lid after 20 minutes if using a Dutch oven) and the loaf sounds hollow when you tap it on the bottom.
A: The dough undergoes two rising stages. First, it must rest at room temperature for about 4 to 6 hours, or until doubled in size. After shaping, it undergoes a second rise on a parchment-lined sheet for another 1 to 2 hours until it looks puffy.
This Garlic and Herb Sourdough Bread is honestly one of those recipes that makes you look like a professional baker with just a little bit of patience. The combination of that tangy starter with the savory punch of roasted garlic is just unbeatable. Go ahead and print this article or save it to your favorites so you have it ready for your next baking day. If you try it, please leave a comment below! I would love to hear if you stuck to the rosemary and thyme or if you went rogue with some other herbs. Happy baking, everyone!
Fresh rosemary, thyme, and parsley mingle with pungent garlic in every bite of this tangy, crusty loaf. It’s the ultimate companion for soups or simple olive oil dipping.
Serving Size 12

Hey there! I’m Noah Blake, and welcome to RecipesDive.com — a blog for anyone who’s ready to dive headfirst into real cooking without the intimidation.