Nutrition Facts
Serving Size 12
- Amount Per Serving
- Calories 27kcal

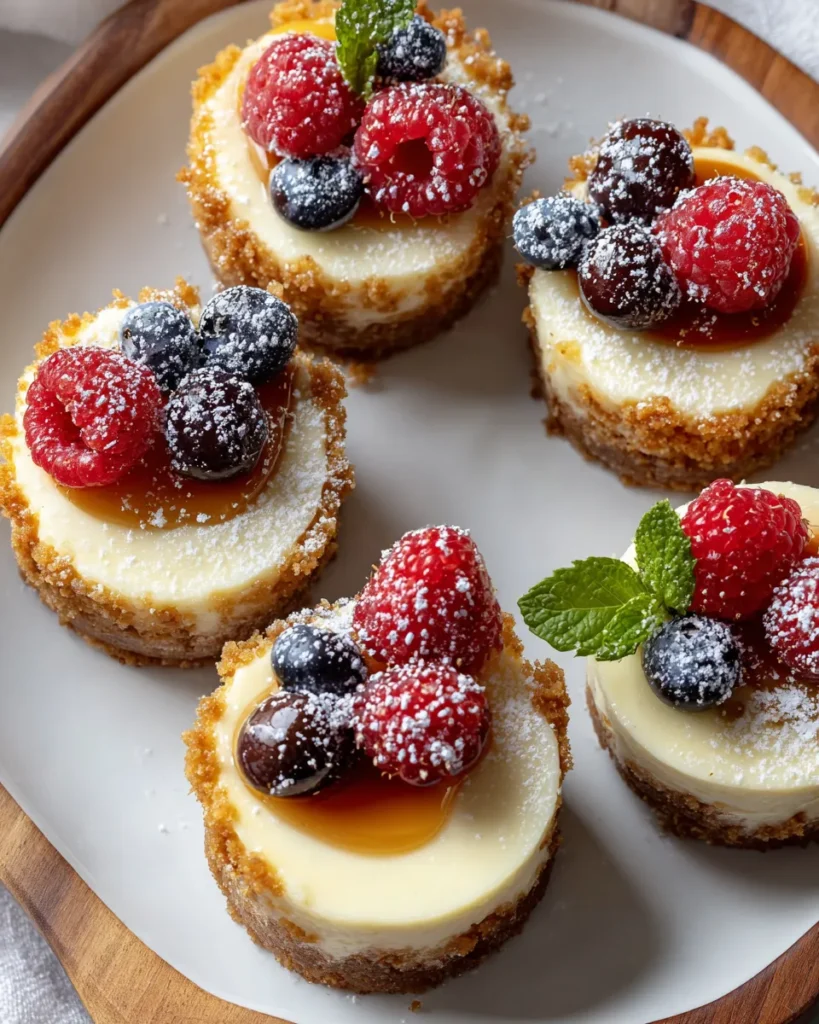
Everyone loves a good cheesecake, but making a whole one can sometimes feel a bit daunting with water baths and long cooling times. That is exactly why I am completely obsessed with these bite-sized treats. They offer that perfect ratio of buttery crunch to creamy, tangy filling without the hassle of a springform pan or the worry of a sinking center. Whether you are hosting a party or just need a sweet pick-me-up on a Tuesday night, these little gems are incredibly satisfying and simple to whip up. Trust me, once you try one, you won't be able to stop at just one!
Before we turn on the oven, let's gather everything we need to make these adorable desserts. The beauty of this recipe lies in its simplicity, using standard pantry staples to create something that tastes truly elegant and complex. It is all about quality basics coming together to form the perfect bite.
I absolutely love this recipe because it breaks down the intimidating process of cheesecake making into very manageable steps. You are essentially creating a simple crust and a quick batter, then letting the oven do the heavy lifting. The most critical part of this entire process is actually the cooling phase. We use a gentle method by cracking the oven door, which saves your cheesecakes from shocking temperature changes that cause cracks. It is a lesson in patience, but the smooth, creamy result is absolutely worth the wait.
1. Preheat your oven to 325°F (163°C). Line a muffin tin with paper liners or grease the cups with nonstick spray to prevent the cheesecakes from sticking.
2. In a medium bowl, combine the crushed graham crackers, granulated sugar, and melted butter. Mix until the mixture resembles wet sand.
3. Divide the graham cracker mixture evenly among the muffin tin cups, pressing down firmly with the back of a spoon to create an even crust. Bake in the preheated oven for about 5 to 7 minutes, or until set and lightly golden. Remove from the oven and let cool.
4. In a large mixing bowl, use an electric mixer on medium speed to beat the softened cream cheese until creamy and smooth.
5. Gradually add the powdered sugar and vanilla extract, mixing until fully incorporated and there are no lumps.
6. Add the eggs, one at a time, mixing just until combined after each addition. Be careful not to overmix the batter.
7. Fold in the sour cream until well combined.
8. Spoon the cheesecake batter over the cooled graham cracker crusts in the muffin tin, filling each cup about 2/3 full.
9. Bake the cheesecakes in the oven for 18 to 22 minutes, or until the edges are set but the centers are slightly jiggly.
10. Turn off the oven and crack the door open, allowing the mini cheesecakes to cool gradually in the oven for about 30 minutes. This helps prevent cracks.
11. After cooling, refrigerate the cheesecakes for at least 2 hours or until firm.
12. Before serving, decorate your mini cheesecakes with fresh berries or a drizzle of chocolate if desired.
Now comes the fun part where you get to play with presentation! While these cheesecakes are delicious straight from the fridge, dressing them up turns them into a show-stopping dessert that looks like it came from a bakery. The white canvas of the cheesecake is perfect for vibrant colors and textures. Whether you are serving these at a summer barbecue or a cozy winter gathering, a little garnish goes a long way in making them feel special and personalized for your guests.
Over the years, I have learned a few tricks that make baking these easier and more consistent. Baking is definitely a science, but it is also about knowing your ingredients and how they behave. The goal here is to keep things stress-free. Since these are individual portions, they are much more forgiving than a large cake, but paying attention to details like temperature and timing will ensure you get that silky smooth texture every single time. Here are the specific notes to keep in mind for success.
If you somehow manage to have leftovers (which is rare in my house because they vanish so quickly), storing them properly is key to maintaining that luxurious texture. Dairy-based desserts can absorb odors from the fridge easily, so protection is important. You want to keep the crust crisp and the filling firm, so avoiding moisture buildup while keeping them cold is the main objective. Here is how I recommend keeping your treats fresh.
I know questions often pop up when you are in the thick of baking, so I have gathered the most common inquiries I get about this recipe. Hopefully, this clears up any confusion so you can bake with total confidence!
A: You should bake the cheesecakes at 325°F (163°C) for 18 to 22 minutes. You will know they are finished when the edges are set but the centers are still slightly jiggly.
A: Once the baking time is complete, turn off the oven and crack the door open. Leave the mini cheesecakes inside to cool gradually for about 30 minutes. This gradual temperature change helps prevent cracks from forming on the surface.
A: Yes, these mini cheesecakes are suitable for freezing. Wrap them tightly in plastic wrap and aluminum foil, and they can be frozen for up to 3 months. If you prefer not to freeze them, they can be made ahead and stored in the refrigerator for up to 5 days.
A: Yes, the recipe can be made gluten-free by modifying the crust ingredients. Simply substitute the 1 cup of crushed graham crackers with crushed gluten-free cookies or almond flour.
A: Start by beating the softened cream cheese until creamy and smooth using an electric mixer on medium speed. After adding the sugar and vanilla, add the eggs one at a time, mixing just until combined after each addition to avoid overmixing. Finally, fold in the sour cream until well combined.
What truly makes this recipe a keeper is the sheer joy of having a perfectly portioned dessert that feels fancy but is secretly easy to pull off. The combination of that buttery, crunchy base with the rich, tangy filling is just magic. Plus, you don't have to commit to eating a massive slice; you can just have a little "gnome-sized" treat whenever the craving strikes! It is funny how something so small can bring so much happiness. Go ahead and print this article or save it to your favorites because I have a feeling you will be coming back to it often. If you give these a try or run into any hiccups while mixing, drop a comment below. I would love to hear how they turned out for you!
A crunchy graham cracker base supports a silky, tangy cream cheese filling in these bite-sized treats. The gentle oven cooling method ensures a smooth, crack-free surface ready for your favorite fresh berries or chocolate drizzle.
Serving Size 12

Hey there! I’m Noah Blake, and welcome to RecipesDive.com — a blog for anyone who’s ready to dive headfirst into real cooking without the intimidation.