Nutrition Facts
Serving Size 24
- Amount Per Serving
- Calories 15kcal

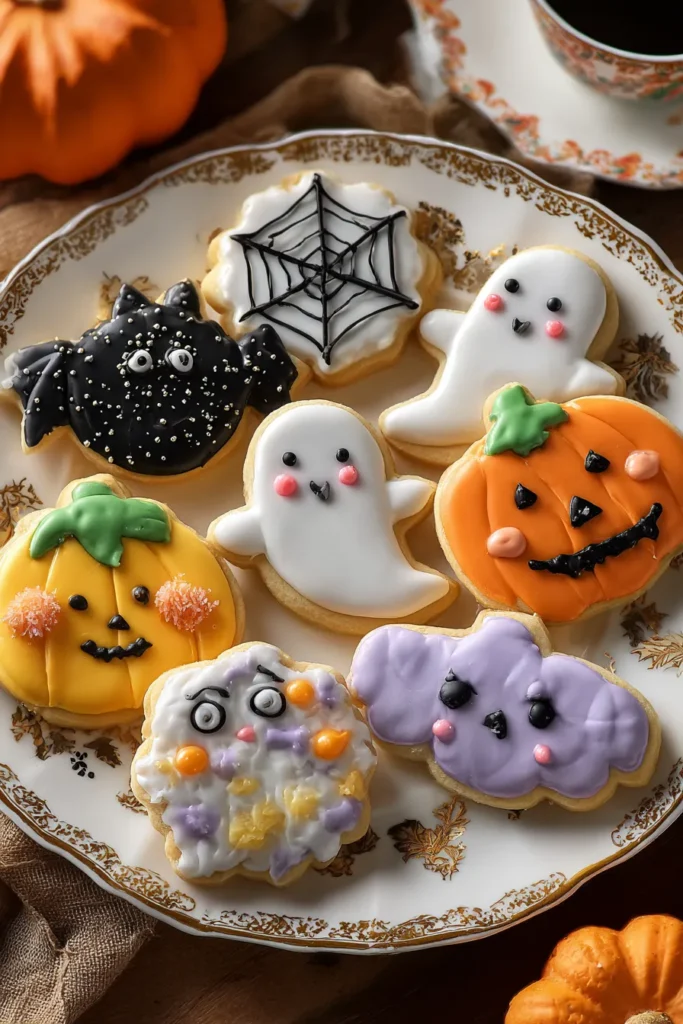
There’s something undeniably enchanting about rolling out cookie dough on a crisp autumn afternoon, especially when the goal is to create little edible masterpieces for Halloween. These Halloween Royal Icing Cookies bring together the comforting, buttery richness of a classic sugar cookie with the dazzling pop of color and detail that royal icing offers. As you mix the ingredients, you’ll catch whiffs of sweet vanilla and a hint of almond that coax you into daydreams of cozy gatherings, laughter echoing through the kitchen, and delighted smiles around the table. Choosing your favorite Halloween-themed cutters—spooky bats, playful ghosts, or grinning pumpkins—instantly transports you into a festive mood, turning ordinary baking into an imaginative adventure.
Once the cookies are baked and cooled, the real magic begins: decorating with royal icing. Vivid orange, deep black, moody purples, and bright greens transform your simple shapes into miniature works of art. Whether you’re outlining a fierce jack-o’-lantern grin or flooding the surface with smooth, glossy icing for an eerie background, each stroke of the piping bag feels like wielding a tiny paintbrush. It’s a delightful way to engage kids and adults alike, inviting everyone to personalize their creations. These cookies aren’t just tasty treats—they’re an opportunity to share stories, spark creativity, and layer your Halloween celebrations with fun and flavor.
Every remarkable cookie starts with quality ingredients that balance flavor, texture, and structure. Below are the essential components that make these Halloween Royal Icing Cookies shine, each bringing its own unique contribution to the final bake.
Provides the sturdy foundation and structure for the cookies. Its balanced protein content ensures a tender crumb without being overly delicate.
Acts as a gentle leavening agent that gives the cookies a slight lift, resulting in a light, soft interior rather than a dense, heavy bite.
Enhances the sweetness and deepens the overall flavor profile. A small pinch prevents the cookies from tasting flat.
Delivers rich, creamy flavor and contributes to a tender, melt-in-your-mouth texture. Using unsalted butter lets you control the exact salt level.
Sweetens the dough while encouraging slight caramelization at the edges for that perfect golden hue and subtle crunchy bite.
Binds the ingredients together, adds moisture, and helps achieve a smooth dough that rolls out cleanly without cracking.
Infuses the dough with warm, comforting notes that enhance the overall sweetness and pair beautifully with the almond extract.
Provides a delicate nutty aroma and flavor that elevates the standard sugar cookie into something extra special.
Offer vibrant, concentrated hues for your royal icing without altering its consistency, making color mixing both easy and precise.
Creates the silky-smooth base of royal icing, dissolving effortlessly for a glossy finish.
Gives royal icing structure and stability, helping it dry to firm peaks that hold intricate designs.
Activates the meringue powder and adjusts the icing consistency, ensuring it flows smoothly through piping tips.
Lets you achieve deep, saturated shades for decorating without watering down the icing.
Ready to transform these simple ingredients into haunted works of art? Follow these detailed steps for baking and decorating cookies that are equal parts delicious and eye-catching.
1. In a large bowl, whisk together the flour, baking powder, and salt until evenly combined. The uniform distribution of leavening and seasoning ensures every bite is consistently flavored.
2. In a separate bowl, cream the butter and sugar using an electric mixer on medium speed for about 2–3 minutes, stopping to scrape down the sides. You’re looking for a pale, fluffy mixture that incorporates plenty of air.
3. Beat in the egg, vanilla extract, and almond extract on low speed until the mixture is smooth and glossy. This step ensures the flavors meld seamlessly into the dough.
4. Gradually add the dry ingredients to the wet mixture, mixing on low speed until a cohesive dough forms. Avoid overmixing to prevent tough cookies.
5. Divide the dough into two equal portions, wrap each tightly in plastic wrap, and refrigerate for at least 1 hour. Chilled dough is easier to roll out and holds shapes better in the oven.
6. Preheat your oven to 350°F (180°C) and line baking sheets with parchment paper or silicone mats to prevent sticking and promote even browning.
7. On a lightly floured surface, roll out the dough to about 1/4-inch thickness. Use Halloween-themed cookie cutters to cut out your favorite shapes, re-rolling scraps as needed.
8. Arrange the cookies on the prepared baking sheets, spacing them about 1 inch apart to allow for slight spreading.
9. Bake for 8–10 minutes, or until the edges just begin to turn golden. Transfer the cookies to a wire rack and let them cool completely before decorating.
10. For the royal icing, combine powdered sugar, meringue powder, and warm water in a mixing bowl. Beat on low speed until the sugar is mostly absorbed, then increase to high speed and whip for 5–7 minutes until stiff peaks form.
11. Divide the icing into separate bowls and stir in gel food coloring until you reach your desired shades. Keep each bowl covered with a damp cloth to prevent drying.
12. Fit piping bags with small tips and decorate your cooled cookies. Outline shapes first, then flood the interior with thinner icing if desired. Allow the icing to set completely—about 4 hours—before stacking or storing.
These cookies are as fun to display as they are to eat. Whether you’re hosting a Halloween party, gifting neighbors, or just treating yourself, presentation makes all the difference. Here are some creative ways to serve your spooky creations and elevate the festive atmosphere.
Proper storage is key to preserving both the texture of the cookie and the sheen of the royal icing. Here are some guidelines to keep your creations looking and tasting their best long after Halloween night.
These Halloween Royal Icing Cookies offer the perfect blend of flavor, creativity, and festive flair. You’ve learned how to transform simple pantry ingredients into soft, buttery cookies crowned with vibrant royal icing that dries to a firm, glossy finish. Whether you’re baking for a spirited party or a cozy night in, these treats bring people together through hands-on decorating fun and irresistible taste. Feel free to print this article and save it for your next Halloween baking session. Tuck it into your favorite recipe binder, or pin it to your digital board so it’s always at your fingertips when the holiday spirit strikes.
Baking and decorating these cookies is an adventure in joy, from creaming butter and sugar to perfecting that final piped swirl. We’ve covered ingredient tips, detailed instructions, serving ideas, and storage recommendations to ensure your cookies look picture-perfect and taste delightful. Below, you’ll find a FAQ section to address any lingering questions you might have. If you decide to give this recipe a whirl, please share your thoughts, ask questions, or offer feedback. Your kitchen triumphs and troubleshooting tales are what make these recipes come alive—so let me know how your spooky treats turn out and how I can help bring even more magic to your baking adventures!
These Halloween Royal Icing Cookies are not just treats; they're art! Soft, buttery cookies topped with colorful royal icing bring festive fun to your Halloween celebrations.
Serving Size 24

Hey there! I’m Noah Blake, and welcome to RecipesDive.com — a blog for anyone who’s ready to dive headfirst into real cooking without the intimidation.