Nutrition Facts
Serving Size 12
- Amount Per Serving
- Calories 25kcal

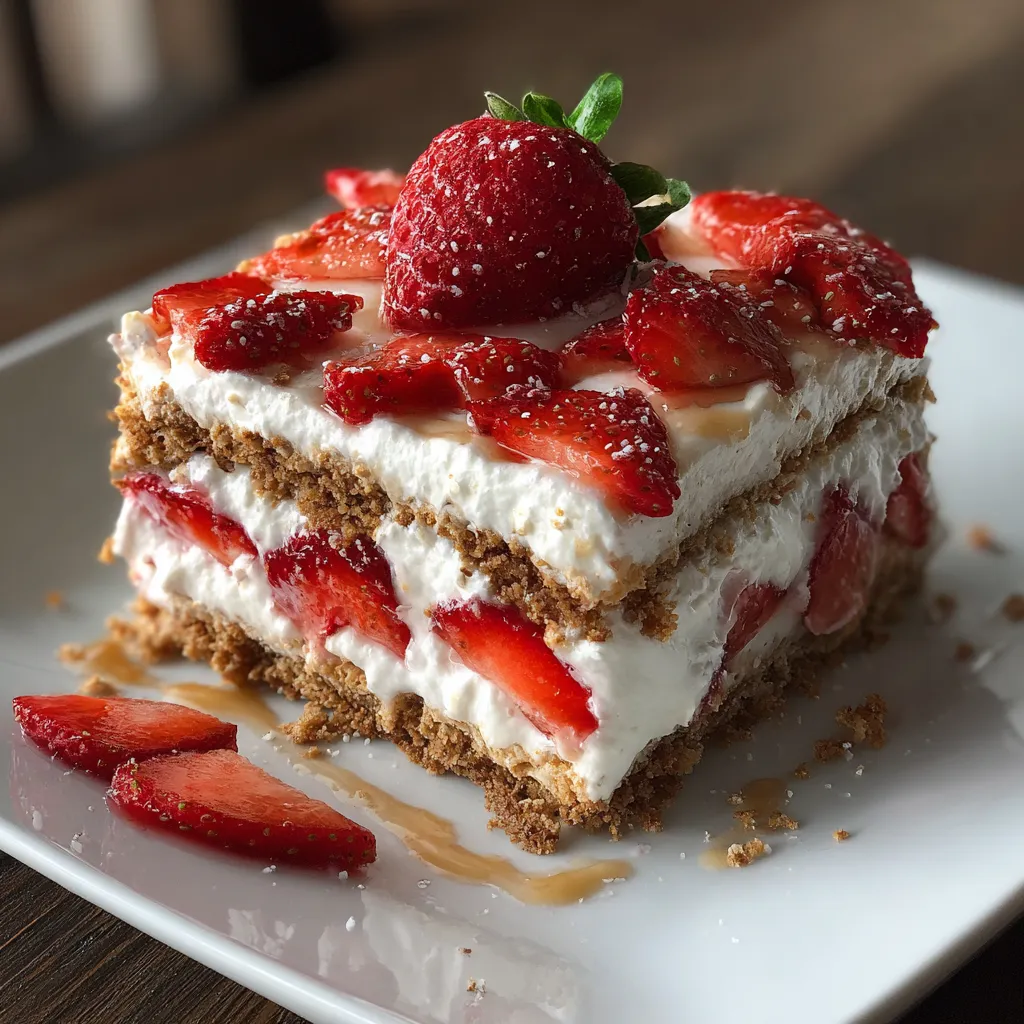
I love how the No-Bake Strawberry Icebox Cake brings together layers of pillowy whipped cream, juicy strawberry slices, and crisp graham crackers in an effortless chilled treat. It’s a breeze to assemble, and the sweet strawberry slices nestle perfectly between the cloud-like cream and crunchy crackers. After a few hours in the fridge, each slice reveals a cool, creamy dessert bursting with fresh berry goodness. Whether you’re hosting or craving something light and sweet, this beginner-friendly dessert will win hearts. So grab your pan and berries and let’s dive in!
To whip up this delightful No-Bake Strawberry Icebox Cake, you’ll need just a handful of simple ingredients that transform into an impressive dessert. Each component plays its part, from creamy sweetness to fruity freshness and satisfying crunch.
This no-fuss recipe comes together in minutes but needs some chilling time to let those layers meld into perfection. You’ll find that with just a quick whip, an easy layer routine, and some patience in the fridge, you’ll end up with a show-stopping dessert—no oven required!
1. In a large mixing bowl, beat heavy cream, powdered sugar, and vanilla extract on medium-high speed using an electric mixer until stiff peaks form—when the peaks stand straight up without drooping.
2. Line a 9×13-inch pan with a single layer of graham crackers, arranging them snugly so there are no gaps.
3. Using a spatula, gently spread one third of the whipped cream mixture in an even layer over the crackers.
4. Arrange one third of the sliced strawberries over the cream, distributing them evenly for uniform fruit coverage.
5. Repeat the cracker, whipped cream, and strawberry layers two more times, ending with a final layer of whipped cream on top.
6. Cover the pan tightly with plastic wrap and refrigerate for at least 4 hours or overnight—this chilling step softens the crackers and melds flavors.
7. When chilled, use a sharp knife to slice into squares, wiping the blade clean between cuts for neat edges.
Once your icebox cake is perfectly set, it’s time to showcase it in style. Think about textures, colors, and complementary flavors to elevate each slice and impress your guests.
With a few insider pointers, you’ll nail this recipe every time. From berry swaps to ideal chilling windows, these tips help you achieve that dreamy texture and vibrant flavor profile.
Proper storage keeps your icebox cake tasting fresh and looking its best. Whether you’re saving slices for later or prepping ahead, follow these methods to lock in flavor and texture.
Here are some quick answers to common questions about making and enjoying your icebox cake:
Active prep time is about 15–20 minutes—whipping the cream, slicing strawberries, and layering. After assembly, the cake must chill at least 4 hours in the refrigerator, though chilling overnight (8–12 hours) is recommended for the best texture.
Yes, you can swap in similar crisp cookies such as digestive biscuits or vanilla wafer cookies. Ensure the substitute is sturdy and plain-flavored so it softens into a cake-like texture without introducing competing flavors.
The whipped cream is ready when the mixture holds its shape firmly: lift the beaters and the peak stands straight up without curling over. If it droops or looks glossy, continue beating a little longer, watching closely to avoid overwhipping into butter.
Use a sharp, clean knife dipped in hot water and wiped dry before each cut. This helps the blade glide through the softened crackers and cream layers cleanly. Wipe the knife between slices to keep edges sharp and neat.
You can assemble and refrigerate it up to 24 hours in advance. For freezing, wrap the pan tightly in plastic wrap and foil; freeze up to one month. Thaw in the fridge overnight before slicing to preserve texture.
Keep leftovers covered in the refrigerator and consume within 2 days. After that, the whipped cream may start to weep and the berries can release excess moisture, which can affect texture and flavor.
Ensure your whipped cream is at stiff-peak stage so it’s thick and not runny. Don’t over-slice or oversoak the fruit before layering. Chilling for at least 4 hours allows controlled softening; avoid leaving the cake at room temperature more than 15 minutes before serving.
This No-Bake Strawberry Icebox Cake stands out because it’s equal parts impressive and effortless. The buttery graham cracker layers soften into a cake-like crumb, while the whipped cream and fresh berries keep every bite light and refreshing. Whether you’re a baking beginner or just craving a fuss-free dessert, this recipe delivers satisfaction with minimal hands-on time. Plus, it’s totally printable—so slip a copy into your recipe binder and whip it out whenever you need a crowd-pleasing sweet treat. Let me know in the comments if you try it, have questions, or discover your own delicious twists!
Sweet strawberry slices nestle between layers of cloud-like whipped cream and crunchy graham crackers. After a few hours in the fridge, each slice reveals a cool, creamy dessert bursting with fresh berry goodness.
Serving Size 12

Hey there! I’m Noah Blake, and welcome to RecipesDive.com — a blog for anyone who’s ready to dive headfirst into real cooking without the intimidation.