Nutrition Facts
Serving Size 12
- Amount Per Serving
- Calories 29kcal

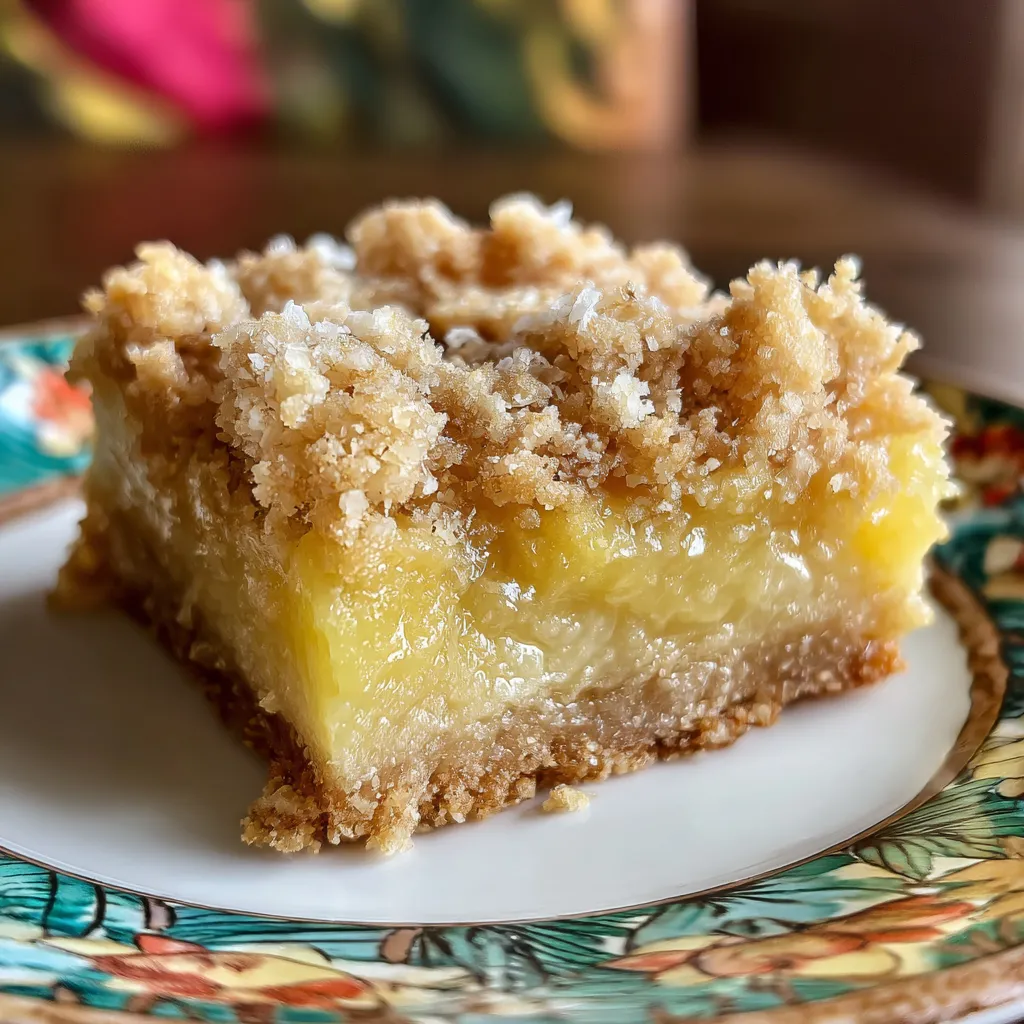
Craving a taste of tropical sunshine? Pineapple Bliss Bars deliver luscious pineapple and sweet coconut flakes atop a buttery graham base, merging creamy cheesecake-style filling with a crisp, golden edge. Whether you’re in need of a simple dessert for beginners or dreaming of a beachy flavor boost in your kitchen, these bars come together in no time and promise every bite to transport you to a sunbathed paradise. Give them a try and get ready to impress your family and friends with this easy, irresistibly creamy treat!
To whip up these Pineapple Bliss Bars, you'll need a handful of simple ingredients that come together to create that perfect balance of crunchy crust, creamy filling, and tropical flair.
Baking these bars is a straightforward process that starts with crafting a sturdy graham cracker crust, moves into whipping up a creamy cheesecake-style layer, and finishes with a sprinkle of coconut for that classic tropical flair. Just preheat your oven, assemble each layer carefully, and give the bars time to bake and chill so every slice comes out clean and firm.
1. Preheat the oven to 350°F (175°C) and line an 8x8-inch baking pan with parchment paper, leaving an overhang for easy bar removal.
2. In a medium bowl, combine graham cracker crumbs, 1/3 cup sugar, and melted butter, stirring until all the crumbs are moistened, then press firmly into the bottom of the pan to form an even crust.
3. Bake the crust for 10 minutes until lightly golden, then remove from the oven and set aside to cool slightly.
4. In a stand mixer or large bowl, beat softened cream cheese on medium speed until smooth, then add 1/2 cup sugar, eggs, and vanilla extract, mixing until the filling is creamy and well combined.
5. Gently fold the drained crushed pineapple into the cheesecake mixture, ensuring the fruit is evenly distributed, then pour the filling over the pre-baked crust.
6. Evenly sprinkle shredded coconut on top of the filling, creating a delicate layer of tropical flavor.
7. Return the pan to the oven and bake for 25 to 30 minutes, or until the center is just set and edges are lightly golden.
8. Allow the bars to cool to room temperature, then refrigerate for at least 2 hours before slicing to achieve clean, firm bars.
These Pineapple Bliss Bars shine when served cool, letting the creamy filling and tropical toppings stand out. Whether you’re hosting a backyard barbecue or indulging in a solo snack session, these versatile bars pair well with a variety of accompaniments. Try these ideas below to take your serving to the next level:
Making Pineapple Bliss Bars couldn’t be simpler, but these insider tips will help you nail every layer, from the sturdy crust to the creamy center and that irresistible coconut topper. Read on for easy adjustments and pro-level tweaks guaranteed to elevate your tropical cheesecake bars.
Proper storage maintains that dreamy cream cheese texture and the tropical tang of pineapple bars. Whether you’re saving leftovers for a midweek treat or prepping ahead for a party, these storage solutions will help preserve flavor, moisture, and presentation.
Got questions about these blissful bars? Here are some quick answers to common queries that will help you get the perfect tropical treat every time.
A: You’ll spend about 15 minutes on prep (lining the pan, mixing crust and filling), 10 minutes baking the crust, 25–30 minutes baking the filling, 20–30 minutes cooling at room temperature, and at least 2 hours chilling in the fridge. In total, plan for around 3 hours from start to slicing.
A: Place the crushed pineapple in a fine-mesh sieve or colander over a bowl and let it drain for 5–10 minutes. Gently press with the back of a spoon or paper towel to remove excess juice. Well-drained pineapple ensures the filling isn’t too wet.
A: After combining crumbs, sugar, and melted butter, press the mixture firmly into the bottom of the lined pan using the bottom of a measuring cup or the flat side of a spatula. A tightly packed crust bakes into a firm base that won’t fall apart when you slice the bars.
A: After chilling the bars for at least 2 hours, run a sharp knife under hot water, dry it off, and slice all the way through. Wipe the blade clean between cuts and reheat briefly under hot water before the next slice for smooth edges.
A: You can swap graham cracker crumbs for digestive biscuits or use low-fat cream cheese, but the bars may be slightly denser or less rich. If you opt for canned pineapple, be extra sure it’s fully drained. For added crunch, stir in chopped macadamia nuts before sprinkling on the coconut.
A: Transfer cooled bars to an airtight container and refrigerate. Stored this way, they’ll stay fresh for up to 5 days. If you’d like to keep them longer, you can freeze individual slices wrapped tightly in plastic wrap and foil for up to 1 month.
These Pineapple Bliss Bars hit the sweet spot between a cheesecake indulgence and a tropical getaway – the tangy pineapple, creamy filling, and toasty coconut deliver a flavor party in every bite. It works because the sturdy graham crust balances the soft center, the drained pineapple keeps it from getting soggy, and that final chill ensures neat slices you’ll be proud of. Go ahead, save or print this recipe to have it on hand for any dessert emergency, then let me know how your first batch turns out or if you’ve swapped in any fun twists!
Creamy layers of cheesecake-style filling meet tangy pineapple and sweet coconut flakes atop a buttery graham base. Each bite offers a soft, cool center contrasted by a golden baked edge and a hint of tropical breeze.
Serving Size 12

Hey there! I’m Noah Blake, and welcome to RecipesDive.com — a blog for anyone who’s ready to dive headfirst into real cooking without the intimidation.