Nutrition Facts
Serving Size 8
- Amount Per Serving
- Calories 31kcal

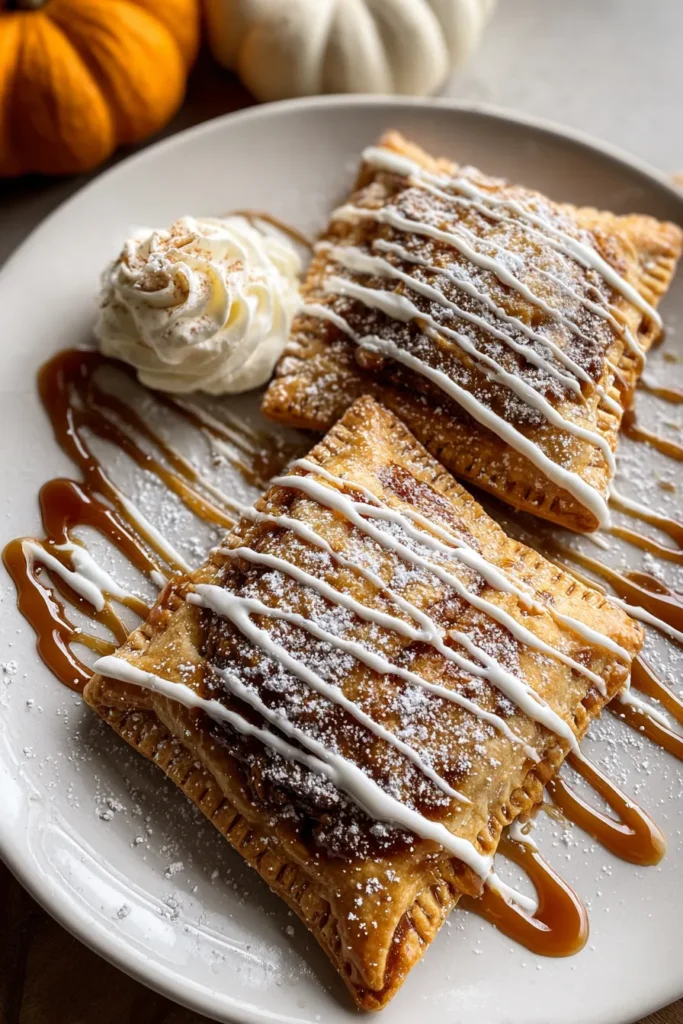
There’s something about the first bite of a homemade Pumpkin Pie Pop Tart that feels like wrapping yourself in a warm, flaky embrace. The golden crust shatters under your teeth, giving way to a creamy swirl of spiced pumpkin that tastes like autumn captured in a little handheld package. Whether you’re a seasoned baker or a curious kitchen rookie, these pop tarts are delightfully approachable—you don’t even need to wrestle a batch of homemade pie dough. These flakey rectangles are ready-made autumn magic, perfect for a crisp morning or an afternoon pick-me-up.
I still remember the first time I pulled a tray of these beauties from the oven. The scent of brown sugar mingled with cozy pumpkin pie spice filled the kitchen, and I couldn’t wait to drizzle that sweet vanilla glaze on top. Each tart turned out perfectly golden, with delicate edges sealed by the satisfying “press” of a fork. They were the star of my Sunday brunch, disappearing faster than I could say “pass the coffee.” With just a handful of simple ingredients and under an hour of active time, you’re well on your way to your own pop tart triumph.
Before diving into the baking process, let’s chat about what makes these pop tarts shine. Each ingredient plays a crucial role in balancing flaky texture, warm spices, and sweet glaze. Here’s what you’ll need to conjure up these autumn-on-the-go treats:
These ready-to-roll pastry sheets are the backbone of our pop tarts. They save time and guarantee consistent thickness, giving you a uniform, flaky crust without the hassle of homemade dough.
Smooth and velvety, this puree provides that unmistakable pumpkin flavor and creamy consistency. It’s the heart of the filling, bringing moisture and a subtle sweetness.
With its rich, molasses-like notes, brown sugar lends a warm depth of flavor that pairs perfectly with pumpkin. It helps caramelize the filling edges for a lightly chewy texture.
This aromatic blend of cinnamon, nutmeg, ginger, and cloves injects that quintessential fall vibe. It ensures every bite tastes as though it was seasoned with crisp autumn air.
Just a pinch of salt elevates all the other flavors. It balances the sweetness and sharpens the spiced nuances in the filling.
Beaten into the filling and used in the egg wash, an egg provides both richness and sheen. It helps seal the pastry edges and gives the crust that appetizing golden glow.
When whisked with the egg, milk thins the mixture for a silky egg wash that’s easy to brush on, ensuring even browning and a glossy finish.
The foundation of our glaze, this superfine sugar dissolves smoothly for a luscious topping. It offers the sweet counterpoint to the spiced filling.
Rich and velvety, heavy cream helps the glaze achieve a thick, pourable consistency. It adds a subtle richness that complements both crust and filling.
A splash of vanilla warms up the glaze with its sweet, floral aroma. It ties together sugar and cream into a cohesive, irresistible frosting.
For a playful or extra-spiced finish, these garnishes add color, texture, or a hint of cinnamon kick. They’re entirely optional but delightfully festive.
Now that we’ve gathered our ingredients, let’s walk through turning them into warm, flaky pockets of pumpkin paradise. The process is straightforward, with a few key techniques—like creating an egg wash and properly sealing the edges—ensuring perfect results every time.
1. Preheat your oven to 375°F (190°C). Line a baking sheet with parchment paper to prevent sticking and make cleanup a breeze.
2. In a small bowl, mix together the pumpkin puree, brown sugar, pumpkin pie spice, and salt until the filling is smooth and spices are evenly distributed. Set this mixture aside.
3. Roll out the pre-made pie crusts on a lightly floured surface. Cut each crust into 8 even rectangles, giving you a total of 16 pieces for assembly.
4. Spoon about 1 tablespoon of the pumpkin mixture onto 8 of the rectangles, spreading it evenly while leaving a small border around the edges so sealing is easier.
5. Beat the egg with the milk to create your egg wash. Brush the edges of each pumpkin-topped rectangle lightly with this wash to ensure a tight seal.
6. Place the remaining 8 rectangles over the filled ones. Firmly press the edges together with a fork to seal in the filling and prevent any leaks during baking.
7. Lightly brush the tops of each pop tart with the leftover egg wash to achieve that signature golden sheen once baked.
8. Bake in the preheated oven for 20–25 minutes, or until the crusts turn golden brown. Transfer the hot tray to a wire rack and let the pop tarts cool completely.
9. Prepare the glaze by whisking together powdered sugar, heavy cream, and vanilla extract in a small bowl until you have a smooth, pourable consistency.
10. Once cool, drizzle the glaze over each pop tart. For an extra pop of color or spice, finish with sprinkles or a dusting of cinnamon.
After all that baking bliss, these pop tarts deserve a grand presentation. Whether you’re sharing them at a weekend brunch or indulging in a solo treat, here’s how to elevate every mouthful. From pairing with your favorite beverages to creating a vibrant fall spread, these ideas will have your guests reaching for seconds (and maybe even thirds). Each suggestion is designed to complement the flaky pastry and sweet, spiced pumpkin filling, helping you turn simple homemade pastries into a memorable feast.
Plate two pop tarts on a small dish, heat them for a few seconds in the microwave to revive that fresh-out-of-the-oven warmth, and place beside a mug of strong coffee or latte. The bold roast flavors highlight the sweet spice of the pumpkin filling.
Slice cooled pop tarts diagonally, spread a thin layer of mascarpone or Greek yogurt on top, and finish with fresh pomegranate seeds and chopped nuts. This transforms each rectangle into a sophisticated party bite.
Arrange one cooled pop tart with sliced apple, cheese cubes, and a small container of Greek yogurt. It’s a balanced mix of carbs, fruit, and protein—perfect for busy mornings or lunches.
Lay pop tarts alongside seasonal fruits like pears and figs, small jars of honey and nut butter, and assorted nuts. Guests can mix and match spreads, making it interactive and visually stunning.
Whether you bake a double batch for friends or simply want to have these treats on hand, proper storage is key to keeping that flaky texture and sweet-spiced flavor intact. The right method will preserve freshness, avoid sogginess, and ensure your pop tarts taste just as delightful days later. Below are the best practices for short-term and longer-term storage, so you can bake once and enjoy throughout the week.
After completely cooling, stack pop tarts in a single layer (or separate layers with parchment paper) inside an airtight container. Stored at room temperature, they’ll stay fresh for up to 3 days.
If you plan to keep them a bit longer (up to 5 days), store the tarts in the fridge. Make sure they’re in an airtight container or sealed bag to prevent moisture absorption. Bring to room temperature or warm briefly before serving.
Wrap each cooled pop tart individually in plastic wrap, then place them in a freezer-safe bag. They’ll keep for up to 2 months. To enjoy, thaw at room temperature or reheat directly from frozen in a toaster oven until warmed through.
For that just-baked crispness, heat pop tarts in a toaster oven or conventional oven at 350°F (175°C) for 5–7 minutes. Avoid microwaving for too long, as it can soften the crust.
This adventure through Pumpkin Pie Pop Tarts has guided you from simple ingredients to flaky perfection—just the ticket for a sweet breakfast or snack that feels special every time. We’ve covered everything from prepping that warm pumpkin filling, mastering the seal with an egg wash, and crafting the silky vanilla glaze to knowing exactly how to store your treasures so they stay fresh and delicious. With a total time of under an hour—20 minutes of prep, 25 minutes of baking, and a brief rest—you’ll have a homemade treat that rivals anything in a bakery case.
Feel free to print this article and tuck it into your favorite recipe binder; it’s a keeper for every fall season. You can also save it for quick reference on busy mornings or weeknight dessert cravings. Below, you’ll find a handy FAQ to address common questions about variations, troubleshooting, and more. If you give these pop tarts a whirl, I’d love to hear how they turned out! Leave a comment sharing your kitchen victories, any twists you tried, or questions if you hit a snag. Your feedback helps this friendly cooking community grow—happy baking!
Imagine biting into a crispy crust filled with spiced pumpkin puree and topped with a luscious glaze. Perfect for breakfast or a sweet treat anytime!
Serving Size 8

Hey there! I’m Noah Blake, and welcome to RecipesDive.com — a blog for anyone who’s ready to dive headfirst into real cooking without the intimidation.