Nutrition Facts
Serving Size 10
- Amount Per Serving
- Calories 5kcal

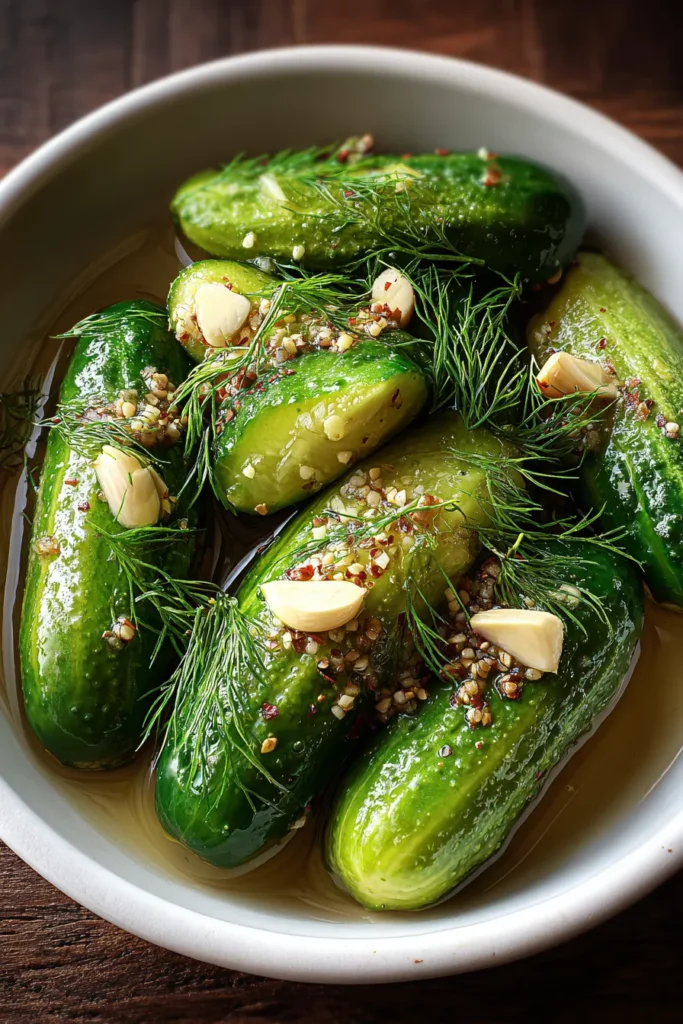
There’s something so rewarding about whipping up a small batch of refrigerator pickles. These Garlic Dill Pickles aren’t just any ordinary pickles—they’re crunchy, garlicky, and bright with fresh dill that dances on your palate. You’ll feel the excitement as you tuck crisp cucumbers into jars, pour over that tangy brine, and seal in all the flavor magic. It’s a simple ritual, but it feels like a celebration every time you hear the gentle clink of glass jars on your countertop. As the garlic and dill infuse, your kitchen takes on a lively buzz, and you’ll catch yourself stealing a sneak-peek slice after just a day in the fridge!
Once you finally open a jar and bite into that first crisp spear, you’ll experience a snap of texture that’s irresistible. The interplay of white vinegar and a hint of sweetness from sugar gives each mouthful the perfect balance of tart and mellow. Kosher salt brings out the cucumber’s natural sweetness while the black peppercorns and red pepper flakes add a playful kick. Before you know it, these little jars of goodness become the star of every snack tray, sandwich, or charcuterie board you assemble. And the best part? No canning equipment is required: just straightforward ingredients, a few easy steps, and a couple days of patience. Whether you’re new to pickling or a seasoned pro, this recipe welcomes everyone into the joy of homemade preserves, delivering a crunchy, flavorful treat in a fraction of the time of traditional methods.
To assemble this small batch of Refrigerator Dill Pickle Garlic, you only need a handful of everyday pantry staples and fresh produce. Each ingredient plays a crucial role in creating the signature crunch, tang, and aromatic layers that make these pickles so addictive.
Provide the essential crunch and fresh, green flavor. Picking cucumbers of similar size ensures even pickling so every spear or slice tastes consistently delicious.
Acts as the base of the brine. When combined with vinegar, it dilutes acidity just enough to highlight the natural cucumber taste without overpowering it.
Delivers the classic tang that defines a dill pickle. Its acidity helps preserve the cucumbers, ensuring they stay crisp and flavorful in the fridge.
Enhances the overall flavor while drawing out moisture from the cucumbers. Its purity allows the crunchy texture to shine through without any off-flavors.
Balances the sharpness of the vinegar with a touch of sweetness, rounding out the flavor profile for a more nuanced bite.
Infuse the brine with savory depth. Smashed and peeled, they release aromatic oils that seep into each cucumber piece.
Add subtle heat and a mild peppery aroma, creating little bursts of spice in every bite.
Offer a faintly sharp, nutty note. As they soak, they swell and release tiny pops of flavor throughout the jar.
Bring a gentle kick of heat. They wake up the palate without overwhelming the garlic-and-dill combination.
Provides that unmistakable dill fragrance and herbaceous freshness. Chopped roughly, it distributes leafy goodness in each jar.
Before diving into the step-by-step instructions, know that this process is all about layering flavors. You’ll prepare a warm brine, infuse it with garlic and spices, and then let nature do the work in your refrigerator. In just a day or two, you’ll have crisp, zesty pickles that taste like they’ve been fermenting for weeks.
1. Prepare your cucumbers by washing them thoroughly and trimming the ends. If the cucumbers are particularly thick, feel free to slice them into spears or rounds so they’ll soak up the brine more evenly.
2. In a medium saucepan, combine the water, white vinegar, kosher salt, and granulated sugar. Bring the mixture to a simmer over medium heat, stirring until the salt and sugar are completely dissolved. Remove the pan from heat and let the brine cool slightly so it won’t wilt the cucumbers.
3. In a clean jar or a few small jars, evenly distribute the garlic cloves, black peppercorns, mustard seeds, red pepper flakes, and chopped dill. This spice layer ensures every cucumber piece picks up maximum aroma.
4. Pack the cucumbers tightly into the jars, leaving about 1/4-inch of headspace at the top. The snug fit helps the brine cover each piece without too much air exposure.
5. Carefully pour the warm vinegar mixture over the cucumbers, ensuring they are fully submerged. Tap the jar gently on the countertop to release any trapped air bubbles, then add more liquid if needed.
6. Seal the jars with lids and let them cool to room temperature on the counter before moving forward. This step prevents sudden temperature shifts that can affect texture.
7. Once the jars are cool, place them in the refrigerator and allow them to pickle for at least 24 hours before tasting. For deeper flavor development, wait 2–3 days—the patience is worth every crisp, garlicky bite.
These garlicky dill pickles shine in so many culinary settings. Whether you’re looking to spice up a casual snack or give a zesty twist to your favorite dishes, these pickles elevate nearly any plate. Their bright acidity, crunchy texture, and subtle heat make them the perfect sidekick. You’ll find yourself reaching for them when you need a refreshing contrast to rich flavors or a refreshing bite to cleanse the palate. Plus, their homemade charm adds a personal touch when entertaining friends or family. Let your creativity run wild and incorporate these pickles into everything from lazy lunches to celebratory feasts. Here are four fun ways to serve your new favorite refrigerator pickles:
Arrange pickle spears alongside a variety of cheeses, cured meats, and rustic bread for a balanced charcuterie board. Their acidity cuts through creamy cheeses and fatty charcuterie, making every bite more exciting.
Layer thin pickle slices on your favorite deli or vegan sandwich. The pop of garlicky tang takes basic cold cuts, veggies, or grilled cheese to the next level, adding both flavor and texture.
Chop a few pickles into bite-sized bits and toss them into green salads or grain bowls. They introduce a crunchy, refreshing element that pairs beautifully with avocado, tomatoes, and a simple olive oil dressing.
Serve whole spears or rounds on a small plate as a zesty snack. Keep a jar in the fridge for moments when you crave something crunchy, savory, and light without any guilt.
Once your garlic dill pickles have transformed into delicious, tangy treats, proper storage is key to maintaining their crunch and flavor. The beauty of refrigerator pickles is their simplicity: no canning water bath or fancy equipment is needed. However, following a few storage best practices will help you enjoy these pickles at their very best. Always use clean utensils to avoid introducing contaminants, and keep an eye on the seal of your jars to ensure freshness. While these pickles keep for weeks, they often taste best within the first month or two, when the cucumber’s texture remains crisp. Below are some tried-and-true methods to store your pickles so they stay vibrant and flavorsome:
Store the sealed jars on a middle or top shelf where the temperature is most consistent. Avoid placing them on the door, where temperatures fluctuate when the fridge opens and closes.
Always use a clean fork or tongs to remove pickles from the jar. Introducing crumbs or other food particles can shorten their shelf life and invite spoilage.
Mark each jar with the preparation date. While these pickles can stay fresh for up to two months, labeling helps you track peak flavor periods and ensures you use the oldest batches first.
Keep jars away from the fridge’s vegetable crisper, which can have slightly higher humidity. Consistent cold keeps the cucumbers crisp and prevents softening or cloudiness in the brine.
Bringing this Refrigerator Dill Pickle Garlic Small Batch recipe into your kitchen means never settling for store-bought pickles again. You’ve learned how to transform simple cucumbers into layers of garlicky, tangy, and herbaceous perfection using a straightforward brine and fresh spices. From washing and trimming those crisp cucumbers to simmering the brine, layering in vibrant dill and aromatics, and patiently waiting for that memorable first taste, every step has been designed with home cooks in mind. The ease of this recipe—beginner-friendly, minimal equipment needed, and small enough to fit on any countertop—makes it a go-to for spontaneous pickle cravings or last-minute appetizer needs. Don’t forget to print this article or save it in your recipe binder so you can revisit these flavorful pickles whenever the mood strikes.
Once you open a jar, you’ll understand why these pickles elevate any meal or snack. Whether you’re adding a bright crunch to sandwiches, salads, or charcuterie boards, or indulging in them straight from the jar, your taste buds will thank you. Feel free to experiment by tweaking spice levels or trying additional ingredients like coriander seeds for a twist. We’ve included a handy FAQ below to address common questions—so feel free to scroll down for answers! If you give this recipe a spin, I’d love to hear how it turned out. Drop a comment with your feedback, questions, or flavor variations. Happy pickling, and here’s to countless crunchy bites ahead!
These crunchy, vibrant dill pickles infused with garlic and spices are a must-try! Perfect for snacking or as a zesty addition to any meal, they're simple to make.
Serving Size 10

Hey there! I’m Noah Blake, and welcome to RecipesDive.com — a blog for anyone who’s ready to dive headfirst into real cooking without the intimidation.