Nutrition Facts
Serving Size 4
- Amount Per Serving
- Calories 8kcal

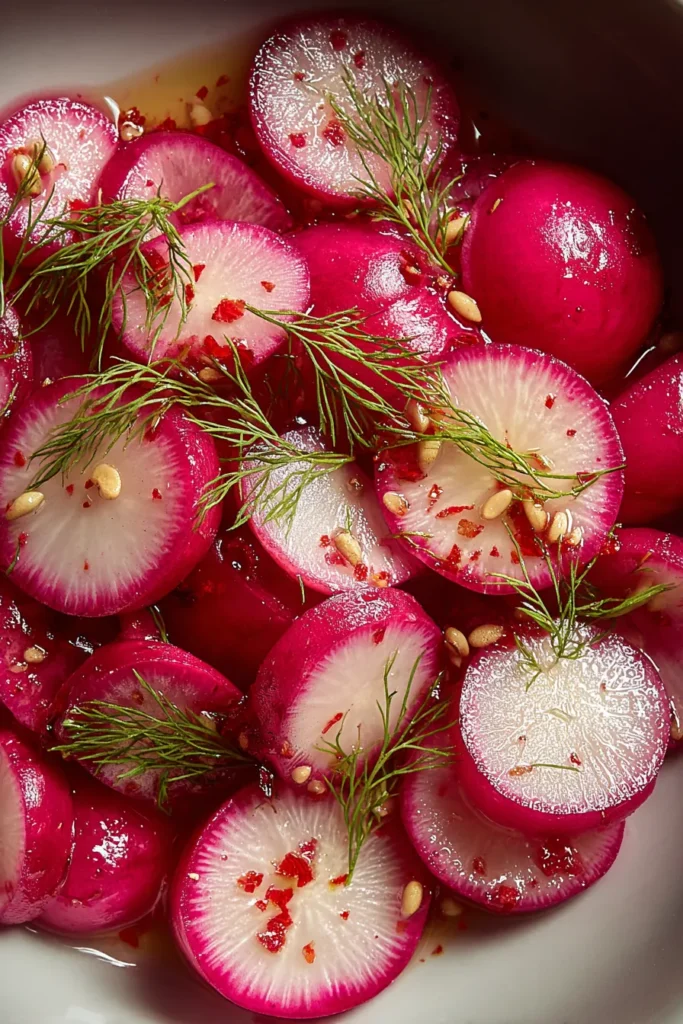
When I first stumbled upon the magic of quick refrigerator pickled radishes, I was amazed at how such a simple process could transform a humble bunch of fresh vegetables into a tangy, crunchy delight. These bright pink slivers pack a zesty punch that wakes up your taste buds, making them a perfect addition to anything from a casual lunch to an elegant dinner spread. With just 10 minutes of active preparation and another 10 minutes on the stovetop, you’ll set aside your worries and let nature—and a nifty little spice blend—work its wonders. As a beginner-friendly recipe, it demystifies pickling, turning it into an easy recipe you can master in under half an hour. After a 24-hour rest time (or up to 48 hours for deeper flavor), you’ll have refrigerator pickles that keep their crispness while soaking up sweet, sour, and savory notes. At only 25 calories per serving, they’re guilt-free tangy snacks that brighten each bite without weighing you down.
Since those first crunchy bites, I’ve found myself reaching for this recipe again and again: as an appetizer on a cozy weekend gathering, a vibrant garnish for breezy summer salads, or simply a refreshing snack straight from the jar. The beginner-level instructions ensure you won’t get overwhelmed, and the subtitle—Quick and Easy Refrigerator Pickled Radishes to Brighten Your Meals—really says it all. You don’t need any fancy equipment beyond a glass jar and a mandoline (or a sharp knife), and you can personalize the spice blend with coriander seeds, fennel seeds, or a pinch of red pepper flakes for extra kick. Whether you’re aiming to jazz up a sandwich, create a tangy topping for tacos, or serve them as a refreshing side, these pickled radishes prove that homemade refrigerator pickles can be both simple and sensational. Get ready to savor the zesty crunch of homemade pickled radishes, and let this lively recipe become a staple in your kitchen repertoire.
Every great recipe starts with fresh, quality ingredients that come together to create magical flavors. In this section, we’ll explore the key players behind the tangy crunch of our refrigerator pickled radishes. Each element brings its own texture, aroma, and taste to the party, helping you understand how they interact in a perfectly balanced brine.
Crisp and vibrant, radishes are the star of the show. Their natural peppery flavor mellows in the brine, leaving a delightful crunch that holds up beautifully over time.
This clear, mildly acidic vinegar provides the tang that characterizes classic refrigerator pickles. It’s the backbone of the brine, preserving the radishes and lending bright, refreshing acidity.
Used to dilute the vinegar slightly, water balances the bite and ensures the brine isn’t overwhelmingly sharp, creating a gentle medium for flavor infusion.
A touch of sweetness softens the acidity and enhances the natural earthiness of the radishes. Sugar also helps the spices bloom, contributing to a rounded, harmonious taste.
Essential for drawing moisture out of the radishes through osmosis, salt intensifies flavor and ensures crispness. It also acts as a preservative, extending shelf life.
Bold and warming, these peppercorns add subtle heat and a fragrant, woody note to the brine, elevating the overall complexity.
Tiny flavor bombs that burst with tanginess and mild spice when soaked in hot liquid. They infuse the brine with a gentle pungency.
Earthy and slightly floral, the bay leaf contributes herbal depth, rounding out the sharpness of vinegar and the sweetness of sugar.
Peeled and smashed, garlic releases its aromatic oils into the hot brine, imparting garlicky warmth without overpowering the profile.
Add a few sprigs of dill for fresh, grassy notes or a pinch of red pepper flakes for a spicy kick, customizing the pickles to your personal taste.
Transforming crisp radishes into tangy refrigerator pickles is a breeze, and each step is designed to guide you through the process with confidence. In just a few simple moves, you’ll harness heat, herbs, and time to create a flavor-packed brine that soaks deep into every slice. Ready your tools, gather your ingredients, and let’s dive into pickling perfection.
1. Clean the radishes thoroughly with cold water, gently scrubbing away any residual soil. Use a knife or mandoline to slice them into uniform, paper-thin rounds, ensuring each piece pickles evenly and looks gorgeous in the jar.
2. In a small saucepan, combine the white vinegar, water, sugar, and salt. Place the pan over medium heat and bring the mixture to a simmer, stirring constantly until the sugar and salt have completely dissolved into the liquid.
3. Remove the saucepan from heat and add the whole black peppercorns, mustard seeds, bay leaf, and smashed garlic cloves to the hot brine. Let them steep briefly to release their essential oils and aromatic compounds.
4. If you choose to include fresh dill or a pinch of red pepper flakes, add them now. These optional ingredients infuse extra layers of herbal or spicy flavor, depending on your preference.
5. Arrange the sliced radishes in a clean glass jar or any heatproof container that holds at least two cups of liquid. Stand them upright or layer them neatly to maximize surface contact with the brine.
6. Pour the hot vinegar brine over the radishes, making sure each slice is fully submerged. Use a small spoon or spatula to gently press down any buoyant slices.
7. Allow the jar to cool to room temperature, then seal it tightly with a lid. This prevents air from diluting the brine or allowing contaminants in.
8. Transfer the sealed jar to the refrigerator and let the radishes pickle for a minimum of 24 hours. For a deeper, more robust flavor, wait 48 hours before indulging.
9. Keep the pickled radishes refrigerated for up to two weeks. Always use a clean fork or utensil to retrieve servings, maintaining freshness and safety.
These pickled radishes are gloriously versatile, enhancing everything from crunchy salads to hearty sandwiches. Their vibrant color and bold flavor make each dish pop, inviting both the eyes and the palate to come alive. Here are some fun and creative ways to put these tangy snacks to good use in your everyday meals:
Proper storage is key to maintaining the crispness and vibrant flavors of your homemade pickled radishes. With a few simple guidelines, you can ensure that every jar you open tastes as fresh as the day you made it. Follow these tips to keep your refrigerator pickles at peak quality for up to two weeks:
From the very first tangy crunch to the last bright bite, these refrigerator pickled radishes prove that homemade refrigerator pickles can be both simple and sensational. We’ve covered everything—fresh ingredients, step-by-step pickling instructions, serving inspirations, and storage tips—so you’re fully equipped to brighten up sandwiches, salads, tacos, and more. As a beginner-friendly recipe, it offers a quick and easy pathway to making zingy, flavorful pickles in under half an hour of active time. After a 24-hour rest, or for even bolder taste at 48 hours, you’ll discover how sugar, vinegar, salt, and spices harmonize to transform everyday radishes into gourmet garnishes. With just 25 calories per 1/4 cup serving, these tangy snacks let you indulge in crisp, vibrant flavor guilt-free.
Feel free to print this article and save it in your recipe collection for future use. You can also find a FAQ below to address common pickling questions and troubleshoot any challenges. If you try this recipe, I’d love to hear how it goes—share your comments, questions, or feedback! Whether you’re a pickling novice or a seasoned brine enthusiast, your insights help this community grow. Happy pickling!
Experience the zesty crunch of homemade pickled radishes! Perfectly tangy, they're a delightful topping for sandwiches or a refreshing snack on their own.
Serving Size 4

Hey there! I’m Noah Blake, and welcome to RecipesDive.com — a blog for anyone who’s ready to dive headfirst into real cooking without the intimidation.