Nutrition Facts
Serving Size 4
- Amount Per Serving
- Calories 151kcal

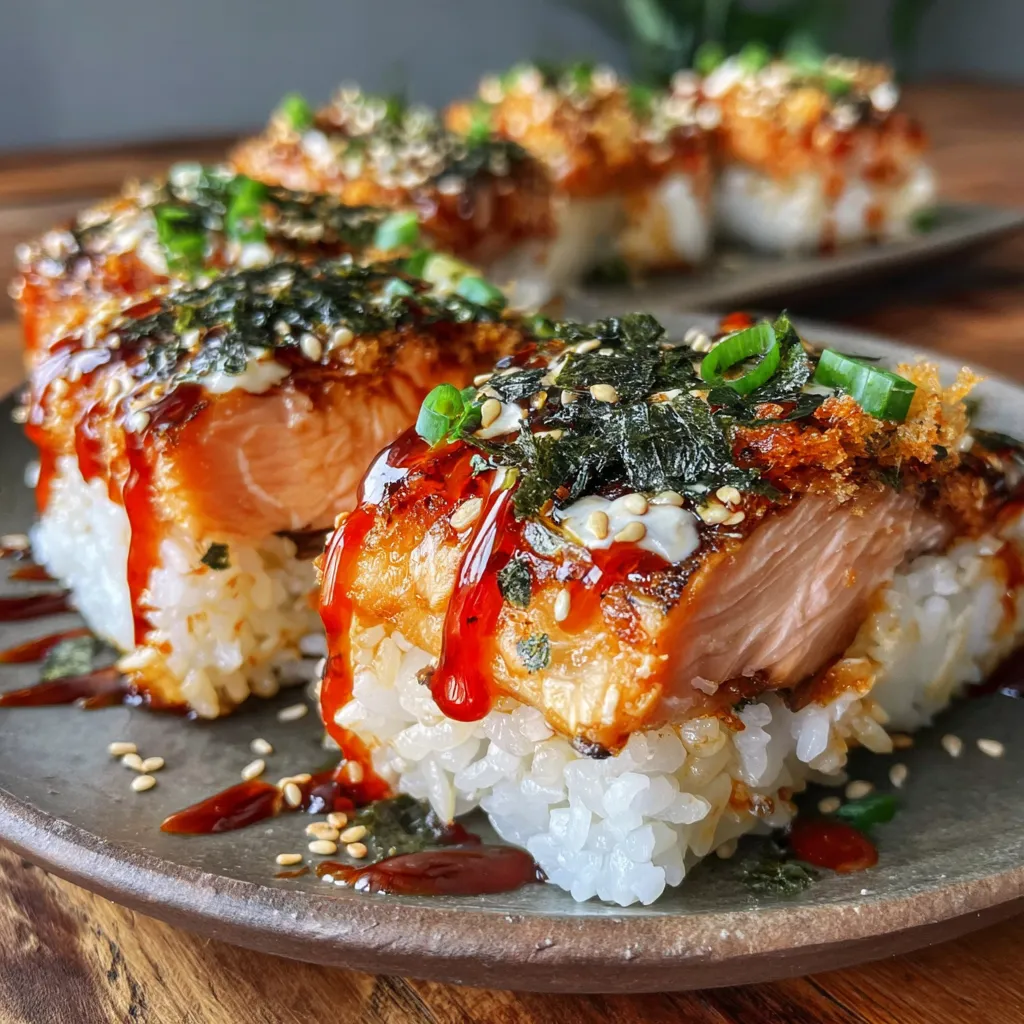
Get ready to dive into a Salmon Sushi Bake—a layered casserole where tangy sushi rice meets creamy spicy salmon and crisp nori, perfect for sharing at home gatherings. Fluffy vinegar-seasoned rice is topped with flaky salmon tossed in a zippy sriracha mayo, layered and baked until golden and bubbly. Each savory square scooped onto a piece of nori bursts with tang, spice, and umami crunch. Whether you’re feeding a crowd or just craving comfort food with a Japanese twist, this recipe delivers a playful way to enjoy all the flavors of sushi without rolling a single piece.
Before jumping into the kitchen, let’s gather the simple yet flavorful ingredients that make this Salmon Sushi Bake so irresistible.
With our ingredients at the ready and your oven preheated, making this Salmon Sushi Bake is a breeze. Follow these steps to cook the rice, bake the salmon, layer the flavors, and finish with a final bake that turns everything golden and bubbly. It’s all about timing and gentle handling to preserve the fluffy texture of the rice and the flakiness of the fish. Ready? Let’s get cooking!
1. Preheat your oven to 375°F and lightly grease an 8x8-inch baking dish with oil or cooking spray to ensure easy removal and even browning.
2. Rinse 2 cups sushi rice under cold running water, stirring gently until clear. Combine with 2 1/4 cups water in a pot, bring to a boil, then reduce to low heat, cover tightly, and simmer for 18 minutes without lifting the lid.
3. In a small bowl, whisk together 3 tablespoons rice vinegar, 1 tablespoon sugar, and 1 teaspoon salt until dissolved. Transfer the hot rice to a large bowl, gently fold in the vinegar mixture using a cutting motion, then spread evenly in the baking dish and press down lightly.
4. Place the 1 pound salmon fillet on a sheet of foil, drizzle with a bit of sesame oil, season with salt and pepper, wrap tightly, and bake for 12–15 minutes or until just cooked through. Let cool slightly, then flake with a fork.
5. In a mixing bowl, combine the flaked salmon with 1/2 cup Japanese mayonnaise, 2 tablespoons sriracha sauce, 1 tablespoon soy sauce, 1 teaspoon sesame oil, 1 tablespoon furikake seasoning, and 2 tablespoons chopped green onions, mixing until smooth and well blended.
6. Spread the salmon mixture evenly over the rice layer, smoothing the top with a spatula, then sprinkle 1 teaspoon sesame seeds over the surface for extra crunch.
7. Bake for an additional 10 minutes, or until the top is bubbly and lightly golden.
8. Allow the bake to rest for 5 minutes, then cut into squares using a sharp knife for clean edges.
9. Serve each square on a piece of nori seaweed, wrapping as desired, and enjoy immediately for the best sushi-style experience.
When it comes to serving your Salmon Sushi Bake, presentation and accompaniments can turn a simple casserole into a memorable feast. Start by arranging the squares on a platter and surround them with vibrant sides like pickled ginger, sliced cucumbers, or a simple edamame salad. Offer a selection of dipping sauces and garnishes, and let guests customize each bite. Whether you’re hosting a casual get-together or a cozy dinner at home, these ideas will ensure every square is devoured with delight.
To get this Salmon Sushi Bake just right, a few simple tricks can make your life way easier. Using leftover cooked salmon saves time—just flake it and skip the foil packet step. If you plan ahead, cook and season the sushi rice a day early, then keep it covered in the fridge; it’ll taste even better after the flavors meld and you’ll breeze through assembly on baking day. Want to dial the heat down or crank it up? Adjust the amount of sriracha sauce to suit everyone’s taste buds. And don’t worry about leftovers—they keep beautifully for up to two days, so slice, store, and pop them back in the oven for a quick, satisfying snack or lunch later on.
Storing your Salmon Sushi Bake properly ensures every square retains its delicious texture and flavor. After baking, let the casserole cool completely at room temperature—this prevents condensation and sogginess when you seal it. Whether you have leftovers or just want to prep ahead for a gathering, following these simple methods will keep your bake fresh and ready to enjoy. From airtight refrigeration to freezing individual portions, you’ll maintain that perfect balance of tender rice and creamy topping so it tastes just as amazing the next day.
Got questions? Here are some answers to common queries about making and storing your Salmon Sushi Bake.
Rinse the sushi rice under cold water until the water runs clear to remove excess starch. Cook it with 2 1/4 cups of water, bringing it to a boil before reducing to low heat and simmering for 18 minutes. While it’s still hot, gently fold in the rice vinegar, sugar, and salt mixture, using a cutting motion so you don’t crush the grains. Spread and press the rice evenly in the baking dish, then let it rest briefly to set before layering.
Yes. You can cook and season the sushi rice up to one day ahead, storing it covered in the refrigerator to prevent drying. You can also bake and flake the salmon in advance—store it in an airtight container in the fridge. On baking day, simply assemble the rice, topping, and finish the final bake for best results.
If Japanese mayonnaise is unavailable, use a high-quality, lightly sweet mayo or Kewpie if possible for similar creaminess. For furikake, you can sprinkle toasted sesame seeds mixed with a pinch of dried seaweed or a dusting of ichimi togarashi for umami flavor. Adjust seasonings to taste.
The recipe calls for 2 tablespoons of sriracha. For milder flavor, start with 1 tablespoon and taste before adding more. If you crave extra spice, increase up to 3 tablespoons or swirl in a few drops of chili oil. Balancing with a little extra mayonnaise will tame the heat if it becomes too fiery.
Transfer cooled bake squares into an airtight container and refrigerate for up to two days. To reheat, place them in a preheated oven at 350°F for about 8–10 minutes until warmed through and the top is lightly bubbly again. Avoid the microwave, which can make the rice gummy.
After cutting the bake into squares, lay a sheet of nori on your hand or plate, top with a square, and wrap it burrito-style or fold into a small taco. Add extra chopped green onions, a drizzle of soy sauce, or pickled ginger on the side for authenticity and brightness.
Ensure your oven is fully preheated to 375°F before the final bake. If it’s still not golden after 10 minutes, switch to broil on high for 1–2 minutes while watching closely to avoid burning. Position the dish in the upper third of the oven for best results.
Who knew baking sushi could be so addictive? This Salmon Sushi Bake takes the classic elements of baked sushi—from fluffy vinegar-kissed rice to creamy sriracha mayo salmon—and transforms them into a generous casserole that’s fun to serve and even more fun to eat. The crisp nori and sesame seeds add just the right crunch, while the playful layering means you get a perfect bite every time. Feel free to print and save this article for your next gathering—you’ll want to revisit these flavor-packed squares again and again. Have questions, tweaks, or rave reviews? Drop a comment below and let’s chat!
Fluffy vinegar-seasoned rice meets flaky salmon tossed in creamy sriracha mayo, layered and baked until golden and bubbly. Scooped onto crisp nori, each bite bursts with tang, spice and umami crunch.
Serving Size 4

Hey there! I’m Noah Blake, and welcome to RecipesDive.com — a blog for anyone who’s ready to dive headfirst into real cooking without the intimidation.