

If you’re craving a dish that wraps you in warmth and satisfaction, these Beef-Stuffed Shells with Creamy Ricotta Filling are just the ticket. Each gigantic pasta shell becomes a little edible treasure chest, brimming with a luscious blend of ricotta, Parmesan, and fragrant herbs. Topped with hearty, simmered ground beef and blanketed in bubbling mozzarella, every bite offers a dance of textures—creamy, tender, and delightfully melty. It’s the kind of meal that transforms a simple evening into a memorable experience, whether you’re treating yourself after a long day or surprising family and friends with an impressive homemade feast.
There’s a comforting rhythm in assembling these shells—boiling the pasta until al dente, sautéing onions until they turn translucent gold, and browning beef until it reaches that perfect caramelized edge. By the time everything comes together in the oven, anticipation hums in the kitchen air. This intermediate-level dinner takes about 20 minutes to prep, 40 minutes to bake, plus 10 minutes to rest—worth every second for the luscious reward. At roughly 450 calories per serving, it strikes a delicious balance between indulgence and satisfaction, making it an ideal centerpiece for any weeknight dinner or lazy weekend gathering.
KEY INGREDIENTS IN BEEF-STUFFED SHELLS WITH CREAMY RICOTTA FILLING
Before diving into the kitchen chaos, let’s get familiar with the essentials that give this recipe its soul. Each component plays a distinct role, from the foundation of the pasta to the final cheesy flourish. Understanding these building blocks will help you appreciate the harmony of flavors you’re about to create.
- Jumbo pasta shells
Sturdy vessels designed to cradle the creamy and beefy fillings. Their extra-large size ensures you get a perfect scoop of filling in every bite.
- Olive oil
Acts as the flavor carrier when sautéing aromatics. Its fruity richness enhances the natural sweetness of onions and garlic.
- Onion
Brings a mild sweetness and savory depth when cooked down until soft. It’s the backbone for a well-rounded filling.
- Garlic
Infuses a punch of warm, pungent flavor. Just a few cloves impart that characteristic Italian flair.
- Ground beef
Provides hearty substance and umami richness. Browning it properly creates caramelized bits that boost the dish’s complexity.
- Salt
Elevates all the individual flavors, ensuring each element shines without tasting flat.
- Black pepper
Adds a gentle kick and aromatic warmth, balancing the richness of the cheeses.
- Marinara sauce
Offers tangy tomato brightness and a silky consistency to bind everything together.
- Ricotta cheese
Delivers creamy, slightly sweet body to the filling, keeping it light yet indulgent.
- Egg
Works as a binding agent, ensuring the ricotta mixture holds its shape inside the shells.
- Parmesan cheese
Contributes a sharp, nutty profile and helps thicken the ricotta blend for a cohesive filling.
- Dried basil
Brings a hint of sweet, peppery herb aroma that brightens the creamy components.
- Dried oregano
Offers earthy, slightly minty notes that deepen the overall flavor.
- Mozzarella cheese
Melts into glorious strings of gooey perfection, forming a golden, bubbly crust.
HOW TO MAKE BEEF-STUFFED SHELLS WITH CREAMY RICOTTA FILLING
Now that your ingredients are prepped and waiting, it’s time to assemble this hearty creation step by step. Follow along, and soon your kitchen will be filled with the comforting scent of bubbling cheese and rich tomato sauce.
1. Preheat your oven to 375°F (190°C). Position the rack in the center so heat circulates evenly around the baking dish.
2. Cook the jumbo pasta shells according to package instructions. Bring a large pot of salted water to a rolling boil, add shells, and cook until al dente. Drain in a colander, rinse lightly to stop further cooking, and set aside to cool just enough for handling.
3. In a large skillet over medium heat, heat the olive oil until it shimmers. Add the chopped onion, then sauté for about 3 minutes, stirring occasionally, until the pieces turn translucent and begin to caramelize.
4. Add the minced garlic to the softened onion and sauté for another minute. You’ll notice its fragrant punch filling the pan, a sign that it’s ready for the next step.
5. Turn the heat up to medium-high and stir in the ground beef. Cook until it’s evenly browned, using a wooden spoon or spatula to break up large chunks. Once golden bits appear on the bottom, drain any excess fat to keep the dish from feeling too heavy.
6. Pour in 1 cup of the marinara sauce, then season with salt and black pepper. Stir thoroughly, reduce heat slightly, and let the mixture simmer gently for about 5 minutes to meld the flavors. Remove the skillet from heat.
7. In a separate bowl, whisk together the ricotta cheese, egg, Parmesan cheese, dried basil, and dried oregano until the mixture is smooth and well combined.
8. Spread ½ cup of marinara sauce evenly over the bottom of a 9×13-inch baking dish. This creates a luscious base that prevents sticking and adds saucy flavor to every shell.
9. Fill each pasta shell with a spoonful of the ricotta blend, then top it with a spoonful of the beef mixture. Arrange the stuffed shells neatly in the prepared dish, snugly fitting them so they won’t tip over during baking.
10. Pour the remaining marinara sauce over all the shells, making sure each one gets a generous coating. Finally, sprinkle the shredded mozzarella cheese evenly on top for that signature gooey finish.
11. Cover the dish with foil and bake for 30 minutes. This gentle start allows the filling to heat through without drying out.
12. Remove the foil and bake for an additional 10 minutes, until the cheese becomes bubbly and golden. Let the dish rest for a few minutes before serving to help everything set and make serving a breeze.
SERVING SUGGESTIONS FOR BEEF-STUFFED SHELLS WITH CREAMY RICOTTA FILLING
Once these beauties come out of the oven, you’ll want to serve them in style. A well-thought-out presentation and complementary sides can elevate your weeknight meal into a full dining experience. Whether you’re hosting a casual dinner or enjoying a cozy family gathering, these serving tips will help you showcase your effort and make every mouthful feel special.
- Garnish with fresh basil chiffonade and a drizzle of high-quality extra virgin olive oil. The herb’s bright green ribbons and an aromatic sheen of oil will enhance the visual appeal and add a fragrant lift to each bite.
- Pair with a crisp green salad dressed in a light lemon vinaigrette. The acidity cuts through the richness of the cheese, and the crunch offers a contrasting texture that keeps the meal balanced.
- Serve alongside warm garlic bread slathered in herb-butter. Toast it under the broiler until golden for a crispy bite that’s perfect for mopping up leftover sauce.
- Offer a glass of Chianti or Sangiovese. These medium-bodied reds complement the tomato-forward sauce and savory beef without overpowering the delicate ricotta filling.
HOW TO STORE BEEF-STUFFED SHELLS WITH CREAMY RICOTTA FILLING
Planning ahead or dealing with leftovers? Proper storage keeps your stuffed shells tasting fresh and flavorful, so you can enjoy them again without losing any of that homemade charm. Follow these tips to maintain texture and taste, whether you’re refrigerating for a quick reheat or freezing for later convenience.
Storing freshly baked shells in an airtight container in the fridge will preserve their creamy texture and prevent the sauce from drying out. If you plan to freeze them for a longer stretch, a freezer-safe container or heavy-duty zip-top bag works wonders. Portion them individually or in family-sized servings to make reheating a breeze without thawing the entire batch.
- Refrigerate in an airtight container for up to three days. Allow shells to cool to room temperature before sealing to avoid condensation, which can make the sauce watery.
- Freeze in a freezer-safe dish or sealed bag for up to two months. Press out as much air as possible to prevent freezer burn, and label the container with the date.
- Reheat in the oven at 350°F (175°C). Place shells in a baking dish, add a splash of extra marinara to keep them moist, cover with foil, and bake for about 20 minutes, or until heated through.
- Refresh the cheese topping by removing foil for the last 5 minutes of reheating. This will encourage the mozzarella to bubble up and develop a light golden crust.
CONCLUSION
These Beef-Stuffed Shells with Creamy Ricotta Filling showcase why baked pasta earns a steadfast spot in the comfort-food hall of fame. From the tender chew of each jumbo shell to the dreamy ricotta and Parmesan blend, complemented by savory beef and bright tomato sauce, this dish speaks to both the heart and the palate. You can print this article and tuck it into your recipe binder or save it digitally for your next kitchen adventure. With a total prep time of just 20 minutes and an easy-to-follow assembly, you’ll feel like a dinner hero every time you pull it out of the oven. Remember, this is an intermediate-level recipe that rewards your effort with a restaurant-worthy result, all made from the cozy comfort of home.
We’ve laid out everything you need—from ingredient insights to storage secrets—so you can confidently recreate this meal again and again. Below, you’ll find a FAQ section that answers common questions and offers troubleshooting tips, ensuring smooth sailing even if you’re juggling busy weeknights. If you try the recipe yourself, I’d love to hear how it went! Feel free to leave comments, share your own twists, or ask any questions if you need clarification. Your feedback and stories bring this dish to life, and I’m here to help you master it every cheesy, comforting step of the way.
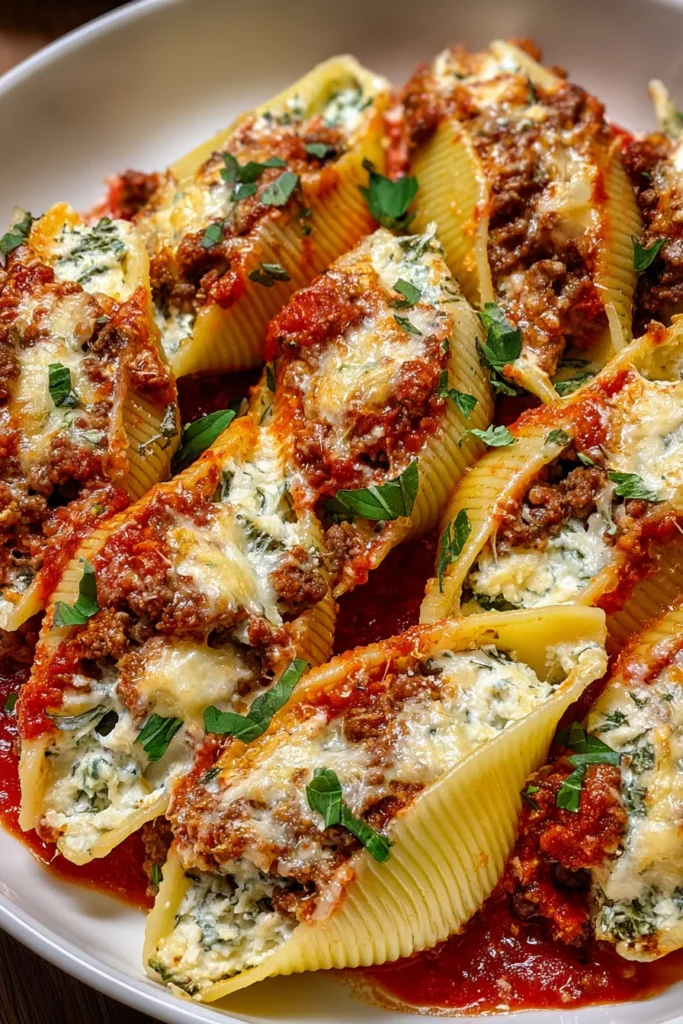

Beef-Stuffed Shells with Creamy Ricotta Filling
Description
These beef-stuffed shells are bursting with savory flavors and creamy goodness. Each bite offers a delightful combination of rich ricotta, seasoned beef, and gooey mozzarella that's simply irresistible.
Ingredients
Instructions
-
Preheat your oven to 375°F (190°C).
-
Cook the jumbo pasta shells according to package instructions. Drain and set aside to cool slightly.
-
In a large skillet over medium heat, add the olive oil. Once hot, add the chopped onion and sauté for about 3 minutes until it is translucent.
-
Add the minced garlic to the onion and sauté for another minute until fragrant.
-
Increase the heat to medium-high and add the ground beef to the skillet. Cook until browned, breaking it up with a spoon as it cooks. Drain any excess fat.
-
Add 1 cup of marinara sauce to the beef mixture, along with salt and black pepper. Stir well and let simmer for 5 minutes. Remove from heat.
-
In a separate bowl, combine ricotta cheese, egg, Parmesan cheese, dried basil, and dried oregano, mixing until smooth.
-
Spread 1/2 cup of marinara sauce evenly over the bottom of a 9x13 inch baking dish.
-
Fill each pasta shell with a spoonful of the ricotta mixture, followed by the beef mixture. Arrange stuffed shells in the prepared baking dish.
-
Pour the remaining marinara sauce over the stuffed shells. Sprinkle mozzarella cheese evenly on top.
-
Cover the dish with foil and bake for 30 minutes. Remove the foil and bake for an additional 10 minutes until the cheese is bubbly and golden.
-
Let the dish cool for a few minutes before serving.
Nutrition Facts
Serving Size 6
- Amount Per Serving
- Calories 75kcal
Note
- You can substitute ground beef with ground turkey or chicken for a leaner option.
- Try adding spinach or chopped mushrooms to the ricotta mixture for extra flavor and nutrition.
- This dish can be made ahead of time and refrigerated. Just bake when ready to serve.
- Leftovers can be stored in an airtight container in the fridge for up to three days.

