

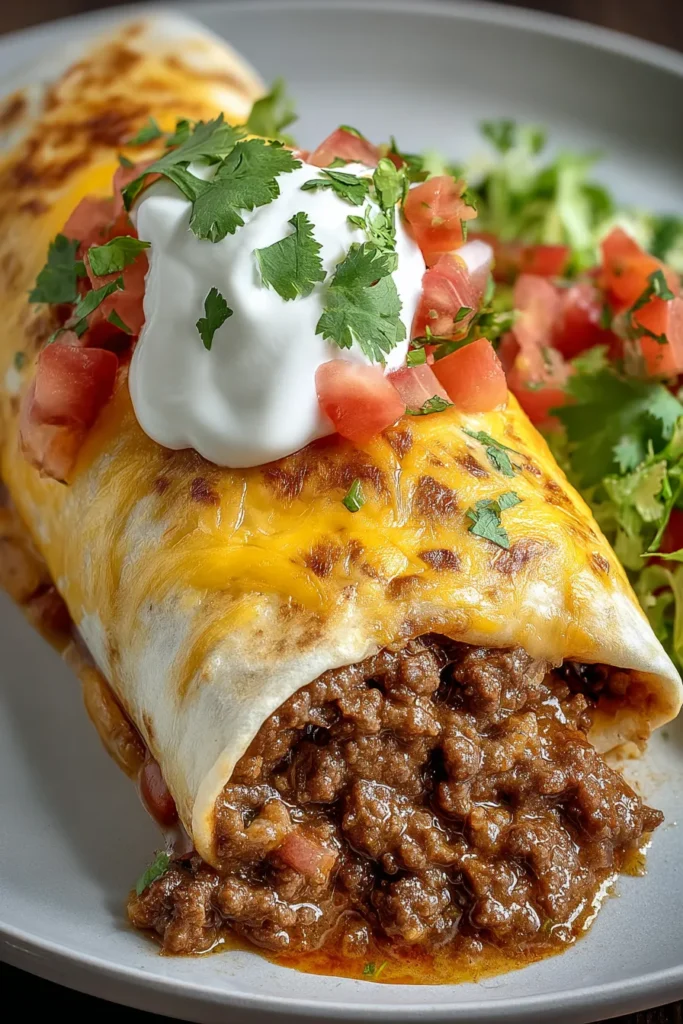
Get ready to dive into comfort food heaven with this Beefy Melt Burrito, bursting with cheesy goodness and zesty beef that’s a crowd-pleaser! Every bite of this homemade Mexican-inspired feast feels like a celebration of flavors. The seasoned ground beef brings that signature savory punch, while the creamy refried beans add a silky layer of richness that hugs each tortilla. You’ll love how the cheddar and Monterey Jack cheeses melt together in perfect harmony, stretching in gooey ribbons as you take your first hearty bite.
As a passionate home cook, I’ve spent countless evenings perfecting easy dinners that feel gourmet without the fuss. This Beefy Melt Burrito is exactly that: a beginner-friendly recipe that delivers big on taste. With just a few simple steps, you can have four generous servings on the table in under an hour—15 minutes to prep, 35 minutes to bake, and a quick 5-minute rest. Clocking in at about 600 calories per burrito, it’s balanced comfort with protein-packed ground beef, a duo of delightful cheeses, and the warming embrace of soft flour tortillas. Whether you’re feeding a hungry family or meal-prepping for the week, these burritos are versatile, freezer-friendly, and endlessly customizable. Have some sautéed peppers on hand? Toss them in. Crave extra heat? Slice up jalapeños or drizzle on your favorite hot sauce. Let’s roll up those sleeves and savor this easy, cheesy dinner sensation!
KEY INGREDIENTS IN BEEFY MELT BURRITO
Before we assemble these delicious burritos, let’s break down the star players that make each bite unforgettable. From the hearty base of seasoned ground beef to the creamy beans and melty cheese duo, every ingredient has its moment to shine. Here’s what you need and why it matters:
- Ground beef
Provides a savory, protein-rich foundation. When browned and seasoned, it delivers that classic beefy flavor that complements all the other fillings.
- Onion
Adds a sweet, aromatic base. Finely chopped and sautéed until translucent, onions deepen the flavor profile of the beef mixture.
- Garlic
Infuses each bite with a warm, pungent depth. Minced garlic rounds out the savory notes and pairs flawlessly with the onions.
- Taco seasoning
Brings a zesty blend of spices—cumin, chili powder, paprika—to the beef, turning humble ground meat into a fiesta of flavor.
- Refried beans
Offer a creamy texture and mild flavor that binds the filling together, making each burrito satisfyingly smooth and hearty.
- Cheddar cheese
Delivers sharp, tangy notes and helps create that irresistible, melty stretch every burrito needs.
- Monterey Jack cheese
Brings a mild, buttery flavor and smooth melting quality, perfectly balancing the sharper cheddar.
- Flour tortillas
Act as the soft, flexible vessel for all the fillings. Large flour tortillas wrap everything up neatly and bake to a slight golden brown.
- Sour cream
Adds a cool, creamy contrast and a hint of tang when served alongside or inside the burrito.
- Salsa
Provides bright acidity and a fresh tomato flavor. Dipping or drizzling salsa on top enhances texture and taste.
- Olive oil
Used to sauté the onion and garlic, helping them soften and release their flavors without sticking.
- Salt and pepper
Simple seasonings that bring out the natural flavors of the meat and vegetables, ensuring a balanced taste.
- Fresh cilantro (optional)
Adds a pop of herbal freshness and vibrant color when sprinkled over the finished burritos.
HOW TO MAKE BEEFY MELT BURRITO
Ready to roll up your sleeves and create these cheesy wonders? Follow these steps to bring your Beefy Melt Burritos to life—with nothing more than a skillet, a baking dish, and some enthusiastic stirring.
1. In a large skillet, heat the olive oil over medium heat. Add the chopped onion and minced garlic, and sauté until the onion becomes translucent, about 3–5 minutes.
2. Add the ground beef to the skillet, breaking it up with a spatula. Cook until the beef is browned and fully cooked, about 8–10 minutes. Drain any excess grease if necessary to keep the filling from becoming too oily.
3. Stir in the taco seasoning and mix well. Season with salt and pepper to taste, then cook for an additional 2 minutes to let those spices meld beautifully into the meat.
4. In a separate bowl, combine the refried beans with half of the cheddar and Monterey Jack cheeses. This mixture will act as the creamy, binding layer in your burritos.
5. Lay each flour tortilla flat on a clean work surface. Spread a generous portion of the bean-and-cheese mixture down the center of each tortilla.
6. Spoon the seasoned ground beef evenly over the beans, ensuring each burrito gets its fair share of juicy, spiced beef.
7. Sprinkle the remaining cheddar and Monterey Jack cheeses over the beef for that ultimate, melty finish when baked.
8. Fold in the sides of each tortilla, then roll it up tightly from the bottom, tucking in the filling as you go to secure everything inside.
9. Preheat your oven to 375°F (190°C). Place the rolled burritos seam-side down in a lightly greased baking dish.
10. Cover the dish with aluminum foil and bake for about 15 minutes. Remove the foil, then bake for an additional 10 minutes, or until the tops are golden and bubbly.
11. Once baked, remove the burritos from the oven and let them rest for a few minutes to firm up slightly.
12. Serve the burritos with sour cream and salsa on the side, and garnish with fresh cilantro if desired.
SERVING SUGGESTIONS FOR BEEFY MELT BURRITO
When it comes to serving your Beefy Melt Burritos, presentation and the perfect accompaniments can elevate every bite. These suggestions will help you create a balanced plate that dazzles the eyes and the palate alike. Here are some tasty ideas for sharing this cheesy, beefy delight with friends, family, or just yourself on a cozy night in:
- Creamy guacamole
Whip up a simple guacamole by mashing ripe avocados with lime juice, chopped cilantro, diced onion, and a pinch of salt. Serve alongside the burritos for a cool, buttery contrast that pairs beautifully with the warm, spiced filling.
- Fresh pico de gallo
Combine diced tomatoes, onion, jalapeño, cilantro, lime juice, and salt to make a vibrant pico de gallo. The bright acidity and crunch bring a lively, refreshing note that cuts through the richness of the cheese and beef.
- Crisp side salad
Toss mixed greens, pepper strips, and sliced cucumbers with a light vinaigrette. The crisp, fresh vegetables add texture and a healthy counterpoint to these indulgent burritos.
- Chilled margaritas or iced tea
A tangy margarita or a refreshing glass of iced tea with a twist of lemon complements the bold flavors. The citrus notes and cool temperature help cleanse the palate between cheesy, beefy bites.
HOW TO STORE BEEFY MELT BURRITO
Proper storage ensures you can enjoy these Beefy Melt Burritos again and again without sacrificing flavor or texture. Whether you’re keeping them fresh in the fridge or stashing extras in the freezer for quick meals, follow these tips to maintain that just-baked taste:
- Refrigeration
Allow the burritos to cool to room temperature, then place them in an airtight container or wrap each one tightly in plastic wrap. Store in the refrigerator for up to 3 days. When ready to eat, reheat in a 350°F oven for 10–12 minutes to restore that golden, bubbly top.
- Freezing
For longer storage, wrap each cooled burrito individually in aluminum foil, then place them in a freezer-safe bag. Freeze for up to 2 months. To reheat, bake frozen burritos at 375°F for 20–25 minutes, unwrapping the foil for the last 5 minutes to crisp the tortilla.
- Microwave reheating
For a quick fix, unwrap a refrigerated or thawed burrito, place it on a microwave-safe plate, and cover loosely with a damp paper towel. Microwave on high for 1–2 minutes, checking halfway, until heated through. Finish with a brief broil in the oven if you crave a crunchy exterior.
- Batch prep tips
If you’re making a large batch, assemble all burritos, then freeze them unbaked on a baking sheet until firm. Transfer to freezer bags once solid, then bake directly from frozen, adding a few extra minutes to the covered and uncovered bake times.
CONCLUSION
Wrapping up our culinary journey through the Beefy Melt Burrito, you’ve learned how to transform simple pantry staples into a warm, cheesy, and deeply satisfying dinner that’s perfect for any night of the week. We covered the roles of each key ingredient—like the savory ground beef, creamy refried beans, and that dynamic cheddar–Monterey Jack cheese duo—along with the step-by-step method for cooking, assembling, and baking these beauties. You also discovered serving ideas to elevate your meal, from creamy guacamole and fresh pico de gallo to crisp salads and refreshing beverages. Plus, with our storage tips, you can prepare ahead and enjoy this homemade Mexican recipe whenever you like, ensuring each burrito maintains its delicious flavor and texture.
Feel free to print this article and save it for later, or bookmark it for quick reference next time you’re craving a cheesy, beefy burrito. You can also find a FAQ section below to troubleshoot common questions and get more tips on customization. I’d love to hear how your Beefy Melt Burritos turn out—so please leave a comment, share your personal tweaks, or ask any questions if you need help. Your feedback and stories inspire new recipes and improvements, and I can’t wait to see how you make this easy dinner your own!
Feeling ready to roll, bake, and savor? Your Beefy Melt Burrito adventure awaits—enjoy every melty mouthful, and let me know how it goes!

Beefy Melt Burrito
Description
This Beefy Melt Burrito features seasoned ground beef, creamy refried beans, and a generous blend of cheeses, all wrapped in a warm tortilla. Perfect for family dinners or a quick weeknight meal.
Ingredients
Instructions
-
In a large skillet, heat the olive oil over medium heat. Add the chopped onion and garlic, and sauté until the onion becomes translucent, about 3-5 minutes.
-
Add the ground beef to the skillet, breaking it up with a spatula. Cook until the beef is browned and fully cooked, about 8-10 minutes. Drain any excess grease if necessary.
-
Stir in the taco seasoning and mix well. If desired, add salt and pepper to taste. Cook for an additional 2 minutes to allow the flavors to meld.
-
In a separate bowl, mix the refried beans with half of the cheddar and Monterey Jack cheese. This will help bind the filling together.
-
Lay out each flour tortilla on a clean surface. Spread a generous amount of the refried bean mixture onto the center of each tortilla.
-
Next, add a portion of the seasoned ground beef on top of the beans. Make sure each burrito is filled evenly.
-
Sprinkle the remaining cheeses over the beef in each tortilla, allowing for a melty finish when cooked.
-
Carefully fold in the sides of the tortilla and then roll it up from the bottom, ensuring the filling is secured inside. Repeat this process for each burrito.
-
Preheat your oven to 375°F (190°C). Place the rolled burritos seam side down in a baking dish.
-
Cover the burritos with aluminum foil and bake for about 15 minutes. Remove the foil, and continue baking for an additional 10 minutes until the tops are golden and bubbly.
-
Once baked, remove the burritos from the oven and let them cool for a few minutes.
-
Serve the burritos with sour cream and salsa on the side, garnishing with fresh cilantro if desired.
Nutrition Facts
Serving Size 4
- Amount Per Serving
- Calories 150kcal
Note
- You can customize the fillings by adding cooked rice or sautéed peppers and corn for extra texture.
- These burritos freeze well. Wrap them individually in foil and store in a freezer-safe bag for quick meals later.
- For an extra cheesy experience, sprinkle more cheese on top before baking.
- If you like it spicy, consider adding jalapenos or hot sauce to the beef mixture.

