

There’s something downright thrilling about sinking your teeth into a velvet-soft cupcake where the rich, red sponge practically melts on the tongue. From the first crack of the crisp liner to that smooth, tangy cream cheese bite, these Bloody Red Velvet Cupcakes are more than just a treat—they’re an experience. Combining classic red velvet flavors with a delightfully ghoulish twist, each morsel is flush with cocoa undertones and velvety dough that’s lovingly laced with just the right amount of tangy buttermilk. With a sprinkle of white vinegar ensuring extra lift and that signature blush of crimson courtesy of vibrant red food coloring, every cupcake tells a deliciously eerie story.
What really sends these cupcakes into the realm of spooky delights is the final flourish: splatters of red gel icing that mimic a chilling “blood-spattered” effect. Whether you’re hosting a haunted soirée or simply looking to add a macabre touch to your dessert table, these cupcakes bring the drama. The combination of the intermediate difficulty level and generous prep time (20 minutes), baking duration (20 minutes), and rest time (30 minutes) makes this recipe an ideal project for home bakers craving festive baking fun. Get ready for a hauntingly good time and calories clocking in at about 250 per cupcake—just enough wickedness to satisfy any sweet tooth.
KEY INGREDIENTS IN BLOODY RED VELVET CUPCAKES
Before the magic begins, gathering fresh, high-quality ingredients is essential for achieving that signature texture and taste. Each element plays a special role, from providing structure to infusing flavor and ensuring the cupcakes rise just right.
- all-purpose flour
Serves as the foundational structure of the cupcake, creating a tender crumb and keeping each bite light yet substantial.
- baking soda
Acts as a leavening agent, reacting with the buttermilk and vinegar to create lift and that irresistibly fluffy rise.
- salt
Enhances all the flavors and balances the sweetness, ensuring the cocoa and tangy notes shine through.
- unsweetened cocoa powder
Adds a subtle chocolate depth, enriching the red velvet profile without overpowering the delicate sponge.
- unsalted butter
Provides moisture and richness in the batter, contributing to a soft texture and luscious mouthfeel.
- sugar
Sweetens and tenderizes the cupcakes, helping to achieve the perfect balance of sugary delight and velvet softness.
- eggs
Bind ingredients, trap air during mixing, and add moisture for that signature velvety interior.
- vanilla extract
Rounds out flavors with a warm, aromatic note that complements both the cocoa and the buttermilk tang.
- buttermilk
Imparts a gentle tang and reacts with baking soda for lift, while keeping the crumb wonderfully moist.
- red food coloring
Delivers that eye-catching crimson hue, turning ordinary cupcakes into a frightfully festive treat.
- white vinegar
Reacts with the baking soda to boost rise and enhances the brightness of the red color.
- softened cream cheese
Forms the tangy, dreamy base of the frosting, providing a luscious counterpart to the sweet sponge.
- unsalted butter (for frosting)
Contributes smoothness and stability to the frosting, ensuring it pipes beautifully and stays fluffy.
- confectioners’ sugar
Sweetens and thickens the cream cheese frosting, creating a velvety consistency that holds peaks.
- vanilla extract (for frosting)
Infuses the frosting with a gentle warmth and depth, tying together all the creamy flavors.
- red gel icing
Used for the dramatic “bloody” splatter, this gel offers concentrated color and a striking décor effect.
HOW TO MAKE BLOODY RED VELVET CUPCAKES
Let’s dive into the process of turning simple staples into hauntingly amazing cupcakes. By following these detailed steps—mixing, baking, and decorating—you’ll create a spooky dessert that wows at every Halloween gathering or themed celebration.
1. Preheat your oven to 350°F (175°C) and line a 12-cup muffin tin with cupcake liners, ensuring even baking and easy removal.
2. In a medium bowl, sift together the flour, baking soda, salt, and cocoa powder to eliminate lumps and distribute ingredients uniformly. Set aside this dry mix.
3. In a large mixing bowl, cream together the softened butter and sugar using an electric mixer until the mixture is light and fluffy, about 3–4 minutes.
4. Beat in the eggs one at a time, ensuring each is fully incorporated before adding the next. Then, stir in the vanilla extract until fragrant.
5. In a separate bowl, mix the buttermilk and red food coloring until you achieve a consistent hue. Add this vibrant liquid slowly to the butter mixture and combine thoroughly.
6. Gradually add the sifted dry ingredients to the wet ingredients, stirring gently until just combined—avoid overmixing to keep the cupcakes tender.
7. Stir in the white vinegar and mix until the batter is perfectly smooth and silky.
8. Divide the batter evenly among the cupcake liners, filling each about two-thirds full to allow room for rise.
9. Bake for 18–22 minutes, or until a toothpick inserted into the center emerges clean. Cool the cupcakes completely on a wire rack.
10. To make the frosting, beat the softened cream cheese and butter together until smooth and lump-free.
11. Gradually add the confectioners’ sugar, beating until the frosting is fluffy, then mix in the vanilla extract.
12. Once the cupcakes are fully cool, spread the cream cheese frosting over each, using an offset spatula for even coverage.
13. To create the “bloody” finale, use red gel icing and splatter it over the frosted tops, achieving that eerie, blood-spattered effect.
SERVING SUGGESTIONS FOR BLOODY RED VELVET CUPCAKES
Presenting these cupcakes can be just as fun as baking and decorating them. With a little creativity, you can amplify their spooky charm and create an unforgettable dessert display. Whether you’re hosting an intimate horror movie night or a full-blown Halloween bash, consider these playful serving ideas to make your Bloody Red Velvet Cupcakes the star attraction on the dessert table.
- Gothic Dessert Platter
Arrange the cupcakes on a matte black or dark slate tray, and garnish the edges with edible silver pearls or sprigs of fresh rosemary dyed black. This contrast highlights the crimson splatters and creates a dramatic centerpiece.
- Chilling Beverage Pairing
Serve alongside a tall glass of iced espresso or a smoky dry ice concoction for a chilling effect. The bold coffee flavors balance the sweet tartness of the cupcakes and elevate the overall tasting experience.
- Individual Boo-tique Boxes
Place each cupcake in clear cellophane boxes tied with black velvet ribbon. Add a miniature treat tag labeled “Handle With Care” for guests to take home—perfect for party favors or bakery-style presentation.
- Tiered Cake Stand Display
Use a tiered stand draped with faux cobwebs to stagger the cupcakes at different heights. Sprinkle edible glitter lightly over the frosting for a subtle shimmer that catches the light and adds to the spooky ambiance.
HOW TO STORE BLOODY RED VELVET CUPCAKES
Proper storage ensures your cupcakes stay moist, flavorful, and visually impressive—even a day or two after baking. With the tangy cream cheese frosting and delicate crumb, these treats respond best to storage methods that control temperature and moisture. Below are some tried-and-true tips to keep your spooky delights in top condition.
- Room Temperature (2 Days)
Store in an airtight container at cool room temperature, away from direct sunlight or heat sources. This method preserves the soft crumb and frosting texture without risking dryness.
- Refrigeration (Up to 5 Days)
Place cupcakes in a single layer inside an airtight container or cover loosely with plastic wrap. The cool environment maintains freshness, though you may want to sit them at room temperature for 15 minutes before serving to soften the frosting.
- Freezing Unfrosted (Up to 3 Months)
After baking and cooling, wrap each cupcake tightly in plastic wrap and store in a freezer-safe bag. Defrost at room temperature, then frost and decorate for a just-baked experience.
- Freezing Frosted (2–3 Weeks)
Freeze fully decorated cupcakes on a tray until firm, then transfer to an airtight container. Thaw overnight in the refrigerator to protect the “bloody” gel splatter and cream cheese frosting from melting.
CONCLUSION
From the moment you mix those vibrant red-hued ingredients to the final, dramatic splatter of gel icing, this recipe takes you on a journey through playful chills and delightful flavors. We’ve covered everything you need to know—from the precise intermediate steps and key ingredients to expert tips on serving and storage. Whether you’re an experienced baker or tackling your first fancy dessert, these Bloody Red Velvet Cupcakes are designed to wow. Feel free to print this article and save it for your next haunted gathering, and don’t forget that you can find a FAQ below to troubleshoot any baking mysteries.
We hope you’ve enjoyed this spooky baking adventure as much as we have! If you give this recipe a whirl, please share your results, stories, or even spooky photos. Have questions about the technique, need help adjusting for high altitude, or want to swap in a vegan cream cheese alternative? Drop a comment below—your feedback and creativity are what make festive baking truly special. Happy haunting and happy baking!
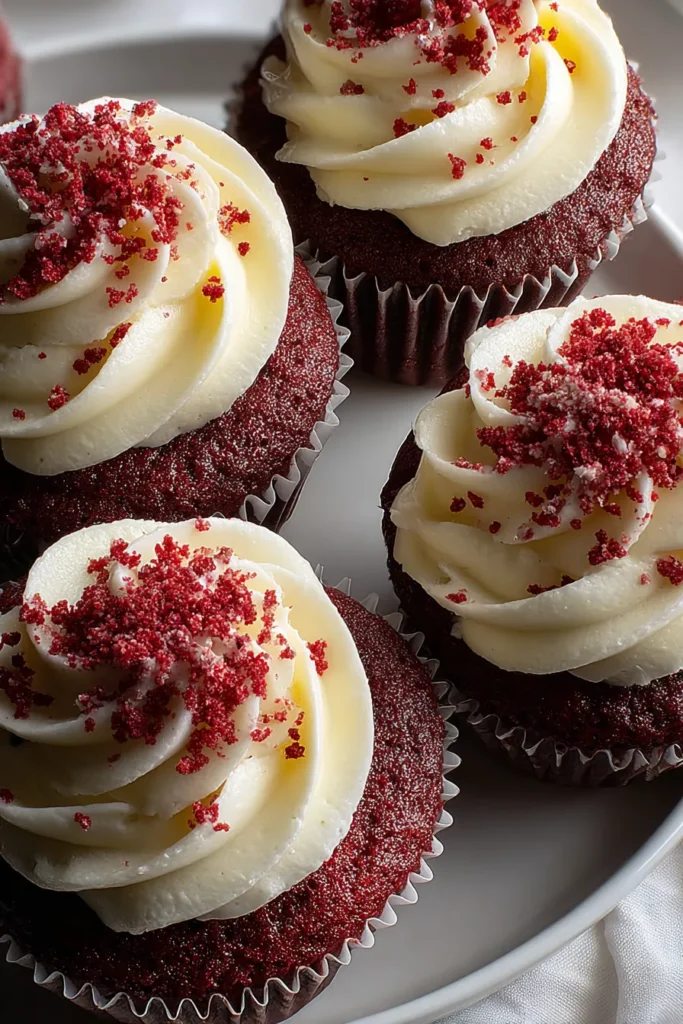

Bloody Red Velvet Cupcakes
Description
These Bloody Red Velvet Cupcakes are a hauntingly tasty treat, bursting with rich flavors, smooth cream cheese frosting, and a thrilling blood-spattered look. Perfect for Halloween!
Ingredients
Instructions
-
Preheat your oven to 350°F (175°C) and line a 12-cup muffin tin with cupcake liners.
-
In a medium bowl, sift together the flour, baking soda, salt, and cocoa powder. Set aside.
-
In a large mixing bowl, cream together the butter and sugar until light and fluffy.
-
Beat in the eggs, one at a time, mixing well after each addition. Stir in the vanilla extract.
-
Mix the buttermilk and red food coloring in a separate bowl until blended. Add this to the butter mixture and combine.
-
Gradually add the dry ingredients to the wet ingredients, stirring until just combined.
-
Stir in the white vinegar until the batter is smooth.
-
Divide the batter evenly among the cupcake liners, filling each about two-thirds full.
-
Bake for 18-22 minutes, or until a toothpick inserted into the center comes out clean. Allow the cupcakes to cool completely on a wire rack.
-
To make the frosting, beat the cream cheese and butter together until smooth.
-
Gradually add the confectioners' sugar, beating until fluffy, and then mix in the vanilla extract.
-
Once the cupcakes are cool, spread the cream cheese frosting over each cupcake.
-
To create the "bloody" effect, use red gel icing and splatter it over the frosted cupcakes to make them appear blood-spattered.
Nutrition Facts
Serving Size 12
- Amount Per Serving
- Calories 17kcal
Note
- These cupcakes are perfect for Halloween or any spooky-themed event.
- You can adjust the intensity of the red color by altering the amount of food coloring.
- For extra chocolatey flavor, increase the amount of cocoa powder by a tablespoon.

