

The bright, tangy crunch of homemade bread and butter pickles is like a flavor fiesta in every bite. These sweet-and-spicy cucumber slices boast a delightful contrast of crunchy vegetables immersed in a syrupy, vinegar-based brine that tingles your taste buds just enough to keep you coming back for more. When you pop open that jar and see the cheerful yellow hue from a hint of turmeric and the glint of mustard seeds dancing around, it’s hard not to feel a sense of pride knowing you sandwiched in a bit of culinary magic with each serving. Whether you’re layering them onto a towering gourmet burger, tucking them into a classic deli sandwich, or simply popping them straight from the jar, bread and butter pickles are the kind of versatile companion that make every meal feel special and homemade.
This recipe is designed with the beginner canner in mind and takes roughly 1 hour of active prep, about 20 minutes of gentle cooking, and then requires a rest period of 1 week for full flavor development. Once sealed and tucked away, these pickles will keep for up to a year, offering sweet-tangy goodness for everything from appetizers to lunch or dinner spreads. At about 150 calories per pint jar, they deliver a guilt-free hit of bright acidity, spicy warmth from ground cloves and cinnamon, and a pop of color to your dishes. Gather your crisp cucumbers, vibrant green peppers, and all those pantry spices—and let’s embark on a pickling journey that promises both crunchy satisfaction and that unforgettable bread-and-butter balance.
KEY INGREDIENTS IN BREAD AND BUTTER PICKLES
Before we roll up our sleeves and dive into the brine, let’s take a closer look at what makes these pickles so irresistible. Each ingredient plays a starring role: from the crisp foundation of cucumbers to the warm spices that infuse every jar with character. Here’s why each component is essential for creating pickles that are sweet, tangy, and satisfyingly crunchy.
- Cucumbers
These thinly sliced cucumbers provide the crisp, juicy foundation of the recipe. Their high water content means they’ll soak up the brine beautifully, giving you that classic pickle snap in every bite.
- Onion
Thinly sliced onions add a mild pungency and subtle sweetness, balancing the tang of vinegar and enhancing the overall flavor depth of the pickles.
- Green Bell Pepper
The pepper’s mild, slightly grassy flavor contributes a tender crunch and a fresh, vegetal note that pairs perfectly with the cucumbers.
- Kosher Salt
This coarse salt draws out excess moisture during the initial soak, ensuring the cucumbers and peppers stay firm. It also provides the essential salinity that elevates all other flavors.
- Apple Cider Vinegar
With its gentle fruity tang, apple cider vinegar is the acidic backbone of the brine. It brightens flavors and acts as a natural preservative.
- Granulated Sugar
The sugar balances the acidity with a pleasant sweetness, giving bread and butter pickles their signature mellow profile.
- Mustard Seeds
These little golden seeds lend a subtle heat and pop as they swell in the hot brine, adding a visually appealing speckle and gentle spice.
- Celery Seeds
Earthy and aromatic, celery seeds accentuate the vegetable foundation and introduce a nuanced bitterness that keeps the sweetness in check.
- Ground Turmeric
This warming spice imparts a cheerful golden hue and a mellow, peppery flavor that ties the brine together.
- Ground Cloves
A pinch of ground cloves adds a hint of cozy warmth reminiscent of holiday baking, giving depth and a whisper of spice.
- Ground Cinnamon
The cinnamon rounds out the spice blend with a sweet warmth, perfectly complementing the vinegar’s tang and sugar’s sweetness.
HOW TO MAKE BREAD AND BUTTER PICKLES
Let’s walk through each key step to transform fresh cucumbers and garden-fresh veggies into jars of irresistible pickles. From drawing out moisture to packing those jars tightly, every move is crafted to capture the perfect sweet-and-spicy balance.
1. In a large bowl, combine the sliced cucumbers, onions, and green peppers. Sprinkle with kosher salt and mix well, making sure each piece is coated. Allow the mixture to sit for about 1 hour so the salt can draw out excess moisture, ensuring crisp pickles.
2. After an hour, rinse the vegetables under cold water to wash away excess salt. Transfer them to a colander and allow them to drain thoroughly—this step prevents over-salting and keeps the texture just right.
3. In a large pot, combine the apple cider vinegar, granulated sugar, mustard seeds, celery seeds, turmeric, cloves, and cinnamon. Bring the mixture to a boil over medium-high heat, stirring until the sugar fully dissolves and the spices infuse the brine.
4. Add the drained vegetable mixture to the pot. Reduce the heat to medium and simmer for about 10 minutes, stirring occasionally so that all the vegetables are evenly coated and heated through.
5. Carefully pack the hot pickles into sterilized jars, leaving about ½ inch of headspace at the top. This space is crucial for proper sealing during processing.
6. Wipe the rims clean and seal with lids. Process the jars in a boiling water bath for 10 minutes to ensure a secure seal and safe, shelf-stable storage.
7. Remove the jars from the water bath and let them cool completely at room temperature. Store in a cool, dark place for at least 1 week to allow the flavors to develop fully before enjoying.
SERVING SUGGESTIONS FOR BREAD AND BUTTER PICKLES
Nothing makes a meal pop quite like that first crunchy bite of a bread and butter pickle. Whether you’re planning a lazy weekend picnic, an intimate sandwich lunch, or a full dinner spread, these pickles can steal the show. Let these serving ideas spark your creativity and help you layer on sweetness, tang, and spice in the most delicious ways.
- Layer them into a classic deli sandwich with roast beef or turkey, adding a sweet-tangy crunch that cuts through rich meats and cheeses.
- Serve alongside a charcuterie board—arrange pickles with a selection of cured meats, artisanal cheeses, and crusty bread for an irresistible snack platter.
- Top a gourmet burger with a generous stack of pickles to introduce that perfect balance of brightness and spice, elevating every bite.
- Chop and mix into a potato or egg salad, giving traditional creamy dishes a zesty twist and a pop of color that surprises and delights.
HOW TO STORE BREAD AND BUTTER PICKLES
After all that preparation and bubbling brine, you want your pickles to stay crisp and flavorful for as long as possible. Proper storage not only maintains their crunch but also allows the sweet-and-spicy flavors to continue to deepen over time. Here’s how to keep your jars of homemade bread and butter pickles at their best:
- Cool, Dark Pantry
Once sealed, store the jars upright in a cool, dark place—ideally between 50°F and 70°F. This environment preserves the pickles’ color and flavor, preventing them from spoiling prematurely.
- Refrigeration After Opening
After cracking a jar open, keep it refrigerated. The cold temperature helps maintain crispness and slows down any bacterial growth. Simply seal the jar tightly and place it in the fridge.
- Avoid Direct Sunlight
Exposure to sunlight can fade the vibrant hues and cause off-flavors. Always tuck your jars away from windows or bright kitchen counters after canning.
- Check Seals Before Storing
Ensure each jar is properly sealed—the lid should not flex up and down when pressed. Any unsealed jars should be refrigerated and consumed within a few weeks.
CONCLUSION
I hope this deep dive into homemade bread and butter pickles has you itching to don your apron and get pickling! We covered everything—from the crucial role of kosher salt and apple cider vinegar to the gentle boil and careful water bath that seal in those sweet-and-spicy flavors. With just a handful of pantry spices like mustard seeds, turmeric, and cinnamon, plus fresh cucumbers and peppers, you can craft four pint-sized jars brimming with crunchy goodness. This recipe is perfectly suited for beginners, requiring about 1 hour of prep, 20 minutes of cooking, and a 1-week wait for peak flavor. Once the jars are sealed, tuck them away in a cool, dark spot for up to a year, and you’ll always have a jar of homemade pickles ready to jazz up appetizers, lunches, and dinners.
Feel free to print this article and save it for later—your future self will thank you when it’s pickle o’clock. Keep an eye out for the FAQ below, where you’ll find answers to common pickling questions and troubleshooting tips. If you give this recipe a try or tweak it to fit your taste, I’d love to hear how it goes! Drop your comments, questions, or feedback below, and let’s continue sharing the joy of homemade pickles together. Happy pickling!
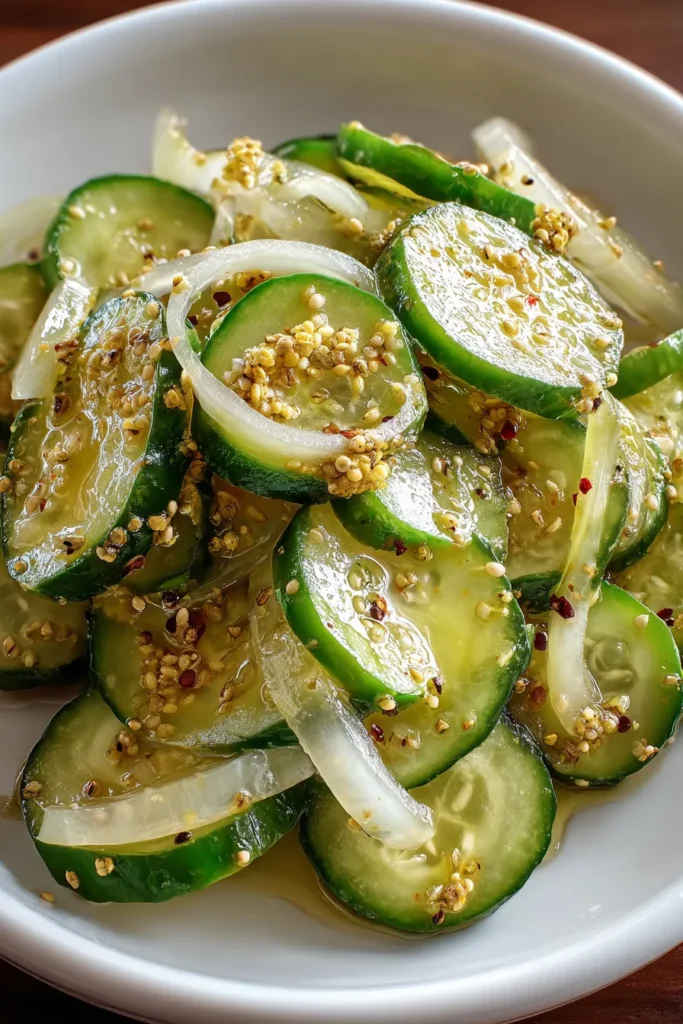

Bread and Butter Pickles
Description
These homemade bread and butter pickles burst with crispness and a delightful balance of sweet and tangy flavors, perfect for snacking or enhancing any dish.
Ingredients
Instructions
-
In a large bowl, combine the sliced cucumbers, onions, and green peppers. Sprinkle with kosher salt and mix well. Allow the mixture to sit for about 1 hour to draw out excess moisture.
-
After an hour, rinse the vegetables under cold water to remove excess salt and drain them in a colander.
-
In a large pot, combine the apple cider vinegar, sugar, mustard seeds, celery seeds, turmeric, cloves, and cinnamon. Bring the mixture to a boil over medium-high heat, stirring until the sugar is dissolved.
-
Add the drained vegetable mixture to the pot. Reduce the heat to medium and simmer for about 10 minutes, ensuring all the vegetables are coated and heated through.
-
Carefully pack the hot pickles into sterilized jars, making sure to leave about 1/2 inch of headspace at the top.
-
Wipe the rims clean and seal with lids. Process in a boiling water bath for 10 minutes to seal.
-
Remove the jars from the water bath and let them cool completely at room temperature. Store in a cool, dark place for at least 1 week to allow the flavors to develop fully.
Nutrition Facts
Serving Size 4
- Amount Per Serving
- Calories 20kcal
Note
- Bread and butter pickles are traditionally sweet with a hint of spice, making them perfect for sandwiches or as a side.
- This recipe yields about 4 pint-sized jars.
- You can adjust the sweetness by reducing the amount of sugar if desired.
- Be sure to use pickling cucumbers for a firmer texture.
- These pickles will keep well for up to a year if properly sealed and stored.

