

There’s a certain kind of joy that bubbles up when a simple ingredient like honey gets transformed into something unexpectedly deep and complex. Burnt Honey Pie is exactly that kind of revelation: a dessert that looks humble but tastes absolutely celestial. The moment you take your first bite, you’ll discover layers of sweetness and warmth intertwined with a gentle nuttiness from the caramelized honey. The filling is smooth and creamy, balanced with a hint of spice that lingers ever-so-slightly on your tongue and invites you back for just one more forkful. As you slice through the flaky, golden crust, you’ll find yourself smiling at the delightful contrast between crisp pastry and luxuriously rich center. It’s the kind of pie that feels like a hug from your grandmother and an elegant flourish all at once.
Whether you’re planning a weekend brunch, a cozy dinner dessert, or just a sweet escape after a long day, Burnt Honey Pie fits the bill. The components may seem straightforward, but don’t be fooled—this is a recipe meant for savoring every step. As the honey bubbles and darkens in the saucepan, the kitchen fills with a deep, caramel undertone that hints at the magic to come. While it cools, you’ll whisk together cream and eggs, creating a velvety base that supports the bittersweet nuances of the burnt honey. Even before it hits the oven, the colors and textures are enough to make your heart race. After baking and a patient chill time in the fridge, this pie reaches its full potential: a perfectly set custard with a slight jiggle at the center, encased in a buttery shell. It’s pure dessert alchemy, and I can’t wait for you to try it!
KEY INGREDIENTS IN BURNT HONEY PIE
Before diving into the step-by-step instructions, let’s talk about the stars of the show. Each ingredient in this pie plays a vital role in building layers of flavor, texture, and structure. From the foundation of a flaky crust to the silky, spiced filling, here’s what you’ll need and why it matters:
- All-purpose flour: Provides the structural base for the crust, ensuring it holds together while remaining tender and flaky.
- Granulated sugar: Sweetens the crust and filling just enough to balance the rich flavors without overpowering the honey.
- Salt: Enhances the overall taste by drawing out the sweetness and deepening the honey’s caramel character.
- Unsalted butter (chilled and cubed): Creates flakiness in the crust as the cold fat melts during baking, leaving delicate layers.
- Ice water: Binds the dough together without warming the butter, preserving that ideal texture.
- Honey: The hero ingredient—when carefully heated, it develops a bittersweet, caramel-like complexity that elevates this pie.
- Heavy cream: Adds richness and creaminess to the filling, lending a silky mouthfeel that balances the burnt honey.
- Unsalted butter (room temperature): Incorporated into the filling to enrich the custard and provide a smooth, luxurious texture.
- Cornstarch: Acts as a stabilizer, helping the filling set properly while keeping it tender and not rubbery.
- Eggs: Thicken and bind the filling, giving it structure and that satisfying custardy quality.
- Vanilla extract: Contributes a sweet, floral note that complements the deep tones of the burnt honey.
- Ground cinnamon: Adds a warm, approachable spice that pairs beautifully with honey’s natural sweetness.
- Ground nutmeg: Offers an earthy warmth that deepens the flavor profile without overwhelming the other spices.
- Salt: A small touch in the filling balances sweetness and makes each flavor pop.
HOW TO MAKE BURNT HONEY PIE
Getting this pie from the mixing bowl to your table is a joyful journey through textures and temperatures. Each step builds on the one before, transforming simple ingredients into something truly special.
1. Preheat your oven to 350°F (175°C). This initial temperature will gently set the crust without over-browning.
2. In a large mixing bowl, combine the flour, sugar, and salt. Add the chilled, cubed butter and use a pastry blender or your fingertips to cut it into the flour until the mixture looks like coarse crumbs—this ensures a flaky crust.
3. Drizzle in the ice water one tablespoon at a time, stirring just until the dough holds together. Form it into a ball, wrap in plastic, and refrigerate for at least 30 minutes so the gluten relaxes and the butter firms up.
4. Once chilled, roll out the dough on a floured surface to fit a 9-inch pie pan. Transfer it gently, trim the edges, and prick the bottom with a fork. Bake for 10–12 minutes or until it starts to turn golden. Remove and set aside.
5. Increase the oven temperature to 375°F (190°C) to prepare for the filling.
6. In a saucepan over medium-high heat, warm the honey until it bubbles and darkens, about 5–7 minutes. Watch it carefully—this is where the signature flavor develops. Remove from heat and let cool slightly.
7. In a separate bowl, whisk together the heavy cream, room-temperature butter, and cornstarch until smooth. Gradually whisk in the eggs, one at a time, then stir in the vanilla, cinnamon, nutmeg, and salt.
8. Slowly pour the cooled burnt honey into the egg mixture, whisking constantly to prevent any curdling or scrambling.
9. Carefully pour the filling into the prebaked crust and use a spatula to smooth the top.
10. Bake in the 375°F oven for 35–40 minutes, or until the center is just set with a slight wobble.
11. Remove from the oven and place on a wire rack to cool. Once at room temperature, refrigerate for at least 2 hours to allow the flavors to meld and the filling to fully set.
SERVING SUGGESTIONS FOR BURNT HONEY PIE
When it comes time to serve your Burnt Honey Pie, you’ll want to showcase its creamy texture and complex flavors. Presenting it just right heightens the experience and makes every slice feel like a special treat. Whether you’re hosting a gathering or treating yourself, these ideas will elevate your serving game.
- Chilled with whipped cream: Top each slice with a generous dollop of lightly sweetened whipped cream. The airy creaminess contrasts beautifully with the dense, honeyed filling and adds a fresh finish.
- Sprinkled with crushed nuts: Scatter some toasted pecans or walnuts over the top to introduce a nutty crunch that complements the burnt honey flavor. The contrast of textures is divine.
- Drizzled with extra honey: Warm a little honey and drizzle it artfully across each slice right before serving. This enhances the sweet notes and adds a glossy, inviting sheen.
- Accompanied by fresh berries: Serve alongside a small bowl of mixed berries—raspberries, blackberries, or sliced strawberries add tartness and vibrant color, balancing the pie’s richness.
HOW TO STORE BURNT HONEY PIE
Proper storage is key to enjoying your Burnt Honey Pie days after baking without sacrificing quality. Because of its custard-like filling and delicate crust, you’ll want to follow these tips to maintain that perfect texture and flavor profile.
- Refrigerate covered: Once fully chilled, cover the pie loosely with plastic wrap or place it in an airtight container. Store in the refrigerator for up to 4 days. This keeps the filling firm and prevents the crust from absorbing unwanted odors.
- Freeze slices: For longer storage, cut the pie into individual slices and wrap each piece tightly in plastic wrap, then foil. Freeze for up to 2 months. Thaw in the fridge overnight before serving.
- Avoid room temperature: Because of the dairy and egg content, do not leave the pie out for more than 2 hours. Extended exposure to warm air can affect texture and food safety.
- Refresh before serving: If the crust softens over time, pop individual slices in a 325°F oven for 5–7 minutes to crisp before serving. Let cool slightly so the filling firms up again.
CONCLUSION
Burnt Honey Pie is more than just a dessert—it’s a celebration of honey’s hidden depths and the joy of homemade baking. From the moment you stir golden honey in a saucepan until it darkens to a rich amber, to the satisfying crackle of the crust under your fork, every step is an experience worth savoring. This pie effortlessly bridges the gap between rustic comfort food and something worthy of special occasions. Its creamy, custard-like filling captures both the sweetness and subtle bitterness of burnt honey, while warm spices like cinnamon and nutmeg add layers of cozy nuance. Plus, the buttery crust provides the perfect vehicle for all those flavors—flaky, tender, and utterly delicious.
Feel free to print this article and tuck it into your recipe binder, so it’s ready whenever you’re craving a slice of sweet indulgence. You can save it for gift-giving occasions, potlucks, or simply a self-care baking session on a rainy afternoon. Below you’ll find a FAQ section to address common questions about this recipe—everything from troubleshooting the crust to tips for perfect caramelization. And if you try this pie, please leave a comment or reach out with any questions or feedback. I love hearing how your kitchen adventures turn out, and I’m here to help if you run into any bumps along the way. Happy baking and enjoy every luscious bite of your Burnt Honey Pie!
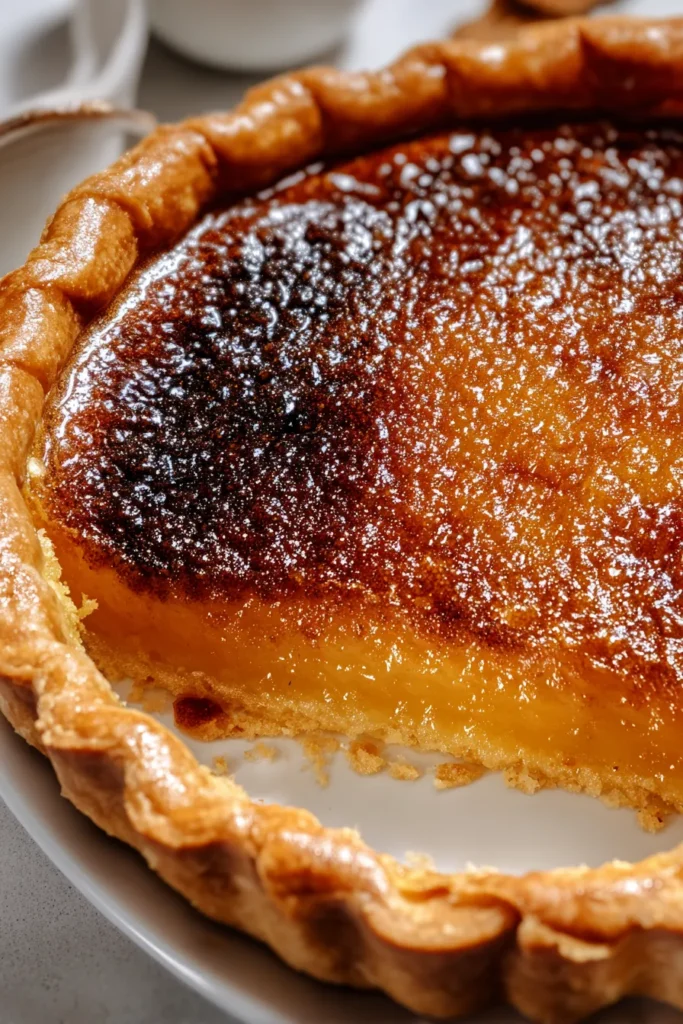

Burnt Honey Pie
Description
This Burnt Honey Pie offers a delightful contrast of flavors, combining the rich sweetness of burnt honey with creamy textures and a hint of warmth from spices, making it a comforting dessert that lingers on the palate.
Ingredients
Instructions
-
Preheat your oven to 350°F (175°C).
-
To make the crust, combine the flour, sugar, and salt in a large mixing bowl. Add the chilled cubed butter and cut it into the flour using a pastry blender or your fingers until the mixture resembles coarse crumbs.
-
Add the ice water, one tablespoon at a time, mixing just until the dough holds together. Form the dough into a ball, wrap it in plastic wrap, and refrigerate for at least 30 minutes.
-
Once chilled, roll out the dough on a floured surface to fit a 9-inch pie pan. Transfer the dough to the pie pan, trim the edges, and prick the bottom with a fork. Bake the crust in the preheated oven for 10-12 minutes or until it starts to lightly brown. Remove from the oven and set aside.
-
Raise the oven temperature to 375°F (190°C).
-
For the filling, heat the honey in a saucepan over medium-high heat until it begins to bubble and darken, about 5-7 minutes. Remove from heat and let it cool slightly.
-
In a separate bowl, whisk together the heavy cream, room temperature butter, and cornstarch until smooth. Gradually whisk in the eggs, one at a time, followed by the vanilla extract, ground cinnamon, ground nutmeg, and salt.
-
Slowly incorporate the cooled burnt honey into the cream and egg mixture, constantly whisking to prevent curdling.
-
Pour the filling into the prebaked pie crust and smooth the top with a spatula.
-
Bake the pie in the 375°F oven for 35-40 minutes or until the filling is set and slightly wobbles in the center.
-
Remove from the oven and let the pie cool on a wire rack. Once cooled, refrigerate for at least 2 hours before serving.
Nutrition Facts
Serving Size 8
- Amount Per Serving
- Calories 50kcal
Note
- Burnt honey has a distinctive depth of flavor that enhances the richness of the pie.
- The pie is best served chilled; it allows the flavors to meld beautifully.
- For a decorative touch, consider topping with a dollop of whipped cream or a sprinkle of crushed nuts.
- Ensure that the honey has cooled before combining it with the eggs to prevent them from cooking.
- Using a high-quality honey can greatly impact the flavor profile of the pie.

