

Cheesy Taco Sticks are the ultimate answer to your snack time prayers, bursting with seasoned beef, gooey cheese, and that perfect crispy crust you get from baked pizza dough. This appetizer-turned-dinner item combines all the best flavors of taco night into portable sticks that practically beg to be dunked in salsa, sour cream, or guacamole. With just 15 minutes of prep, a quick 12 minutes in the oven, and a 5-minute resting period, you’ll be enjoying hot, cheesy perfection in under half an hour. At about 350 calories per serving, these sticks are a balanced choice for any gathering, whether it’s a laid-back family dinner or game day with friends. Rated beginner-friendly, this recipe guides you through each step, from cooking the ground beef to sprinkling on fresh cilantro, making it simple for anyone to master. The combination of cheddar or a Mexican blend cheese, seasoned beef, and butter-brushed dough creates a symphony of textures and tastes that will have everyone going back for seconds. Savor the crunchy goodness of these cheesy taco sticks – your new favorite snack!
I first whipped up these cheesy wonders at a casual backyard barbecue, and trust me, they disappeared faster than any tray of traditional wings or nachos. As I rolled out the refrigerated pizza dough on a sun-lit patio table, neighbors peeked over the fence asking for a sneak preview. The sizzle of ground beef hitting the hot skillet filled the air with a savory promise of what was to come. Breaking up the meat with a wooden spoon felt almost therapeutic, as I chatted with friends and added just enough taco seasoning to give it that authentic southwestern kick. Folding the dough over the meat and cheese felt like creating tiny parcels of comfort, each one bursting with anticipation. When those golden-brown sticks finally emerged from the oven, the sight of bubbling cheese and crispy edges was pure joy. I couldn’t resist sharing, and as everyone dunked their sticks into bowls of fresh guacamole and tangy salsa, I knew this easy snack was destined for repeat performances at every gathering.
KEY INGREDIENTS IN CHEESY TACO STICKS
These Cheesy Taco Sticks rely on a handful of kitchen staples to deliver maximum flavor with minimal fuss. Each ingredient plays its part, from building the savory filling to creating that irresistible golden crust.
- Ground beef
Provides a rich, meaty base that’s satisfying and hearty. As it browns, the beef releases juices that absorb the taco seasoning, creating a flavor-packed filling.
- Taco seasoning
A fragrant blend of spices (cumin, chili powder, garlic, and more) that transforms plain beef into a bold, zesty mixture. It’s the secret to authentic taco flavor without measuring out individual spices.
- Shredded cheese
Acts as the gooey, melty glue that binds everything together. Cheddar or a Mexican blend add sharpness and creaminess, giving each stick that signature cheese pull.
- Refrigerated pizza dough
Offers a quick, tender crust that bakes up flaky and golden. Using pre-made dough saves time while delivering bakery-style results.
- Olive oil
Ensures the beef cooks evenly by preventing sticking and adds a hint of fruity richness that balances the spices.
- Butter, melted
Brushed on top of the sticks before baking for a glossy, golden finish and an extra touch of indulgence.
- Chopped fresh cilantro
Sprinkled after baking to introduce a bright, herbal note that cuts through the richness of the meat and cheese.
- Salsa, sour cream, or guacamole (optional)
Perfect for dipping, these accompaniments bring acidity, creaminess, and freshness to every bite, taking your snack to the next level.
HOW TO MAKE CHEESY TACO STICKS
Get ready to roll up your sleeves and transform simple ingredients into a crowd-pleasing treat. This step-by-step guide makes assembling and baking these sticks feel effortless, even for first-time cooks.
1. Preheat your oven to 425°F (220°C). Line a baking sheet with parchment paper or coat it with non-stick cooking spray to prevent sticking and ensure easy cleanup.
2. In a medium skillet set over medium heat, add the olive oil and then the ground beef. Cook, breaking it up with a spoon, until it's fully browned and no longer pink in the center.
3. Drain any excess grease from the skillet, then stir in the taco seasoning following the packet directions, usually combining it with a splash of water. Simmer the mixture until the sauce thickens and clings to the meat.
4. Roll out the refrigerated pizza dough on a lightly floured surface into a rectangle about 14 by 10 inches.
5. On one half of the dough, evenly spread the seasoned taco meat, then sprinkle the shredded cheese across the top, creating a gooey layer of cheddar or Mexican blend.
6. Fold the other side of the dough over the toppings, press the edges together firmly to seal, and use a sharp knife or pizza cutter to slice the folded dough into 10-12 even sticks.
7. Arrange the sticks on the prepared baking sheet, brush each top with the melted butter, and sprinkle the chopped cilantro for a fresh pop of color.
8. Bake in the preheated oven for 10-12 minutes, or until the dough turns golden brown and the cheese is bubbling.
9. Remove the baking sheet, let the sticks cool slightly, then serve them warm alongside salsa, sour cream, or guacamole for dipping.
SERVING SUGGESTIONS FOR CHEESY TACO STICKS
Elevating these Cheesy Taco Sticks from simple snack to memorable feast is all about thoughtful presentation and perfect pairings. Whether you're setting up a buffet table for game day, arranging a casual finger-food spread for friends, or serving a fun family dinner, the right accompaniments bring this appetizer to life. Fresh, vibrant dips contrast beautifully with the warm, savory sticks, while crisp salads or tangy slaws add palate-cleansing brightness. A well-curated platter balances textures and flavors—creamy, crunchy, spicy, and cooling elements all have a place here. Don’t be afraid to experiment: swap in your favorite cheeses, toss in pickled jalapeños for heat, or top dips with chopped herbs and citrus zest. With these serving ideas, every bite becomes an event of its own, and your guests will love customizing their own combinations. Presentation also plays a key role—arrange the sticks on a rustic wooden board or a colorful ceramic platter, garnish with lime wedges, and set small bowls of toppings alongside. The result? A vibrant, communal spread that looks as good as it tastes.
- Serve with zesty tomato salsa and lime wedges for a bright, citrusy kick that cuts through the richness of the cheese.
- Offer a bowl of creamy avocado crema or guacamole topped with pomegranate seeds for a silky, fruity contrast and a pop of color.
- Create a dipping station featuring spicy ranch, cool sour cream, and smoky chipotle aioli so guests can mix and match their favorite flavors.
- Plate alongside a Mexican street corn salad (elote) or pico de gallo for a refreshing side that balances the warm, cheesy sticks with fresh, crunchy veggies.
HOW TO STORE CHEESY TACO STICKS
Keeping Cheesy Taco Sticks as fresh and delicious as possible requires just a few easy steps. Whether you’re saving leftovers for later in the week or prepping a big batch to freeze for future parties, proper storage maintains that golden-brown crunch and gooey interior. Moisture is the arch-nemesis of crispness, so always allow the sticks to cool completely before packing them away. Airtight containers and resealable bags are your best friends here, blocking out air and preventing sogginess. Labeling each package with the date helps you keep track of freshness, while stacking sticks in a single layer avoids crushing. When it’s time to reheat, gently warming them in an oven or toaster oven revives the texture better than a microwave. With these tips, you can stock up ahead of time and pull out baked or frozen sticks whenever snack cravings strike, ensuring that every bite tastes freshly made.
- Refrigerator storage: Once cooled, place the sticks in an airtight container in a single layer, sealing tightly. They’ll stay fresh for up to 3 days.
- Freezer storage: For longer keeping, flash-freeze cooled sticks on a parchment-lined tray, then transfer to a freezer-safe bag or container. They’ll hold up for 2 months.
- Reheating tips: To restore crispiness, preheat the oven or toaster oven to 350°F (175°C), arrange sticks on a baking sheet, and bake for 5–7 minutes until heated through.
- Avoiding moisture: Store dips separately from the sticks and only combine when ready to serve to prevent sogginess.
CONCLUSION
From the very first bite of warm, cheesy goodness to the last crunchy end piece, Cheesy Taco Sticks offer a fun twist on classic tacos that’s perfect for any occasion. Whether you’re hosting a lively game day gathering, planning a relaxed family dinner, or simply craving a quick snack, this beginner-friendly recipe delivers bold taco flavors wrapped in a flaky, golden crust. With just 15 minutes of preparation, 12 minutes of baking, and a brief 5-minute rest, you can transform simple ingredients into an appetizer or meal that feels indulgent yet approachable. The versatile formula invites experimentation—try different cheeses, add diced jalapeños for heat, or swap in black beans for a vegetarian version. Fresh cilantro, melted butter, and optional dips like salsa, sour cream, or guacamole take each stick over the top. With clear instructions and minimal equipment needed, these sticks are as accessible to kitchen novices as they are to seasoned home cooks.
Feel free to print this article and save it for later reference; having a hard copy in your recipe binder means you can quickly revisit the steps whenever those taco cravings hit. You’ll also find a handy FAQ below to address common questions about substitutions, storage, and reheating. If you give this recipe a try or need any tips on perfecting your Cheesy Taco Sticks, I’d love to hear from you. Leave a comment with your feedback, questions, or creative twists—your insights help our cooking community grow and inspire others to dive into the fun world of homemade snacks. Happy cooking!
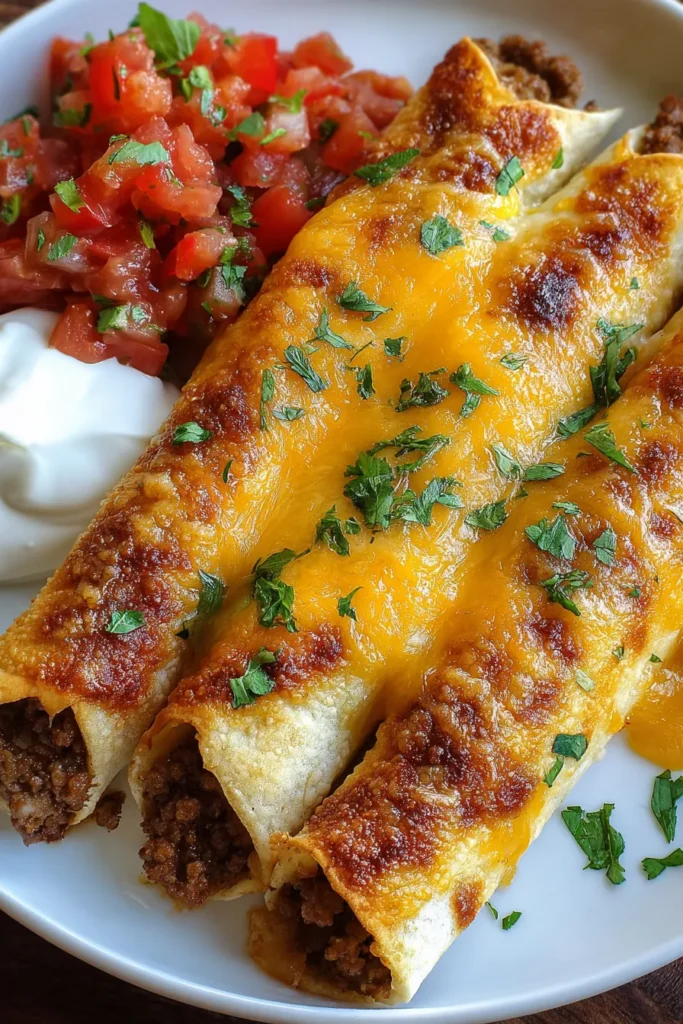

Cheesy Taco Sticks
Description
These cheesy taco sticks are bursting with flavor, featuring seasoned beef and gooey cheese wrapped in crispy pizza dough. Perfect for parties or a family night!
Ingredients
Instructions
-
Preheat your oven to 425°F (220°C). Line a baking sheet with parchment paper or spray with non-stick cooking spray.
-
In a medium skillet over medium heat, cook the ground beef until fully browned, breaking it up with a spoon as it cooks.
-
Drain any excess grease and stir in the taco seasoning according to the packet instructions, typically adding a small amount of water to mix. Simmer until thickened.
-
Roll out the refrigerated pizza dough into a large rectangle, roughly 14 inches by 10 inches.
-
Spread the prepared taco meat evenly over one half of the rectangle, then sprinkle the cheese on top of the meat.
-
Fold the other half of the dough over the toppings, pressing the edges together to seal. Use a knife or pizza cutter to cut into even sticks, approximately 10-12 strips.
-
Place the sticks onto the prepared baking sheet. Lightly brush the tops with melted butter and sprinkle with chopped cilantro.
-
Bake in the preheated oven for 10-12 minutes, or until golden brown and the cheese is bubbly.
-
Remove from oven and let cool slightly. Serve warm with your choice of salsa, sour cream, or guacamole.
Nutrition Facts
Serving Size 4
- Amount Per Serving
- Calories 63kcal
Note
- For a spicier kick, consider adding diced jalapenos or a sprinkle of red pepper flakes when adding the cheese.
- Experiment with different cheeses such as Monterrey Jack, mozzarella, or a spicy pepper jack for varied flavors.
- These cheesy taco sticks can also be made vegetarian by substituting seasoned black beans for ground beef.
- These are great for game day snacks or as a fun twist on taco night.
- Store any leftovers in an airtight container and reheat in the oven for the best results.

