

Chicken Caesar Wrap is the ultimate lunch hack, with juicy grilled chicken, crunchy romaine, and tangy Caesar dressing tucked into a warm tortilla for a quick, satisfying handheld meal. Enjoy smoky seared chicken, crisp lettuce, and nutty Parmesan mingling with creamy dressing and a crackle of crushed croutons. This handheld delight assembles in minutes, making it perfect for busy weekdays or relaxed weekend picnics. Dive in and treat yourself to a wrap that warms both your hands and your taste buds!
Key Ingredients
Before you roll, let’s gather our simple but flavorful lineup of ingredients.
- 2 boneless skinless chicken breasts: Tender protein that soaks up seasonings and grills to juicy perfection.
- 1 tablespoon olive oil: Helps achieve a golden sear on the chicken and prevents sticking.
- 1 teaspoon salt: Enhances the natural flavor of the chicken.
- 1 teaspoon black pepper: Adds a subtle heat and aromatic kick.
- 4 large flour tortillas: Soft, pliable wraps that hold all the tasty fillings.
- 1 cup Caesar dressing: Creamy, tangy sauce that brings everything together.
- 2 cups romaine lettuce, chopped: Provides a crisp, refreshing crunch.
- 1/2 cup Parmesan cheese, grated: Delivers a nutty, salty finish.
- 1/4 cup croutons, crushed: Adds a satisfying crunch in every bite.
How To Make Chicken Caesar Wrap
This simple method transforms raw chicken into a delectable wrap in just a few steps. You’ll learn to perfectly sear the breasts, rest and slice them for maximum juiciness, warm the tortillas for easy rolling, and assemble each component for balanced bites. Ready to get cooking and assemble a handheld meal that’s bursting with flavor and texture?
1. Preheat a skillet over medium-high heat for a few minutes until it’s hot enough to sizzle a drop of water.
2. Season the chicken breasts with salt and pepper on both sides, pressing gently so the seasoning adheres.
3. Add olive oil to the hot skillet, then place the chicken breasts in a single layer; cook for 6 to 7 minutes per side until golden brown and fully cooked.
4. Remove the chicken from the skillet and let it rest on a cutting board for 5 minutes so the juices redistribute, then slice into thin strips.
5. Warm the flour tortillas in the same skillet for about 30 seconds on each side until they’re soft and pliable.
6. Lay each tortilla flat on a clean surface and spread 1/4 cup of Caesar dressing down the center in a straight line.
7. Divide the chopped romaine lettuce, sliced chicken, grated Parmesan cheese, and crushed croutons evenly among the tortillas, layering each ingredient for balanced bites.
8. Fold the sides of each tortilla inward over the filling, then roll tightly from one end to form a secure wrap.
9. Slice each wrap in half diagonally with a sharp knife and serve immediately to enjoy the crisp croutons at their crunchiest.
Serving Suggestions
Serving these Chicken Caesar Wraps straight from the skillet is tempting, but pairing them with complementary sides and drinks takes this lunch to the next level. You can boost the crunch factor, balance the creamy dressing, and add color to your plate. The right accompaniments not only fill out the meal but also contrast flavors and textures in all the right ways. Try one of these suggestions to transform a simple wrap into a full dining experience that pleases everyone at the table, whether it’s a solo lunch or a casual gathering.
- Serve alongside sweet potato fries for a crispy, colorful side that balances the creamy wrap.
- Offer a duet of fresh salsa or pico de gallo to add a bright, zesty kick.
- Pair with a crisp green salad dressed in lemon vinaigrette to lighten the meal.
- Include a small bowl of pickled cucumbers or olives for a tangy contrast.
Tips For Perfect Chicken Caesar Wrap
Here’s the scoop on making your wraps even better: minor tweaks and smart shortcuts can shave off time and add flavor. From using cooked rotisserie chicken to custom add-ins, these tips ensure your wraps stay crisp, creamy, and hassle-free. A good wrap is all about timing and handling—warm tortillas, dry lettuce, and secure rolls make a world of difference. Whether you’re packing lunchboxes or hosting an impromptu dinner, these insights are your ticket to stress-free assembly and mouthwatering results. Don’t forget, a little prep hack goes a long way in keeping those tortillas from tearing and your guests coming back for seconds!
- Use rotisserie chicken or leftover grilled chicken to cut down on prep time.
- For extra crunch, add crispy bacon bits or sliced cucumbers.
- Keep the wraps tightly rolled and secure with toothpicks to prevent filling from spilling.
- Store any extra dressing separately and assemble wraps just before serving to avoid sogginess.
How To Store It
After enjoying a few wraps, you might have leftovers or want to prep ahead for busy days. Proper storage keeps each component fresh, so your next meal is just as tasty as the first. The key is separating wet and dry ingredients and packaging them to prevent sogginess. Follow these simple methods to lock in flavor, maintain crunch, and cut down on waste—so your Chicken Caesar Wraps are ready to grab and go whenever hunger strikes.
- Separate components: Store sliced chicken and tortillas in one airtight container or wrapped tightly in foil, and keep lettuce in a dry container lined with a paper towel.
- Keep dressing on the side: Place Caesar dressing in a small airtight jar to avoid soggy lettuce; add it just before serving.
- Use airtight containers: Pack assembled wraps individually in plastic wrap or reusable wraps to maintain shape and freshness.
- Reheat carefully: If you store cooked chicken and tortillas together, reheat in a dry skillet or microwave for 30–45 seconds to restore warmth without wilting the tortilla.
Frequently Asked Questions
Here are some quick answers to common questions about making these wraps:
- Q: How long does it take to prepare and cook the Chicken Caesar Wraps?
A: It takes about 30 minutes from start to finish. This includes 10 minutes of prep (seasoning chicken, chopping lettuce), about 14 minutes of cooking the chicken (6–7 minutes per side), 5 minutes of resting, 1 minute to warm the tortillas, and 5 minutes to assemble the wraps.
- Q: Can I use rotisserie or leftover grilled chicken instead of cooking fresh breasts?
A: Yes. Shred or thinly slice about 2 cups of rotisserie or leftover grilled chicken, skip the cooking and resting steps, then warm tortillas and assemble. This shortcut cuts total time to around 15 minutes.
- Q: How do I prevent the flour tortillas from tearing while rolling?
A: Warm each tortilla in a dry skillet over medium-high heat for about 30 seconds per side until pliable. You can also wrap them in a damp paper towel and microwave for 20–30 seconds. Handling them gently once warm ensures they won’t crack when you roll.
- Q: What’s the best way to keep the wraps from becoming soggy if I make them ahead?
A: Store the Caesar dressing separately in an airtight container and keep the chopped lettuce dry by patting it with paper towels. Assemble the wraps just before serving. If you need to prep components in advance, combine chicken, cheese, and croutons in one container and lettuce in another, then add dressing at the last minute.
- Q: How should I store leftovers and reheat them?
A: For best results store components separately: chicken and tortillas wrapped tightly in foil, lettuce in an airtight container, and dressing sealed. Refrigerate up to 2 days. To reheat, warm chicken and tortillas in a skillet or microwave for 30–45 seconds, then assemble with fresh lettuce and dressing.
- Q: What add-ins or variations work well with this recipe?
A: For extra crunch, stir in 1/4 cup crispy bacon bits or 1/4 cup thinly sliced cucumbers with the lettuce. You can also experiment with whole-wheat tortillas or a light yogurt-based Caesar dressing, but the classic combo of creamy dressing, Parmesan, and croutons delivers the signature flavor.
- Q: How can I slice and serve the wraps neatly?
A: After rolling each wrap tightly and securing the ends with toothpicks, use a sharp serrated knife to slice diagonally in the center. Let the wrap rest for 1 minute to settle filling, then cut with a single smooth motion to prevent ingredients from spilling. Remove toothpicks before serving.
What Makes This Special
What makes this Chicken Caesar Wrap so special is the perfect blend of textures and flavors in every bite: juicy grilled chicken, crunchy romaine, tangy Caesar dressing, nutty Parmesan, and that satisfying crunch from the croutons. The soft tortilla ties it all together, making it a handheld feast that works for busy lunches or casual dinners. Plus, the recipe’s flexible nature means you can swap in leftovers or add-ons with zero fuss. Feel free to print this out, stick it on your fridge, and try it soon—then drop a comment or question below; I’m always here to help you wrap like a pro!
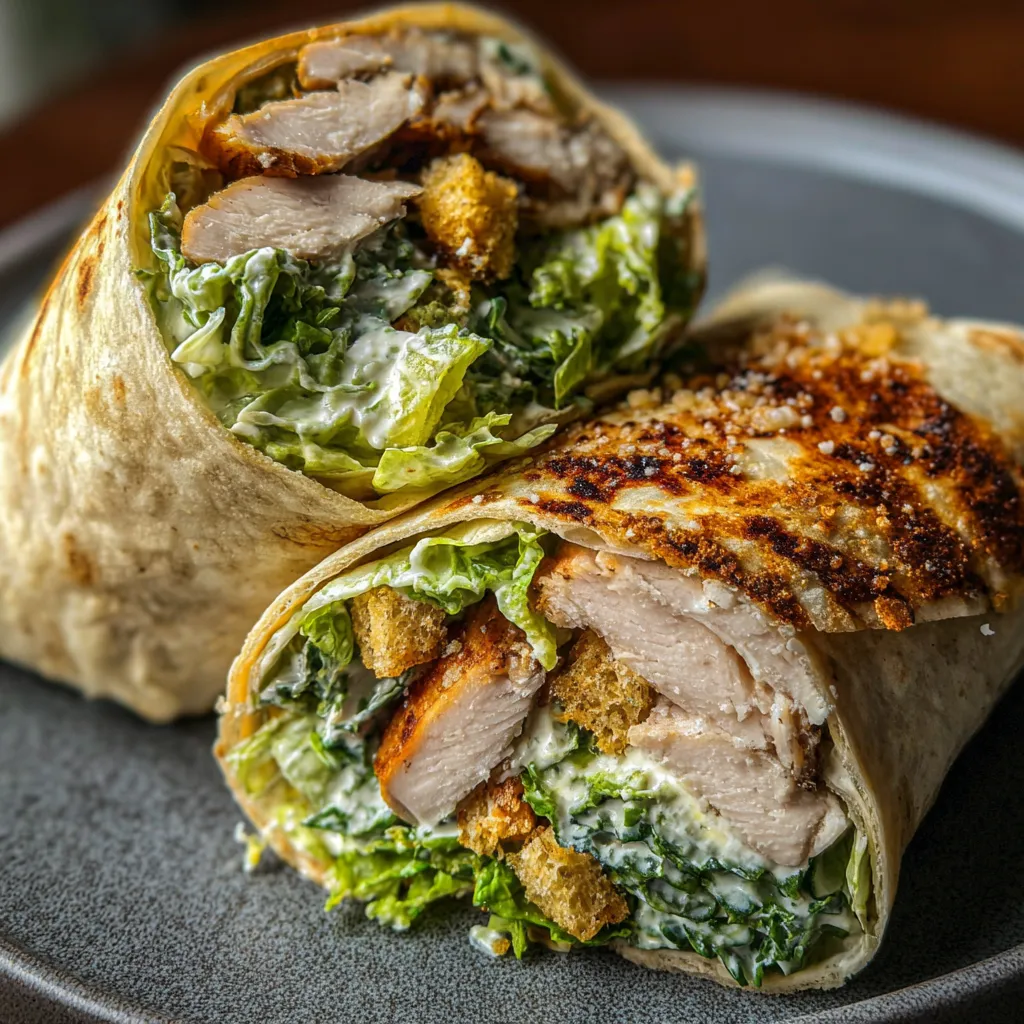

Chicken Caesar Wrap
Description
Enjoy smoky seared chicken, crisp romaine, and nutty Parmesan mingling with creamy Caesar dressing. Each bite crackles with crushed croutons, wrapped in a soft tortilla that warms your hands and taste buds.
Ingredients
Instructions
-
Preheat a skillet over medium-high heat.
-
Season the chicken breasts with salt and pepper on both sides.
-
Add olive oil to the hot skillet and cook the chicken 6 to 7 minutes per side until golden brown and cooked through.
-
Remove the chicken from the skillet and let it rest for 5 minutes, then slice into thin strips.
-
Warm the flour tortillas in the skillet for about 30 seconds on each side until pliable.
-
Lay each tortilla flat and spread 1/4 cup of Caesar dressing down the center.
-
Divide the chopped romaine lettuce, sliced chicken, grated Parmesan cheese, and crushed croutons evenly among the tortillas.
-
Fold the sides of each tortilla inward, then roll tightly from one end to form a wrap.
-
Slice each wrap in half diagonally and serve immediately.
Nutrition Facts
Serving Size 4
- Amount Per Serving
- Calories 180kcal
Note
- Use rotisserie chicken or leftover grilled chicken to cut down on prep time.
- For extra crunch, add crispy bacon bits or sliced cucumbers.
- Keep the wraps tightly rolled and secure with toothpicks to prevent filling from spilling.
- Store any extra dressing separately and assemble wraps just before serving to avoid sogginess.

