

Nothing beats the satisfying crunch of a homemade pickle—the gentle snap when you bite in, releasing a wave of tangy, garlicky goodness that tingles on your tongue. These crisp homemade dill pickles are a celebration of fresh cucumbers bathed in a bright, zesty brine. Every jar holds a symphony of flavor: the earthy warmth of dill seed, the peppery pop of black peppercorns, and subtle garlic undertones dancing together in perfect harmony. Whether you’re a seasoned canning pro or a beginner looking to expand your culinary repertoire, this recipe will guide you through each step with ease.
The joy of canning these pickles goes beyond just preserving cucumbers—it’s about creating a pantry staple that elevates every meal. Picture yourself opening a jar two weeks from now to find that each spear has soaked up enough brine to be both juicy and firm, bursting with that signature dill punch. This recipe has been crafted for home cooks of all skill levels, from novice to master, and is perfect for snacking straight from the jar, layering onto sandwiches, or shouting a crunch across the dinner table. With a preparation time of just 30 minutes, another 30 minutes spent boiling jars and brine, and a week (or two!) of rest time, you’ll soon be enjoying crunchy pickles that last up to a year in a cool pantry.
KEY INGREDIENTS IN CRISP HOMEMADE DILL PICKLES
Before diving into the process, let’s talk about the components that make these pickles pop with flavor and texture. Each ingredient plays a unique role, whether it’s providing acidity for preservation, adding spice notes, or ensuring that signature crunch holds up over time.
- Pickling Cucumbers
Often shorter and firmer than slicing varieties, these cucumbers have fewer seeds and a thicker skin that helps them maintain a snappy texture once pickled.
- Distilled White Vinegar
This clear, high-acidity vinegar is the backbone of the brine—it preserves the cucumbers while imparting a bright, tangy flavor without altering the color.
- Water
Used to balance the acidity of vinegar, water dilutes the brine to just the right strength so the pickles are tangy but not overpowering.
- Sea Salt or Pickling Salt
Free from additives found in table salt, this coarser salt draws moisture out of the cucumbers, creating crispness while seasoning them evenly.
- Garlic Cloves
Peeled and crushed, garlic infuses the brine with a mellow, savory kick that pairs beautifully with dill’s freshness.
- Dill Seed
These seeds deepen the herbal dill flavor in every bite, complementing the fronds of fresh dill heads for a full-spectrum dill experience.
- Black Peppercorns
A few whole peppercorns add a subtle heat and complexity, popping in your mouth as you chew to release aromatic oils.
- Fresh Dill Heads
Beyond its aesthetic appeal, fresh dill brings bright, grassy notes that define a classic dill pickle.
- Red Pepper Flakes (Optional)
For anyone craving a bit of spice, a teaspoon per jar adds a gentle, lingering heat that balances beautifully with the tangy brine.
HOW TO MAKE CRISP HOMEMADE DILL PICKLES
All the preparation in the world won’t help if you skip the fundamentals of canning, but don’t worry—these steps are straightforward and beginner-friendly. Follow them carefully to ensure your pickles stay crisp, flavorful, and shelf-stable.
1. Thoroughly wash your canning jars in hot, soapy water, paying special attention to any crevices. Rinse them well, then sterilize by submerging the jars and lids in a pot of boiling water for at least 10 minutes. Use tongs to remove them and let them air dry on a clean towel.
2. Rinse the cucumbers under cool running water, scrubbing away any dirt. Slice off the blossom end to prevent softening; then decide whether to keep them whole, cut in half, or slice into spears depending on your preference.
3. In a large saucepan, combine the vinegar, water, and salt. Bring the mixture to a lively boil, stirring occasionally to dissolve the salt. Once it’s bubbling, reduce the heat to keep the brine warm but not rolling.
4. In each sterilized jar, layer 1–2 crushed garlic cloves, one head of dill, dill seed, and a few black peppercorns. If you like heat, sprinkle in red pepper flakes—about a teaspoon per jar.
5. Pack the prepared cucumbers snugly into the jars, leaving about ½ inch of headspace at the top to allow for expansion during processing.
6. Carefully pour the hot brine over the cucumbers, using a ladle to ensure every piece is submerged and there are no air gaps.
7. Gently tap each jar on the countertop to release any trapped air bubbles. Use a non-metallic utensil to coax bubbles upward, then wipe the rim with a damp cloth to ensure a clean seal.
8. Secure the lids on the jars without over-tightening and place them in a hot water bath. Process for 10 minutes, adjusting for altitude if needed, to guarantee a proper seal.
9. Remove the jars and let them cool to room temperature on a towel-lined surface. Once cool, transfer to a cool, dark place. Allow at least one week to cure—two is even better—to let flavors fully mature.
SERVING SUGGESTIONS FOR CRISP HOMEMADE DILL PICKLES
These pickles are versatile and can elevate almost any bite. Whether you’re an after-school snack enthusiast or you’re curating a gourmet spread, serving these crunchy delights alongside your favorite foods takes every dish up a notch. Let your creativity run wild, but here are four of our favorite ways to enjoy these tangy gems.
- Enjoy a zesty snack straight from the jar by chilling your pickles for at least an hour in the fridge. The cold temperature enhances the crunch, and the flavor explodes with every bite—perfect for tackling those mid-afternoon cravings.
- Add a punch of brightness to your sandwiches. Layer sliced dill pickles on a classic BLT, turkey melt, or veggie wrap. The acidity cuts through rich cheeses and fatty meats, providing a refreshing balance.
- Chop your pickles finely for a unique relish. Fold the chopped pickles into deviled egg filling, spoon over homemade potato salad, or mix into tuna or chicken salads to add texture and tang.
- Build an irresistible charcuterie board by pairing pickle spears with cured meats, soft cheeses, and crusty bread. The acidity acts as a palate cleanser between rich bites, making every combination feel new and exciting.
HOW TO STORE CRISP HOMEMADE DILL PICKLES
Proper storage ensures your dill pickles stay fresh, crunchy, and bursting with flavor well beyond the initial curing period. Whether you’re tucking jars into a pantry or stashing them in the fridge after opening, these tips will help you maintain that signature snap.
A sealed jar of these pickles will keep for up to a year in a cool, dark pantry—think around 50–70°F away from direct sunlight. The vines will continue to mellow in flavor, so older pickles often taste even better than when newly made.
Once you crack a lid, refrigeration becomes essential. Keep opened jars sealed tightly and store them in the coldest part of your fridge, rather than in the door, to ensure even temperatures and maximum crispness. Consume within one month for the best quality.
For ultimate crunch, drop a grape leaf into each jar before jarring. The natural tannins in grape leaves help maintain firmness of the cucumber skins, giving you an extra-snappy bite throughout the storage period.
If you’d like to rotate stock, always remove clean utensils from the jar—never your fingers—to avoid introducing bacteria that can shorten shelf life. With these simple techniques, your homemade pickles will remain delightful for months to come.
CONCLUSION
Creating your own batch of crisp homemade dill pickles is an incredibly rewarding journey—one that rewards patience and celebrates the freshest ingredients. From the moment you prepare your jars and brine, to the first satisfying pop when you open a cured jar, you’ll appreciate how simple steps yield extraordinary results. These pickles carry a bright, garlicky punch, balanced by just the right amount of spice, making them an indispensable addition to any pantry. You’ve learned how to select and prep ingredients, the importance of sterilizing jars, and the art of packing cucumbers so they come out delightfully crunchy every time. You can print this article and save it for later use, ensuring that whenever you’re ready to embark on your pickling adventure, the entire guide is right at your fingertips.
Don’t forget to check the FAQ section below for answers to common canning questions, and feel free to reach out if you hit any snags or simply want to share your pickle success story. I’d love to hear how your jars turn out—drop a comment, ask a question, or leave feedback if you try the recipe. Happy pickling!
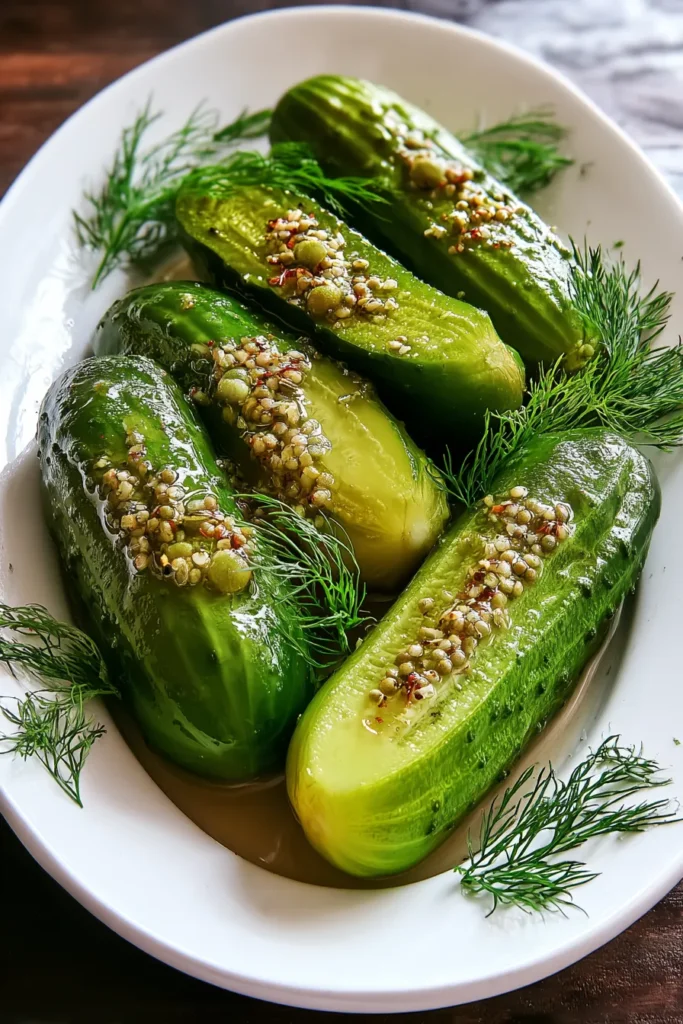

Crisp Homemade Dill Pickles
Description
Bright and refreshing, these crisp dill pickles pack a delightful crunch with a tangy, garlicky punch. Perfect as a side or snack, they're a must-try!
Ingredients
Instructions
-
Prepare your canning jars by thoroughly washing them with hot, soapy water. Rinse well, then sterilize them by submerging them in boiling water for at least 10 minutes. Allow them to air dry on a clean towel.
-
Wash the cucumbers well and cut off the blossom end. You can leave them whole, halve them, or slice them into spears.
-
In a large saucepan, combine the vinegar, water, and salt. Bring to a boil, then reduce the heat to keep the brine warm.
-
Into each sterilized jar, place 1-2 crushed garlic cloves, a head of dill, 1 teaspoon of dill seed, and a few peppercorns. If using red pepper flakes, add 1 teaspoon per jar.
-
Pack the cucumbers tightly into the jars, leaving about 1/2 inch headspace at the top.
-
Pour the hot brine over the cucumbers in each jar, ensuring they are completely submerged.
-
Remove any air bubbles by gently tapping the jar on the counter and adjusting the contents if necessary. Wipe the rims clean with a damp towel.
-
Secure the lids onto the jars, then process them in a hot water bath for 10 minutes to seal.
-
Allow the pickles to cool to room temperature before moving them to a cool, dark place to cure for at least one week, preferably two, for the best flavor.
Nutrition Facts
Serving Size 10
- Amount Per Serving
- Calories 5kcal
Note
- The blossom end of cucumbers contains enzymes that can cause pickles to soften, so be sure to slice it off.
- For a sturdier crunch, consider adding grape leaves to the jars. They contain tannins that preserve crispness.
- Customize your pickles by experimenting with additional spices like mustard seeds, coriander seeds, or even a bay leaf for different flavors.
- These pickles will keep for up to a year in a cool, dark pantry as long as the jars remain sealed. Once opened, store in the refrigerator and consume within a month for the best taste.

