

There’s something irresistibly comforting about a golden Dutch apple pie fresh out of the oven. As a beginner-friendly dessert, it marries the tangy brightness of Granny Smith apples with the warm embrace of cinnamon and nutmeg. The crisp crumb topping shimmers with sugar crystals, promising that familiar crackle under your fork. Every slice delivers a symphony of textures: tender, juicy apple slices nestled in a flaky crust, crowned by buttery crumbs that melt on your tongue. In just under an hour of active preparation and baking time, you get a dessert that feels both homemade and celebratory. Difficulty? Beginner. Course type? Dessert. Total time from mixing bowl to plate is around 90 minutes, including a brief rest to let the juices settle. At roughly 450 calories per slice, this Dutch apple pie strikes a delightful balance between indulgent and wholesome. Whether you’re gearing up for an autumnal gathering or just craving something cozy on a cool evening, this crumb-topped wonder hits all the right notes.
From the first swirl of cinnamon-scented steam to the last crumb scraped from the plate, this pie is more than a recipe—it’s a moment. It’s laughter around a family table when someone sneaks the first slice, it’s the anticipation of that heavenly first bite, and it’s the joy of sharing something simple yet extraordinary with friends. Over the years, I’ve watched this recipe become a staple in my own kitchen, passed down like a cherished secret. With each apple I slice and every crumb I press into place, I remember my grandmother’s worn wooden rolling pin and the cozy warmth of her farmhouse kitchen. Now, I can’t wait for you to create your own memories with this Dutch apple pie recipe. So grab an apron, gather your ingredients, and let’s dive into a classic dessert that feels like a warm hug on a plate.
KEY INGREDIENTS IN DUTCH APPLE PIE
Before we dive into the baking, let’s take a moment to appreciate each key ingredient and what it brings to this recipe. From the sturdy base of the crust to the sweet, spiced crumbs on top, every component plays an essential role in building layers of flavor and texture.
- Unbaked 9-inch pie crust: Provides a flaky, buttery foundation that holds all the juicy apple filling. Choosing a pre-made crust saves time and ensures a consistent, golden edge.
- Tart apples (such as Granny Smith): Offer a firm texture and bright, tangy flavor that stands up beautifully to baking. Slicing them thinly ensures even cooking and perfect tenderness.
- Lemon juice: Helps prevent the apple slices from browning and adds a hint of brightness that balances the sweetness.
- Granulated sugar: Sweetens the filling and helps draw out natural juices from the apples for a succulent texture.
- Brown sugar: Infuses a hint of molasses flavor and deep caramel notes into both the filling and topping.
- All-purpose flour: Thickens the apple juices in the filling and combines with butter and sugars in the topping to create that irresistible crumb.
- Ground cinnamon: Adds warm, spicy sweetness that ties all the flavors together.
- Ground nutmeg: Contributes a subtle, aromatic depth that elevates the spice profile.
- Salt: Enhances the sweetness and balances the flavors throughout the filling and topping.
- Cold unsalted butter (diced): Creates the rich, crunchy crumbs in the topping when cut into the flour-and-sugar mixture.
HOW TO MAKE DUTCH APPLE PIE
Now that we’ve gathered our ingredients, it’s time to transform them into a delightfully cozy dessert. Follow these detailed steps for a perfectly balanced filling and a golden crumb topping that’s crisp on the outside and tender just beneath.
1. Preheat your oven to 375°F (190°C). Ensuring the oven reaches the right temperature before baking sets the stage for even cooking and a beautifully browned topping.
2. Place the unbaked pie crust in a 9-inch pie plate and set aside. Press it gently against the plate’s bottom and sides to eliminate air pockets.
3. In a large bowl, toss the sliced apples with lemon juice to prevent browning and to add a touch of tartness that brightens the final pie.
4. In another bowl, combine the granulated sugar, brown sugar, flour, cinnamon, nutmeg, and salt. Whisk until the mixture is smooth and the spices are evenly distributed.
5. Pour the sugar-flour mixture over the apples and toss to coat each slice thoroughly, ensuring that every bite will be warmly spiced and sweet.
6. Spoon the apple mixture into the prepared pie crust, mounding the fruit slightly in the center to account for natural shrinkage during baking.
7. In a separate bowl, prepare the crumb topping by mixing together the flour, granulated sugar, brown sugar, and cinnamon until uniform in color.
8. Add the cold diced butter and use a pastry cutter or your fingers to blend until the topping resembles coarse crumbs, with pea-sized pieces of butter distributed throughout.
9. Sprinkle the crumb topping evenly over the apples, covering every nook and cranny for even browning and crunch.
10. Place the pie on a baking sheet to catch any drips, and bake for about 45 to 50 minutes, or until the filling is bubbling and the topping turns a rich, golden brown.
11. If the topping browns too quickly, loosely cover the pie with foil during the final 10 minutes of baking to prevent over-browning.
12. Remove from the oven and let the pie rest for at least 10 minutes before serving. This allows the filling to set and makes slicing easier.
SERVING SUGGESTIONS FOR DUTCH APPLE PIE
After you pull this jewel of a pie from the oven, the real joy comes in serving it up just right. Whether you’re hosting a festive gathering or enjoying a quiet treat at home, presentation and accompaniments can transform every slice into a memorable moment.
- Serve warm with a scoop of vanilla ice cream for a classic contrast of hot and cold. The melting ice cream seeps into the crumb topping, creating pockets of creamy richness.
- Add a dollop of whipped cream and a dusting of cinnamon to accentuate the warm spices. For extra flair, pipe the whipped cream in decorative rosettes.
- Pair with a cup of spiced tea or coffee to complement the cinnamon-nutmeg notes. The warmth of the drink enhances the cozy vibe of each bite.
- Drizzle lightly with warm caramel sauce for an indulgent finish that elevates the brown sugar undertones and makes every forkful extra luxurious.
HOW TO STORE DUTCH APPLE PIE
Storing your Dutch apple pie correctly ensures that every slice retains maximum flavor and texture, even if you’re enjoying leftovers. Whether you plan to eat it the next day or save portions for later, these tips will help keep your pie tasting fresh.
- Room temperature: Cover the pie loosely with aluminum foil or a pie keeper and store at room temperature for up to 2 days. This method preserves the crumb’s crunch and the filling’s juiciness.
- Refrigerator: Wrap the pie in plastic wrap or place it in an airtight container and refrigerate for up to 4 days. Chilled slices make a refreshing treat, and you can warm them briefly in a 350°F oven to revive the textures.
- Freezing whole: Tightly wrap the cooled pie in plastic wrap and then in aluminum foil. Freeze for up to 2 months. Thaw in the refrigerator overnight before reheating at 350°F until warmed through.
- Freezing slices: Wrap individual portions in plastic wrap and store in a freezer-safe bag. This makes quick reheating a breeze—simply pull a slice from the freezer and bake at 350°F for 10–15 minutes until heated.
CONCLUSION
We’ve journeyed through every step of creating a classic Dutch apple pie, from selecting the perfect tart apples and combining sweet spices to achieving that irresistible crumb topping. Along the way, we explored how ingredients like lemon juice brighten the filling, how butter transforms simple flour and sugars into crunchy crumbs, and why a good preheat can make or break your bake. With beginner-friendly instructions, a quick prep time of 30 minutes, and an overall cook time of about 50 minutes, you’re well-equipped to tackle this cozy dessert for any occasion—autumn gatherings, holiday feasts, or a spontaneous Sunday treat. Be sure to keep this article handy: you can print it out or save it digitally to refer back to whenever the craving for a warm slice strikes.
If you found this recipe helpful, feel free to leave your comments or questions below. Whether you have feedback about ingredient swaps, troubleshooting tips, or just want to share a photo of your finished pie, I’d love to hear from you. Remember, you can also scroll down to find a FAQ section that covers common queries about ovens, apple varieties, and storage methods. Baking is as much a journey as it is a science, and your experiences add richness to the conversation. Happy baking, and may every slice bring a little spark of joy to your day!
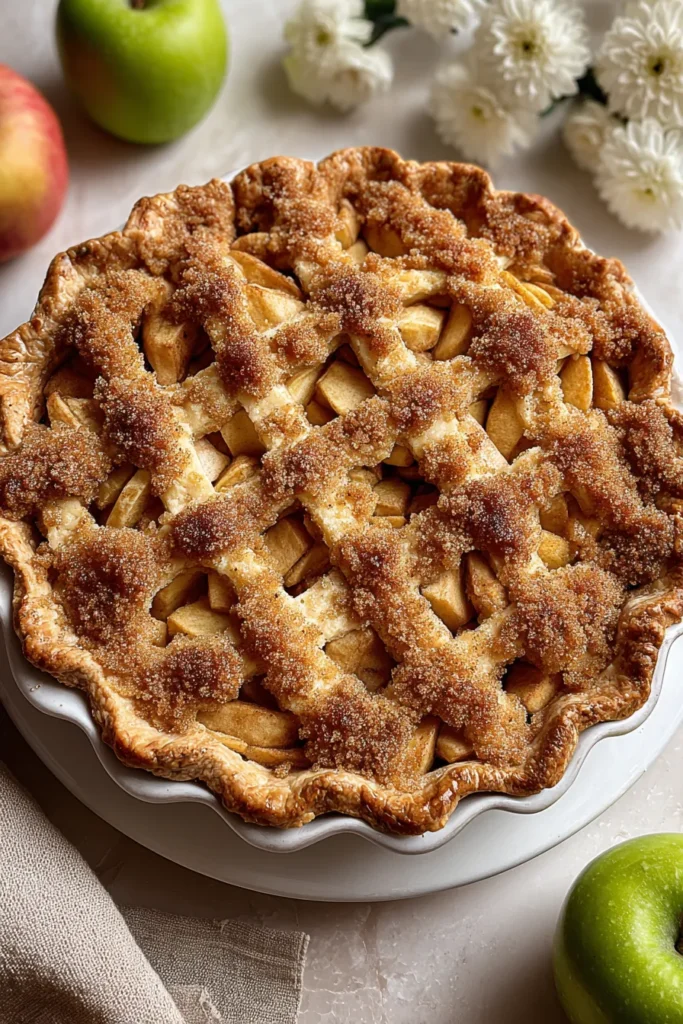

Dutch Apple Pie
Description
This delightful Dutch Apple Pie features crisp, tart apples enveloped in a sweet and cinnamon-infused crumb topping, making it a cozy dessert perfect for any occasion.
Ingredients
Instructions
-
Preheat your oven to 375°F (190°C).
-
Place the unbaked pie crust in a 9-inch pie plate and set aside.
-
In a large bowl, toss the sliced apples with lemon juice to prevent browning.
-
In another bowl, combine the granulated sugar, brown sugar, flour, cinnamon, nutmeg, and salt.
-
Pour the sugar-flour mixture over the apples and toss to coat evenly.
-
Spoon the apple mixture into the pie crust, mounding them in the center.
-
In a separate bowl, prepare the crumb topping by mixing together the flour, granulated sugar, brown sugar, and cinnamon.
-
Add the cold diced butter and use a pastry cutter or your fingers to blend until the mixture resembles coarse crumbs.
-
Sprinkle the crumb topping evenly over the apples.
-
Place the pie on a baking sheet to catch any drips, and bake for about 45 to 50 minutes, or until the apples are tender and the crumb topping is golden brown.
-
If the topping browns too quickly, cover the pie with foil during the last 10 minutes of baking.
-
Remove from the oven and let the pie cool to set before serving.
Nutrition Facts
Serving Size 8
- Amount Per Serving
- Calories 44kcal
Note
- Dutch apple pie differs from a traditional apple pie because it includes a crumb topping instead of a double crust.
- Serve warm with a scoop of vanilla ice cream or a dollop of whipped cream.
- Experiment with different types of apples or a combination for varied flavor and texture.

