

Achieving glossy, tender sushi rice with each grain perfectly sticky and lightly seasoned can feel like a culinary triumph. Flavorful Steamed Sticky Sushi Rice brings together simple Japanese pantry staples—rice vinegar, sake, mirin, sugar, salt, and a piece of kombu—to transform short-grain sushi rice into that iconic foundation for your favorite rolls, nigiri, or bowls. With just a bit of technique, you’ll master rice that’s plump, shiny, and balanced between sweet and tangy—ready for any sushi project at home!
Key Ingredients
To nail this recipe, gather these fundamental components that each play a vital role in creating the perfect sushi rice:
- 2 cups sushi rice: High-starch short-grain rice that yields the classic sticky texture and chew.
- 2 1/4 cups water: Precisely measured liquid for even hydration and tender grains.
- 1 piece kombu: Dried kelp that infuses subtle umami depth during the steaming process.
- 2 tablespoons rice vinegar: Sweet-tangy seasoning that flavors the rice and helps preserve freshness.
- 1 tablespoon sake: Enhances aroma and adds a gentle sweetness to the rice.
- 1 tablespoon mirin: Rice wine that balances acidity and contributes to the rice’s glossy sheen.
- 2 tablespoons sugar: Provides the signature sweet finish in the vinegar dressing.
- 1 teaspoon salt: Rounds out all the flavors and ensures a balanced taste.
How To Make Flavorful Steamed Sticky Sushi Rice
Making perfect sushi rice is all about precise preparation and gentle handling. You’ll start by rinsing and soaking the rice to achieve even moisture, steam it with kombu, sake, and mirin for subtle flavor infusion, then fold in the seasoned vinegar mixture with a delicate cutting motion. Fanning the rice as you work locks in gloss and sets the texture. Follow each step carefully to transform those simple grains into sushi-ready masterpieces.
1. Place sushi rice in a bowl and rinse under cold water, swirling gently until the water runs clear to remove excess surface starch.
2. Drain the rice and soak in fresh water for 30 minutes, then drain again to ensure even hydration and tender cooking.
3. Combine the rice, water, kombu, sake, and mirin in a heavy pot or steamer; bring to a gentle boil, then cover tightly and steam for 12 minutes without lifting the lid.
4. Remove from heat, keep the lid on, and let the rice rest for 10 minutes so residual steam finishes the cooking evenly.
5. While the rice rests, mix rice vinegar, sugar, and salt in a small bowl until the sugar and salt dissolve completely.
6. Remove the kombu and transfer the rice to a wooden hangiri or wide bowl; gently fold in the vinegar mixture using a cutting motion to coat each grain without crushing them.
7. Fan the rice as you fold to cool it quickly, setting that signature glossy finish, then cover with a damp cloth until you’re ready to serve.
Serving Suggestions
Perfectly seasoned, glossy sushi rice is unbelievably versatile and shines when paired thoughtfully. Whether you’re building simple nigiri or layering a vibrant chirashi bowl, these serving ideas will make your rice the star of the show.
- Classic nigiri: Wet your hands, form small rice ovals, and top with your favorite sashimi slices for an elegant bite.
- Pickled ginger and wasabi: Offer thin-sliced ginger and a dab of wasabi alongside each serving to cleanse the palate and add a spicy lift.
- Chirashi bowls: Spread a bed of rice in a bowl and arrange assorted sashimi, vegetables, or tamagoyaki on top for a colorful, deconstructed sushi experience.
- Onigiri triangles: Shape the rice into handheld triangles and wrap with a strip of nori for a convenient, portable snack or lunch.
Tips For Perfect Flavorful Steamed Sticky Sushi Rice
Getting sushi rice just right requires a few insider tricks—here’s how to make every batch shine:
- Use a hangiri or wide bowl for best seasoning absorption and easier folding without crushing the grains.
- Be careful not to mash the rice when folding in the vinegar; a gentle cut-and-turn motion preserves each grain’s shape.
- If sushi rice is unavailable, swap in short-grain rice and reduce the cooking water by about two tablespoons to maintain stickiness.
- Sushi rice is best served at room temperature and consumed within a few hours to enjoy its ideal texture and glossy appearance.
How To Store It
Storing sushi rice properly is key to preserving its moisture, gloss, and flavor. Follow these methods to keep your rice fresh and ready for later use:
- Room Temperature, Short-Term: Cover the rice with a damp cloth and leave at room temperature for up to two hours—perfect if you plan to serve it soon.
- Refrigeration: Transfer cooled rice to an airtight container and chill. Before serving, let it sit at room temperature and gently re-steam or microwave with a sprinkle of water.
- Freezing: Avoid freezing seasoned sushi rice, as the texture and glossy finish can degrade once thawed.
- Reheating: To revive chilled rice, sprinkle with a little water, cover, and reheat briefly—either in a steamer or microwave—to restore moisture and softness.
Frequently Asked Questions
Here are quick answers to common queries about making flawless sushi rice:
- Q: Why is it important to rinse the sushi rice until the water runs clear?
A: Rinsing removes excess surface starch from the rice grains, preventing them from becoming overly gummy or sticky in clumps and ensuring each grain remains distinct after steaming.
- Q: What purpose does soaking the rice for 30 minutes serve?
A: Soaking allows the rice grains to fully absorb water, ensuring even cooking and a tender texture; without soaking, the center may stay undercooked while the exterior turns mushy.
- Q: Why do we add kombu, sake, and mirin during steaming?
A: Kombu imparts subtle umami depth, while sake and mirin add sweetness and aromatic complexity, infusing the rice with flavor beyond plain steamed grains.
- Q: Can I lift the lid during the 10-minute resting period?
A: No. Keeping the lid closed traps steam and allows residual heat to finish cooking evenly; lifting it releases steam and may result in uneven texture.
- Q: How should I fold in the vinegar mixture to avoid mashing the rice?
A: Use a slicing or cutting motion with a rice paddle or spatula, gently turning and lifting the grains to separate them and evenly distribute seasoning without breaking them.
- Q: Why is fanning the rice during seasoning recommended?
A: Fanning cools the rice quickly, helping set the glossy exterior, preventing sogginess, and bringing the rice to the ideal room temperature for serving.
- Q: What adjustments should I make if I don’t have sushi rice and must use short-grain rice?
A: Use the same volume of short-grain rice but reduce the cooking water by about two tablespoons to achieve characteristic stickiness without turning mushy.
- Q: How long can I keep the seasoned sushi rice before it loses quality?
A: Seasoned rice is best served at room temperature and consumed within two to three hours; after that, it may dry out or lose its sheen. If stored, cover with a damp cloth in the refrigerator and gently re-steam before serving.
What Makes This Special
This recipe strikes the perfect balance between sweet and tangy, with every grain glossy, plump, and infused with umami-rich kombu, sake, and mirin. It works because you’re tailoring hydration, steaming, and seasoning techniques to highlight the rice’s natural starchiness without overworking it. Plus, that cutting-and-fanning method locks in the sheen and prevents mush. Feel free to print this guide, save it for your next sushi night, and share your results or questions below—your feedback (or sushi tales!) always makes my day. Enjoy every sticky, shiny bite!
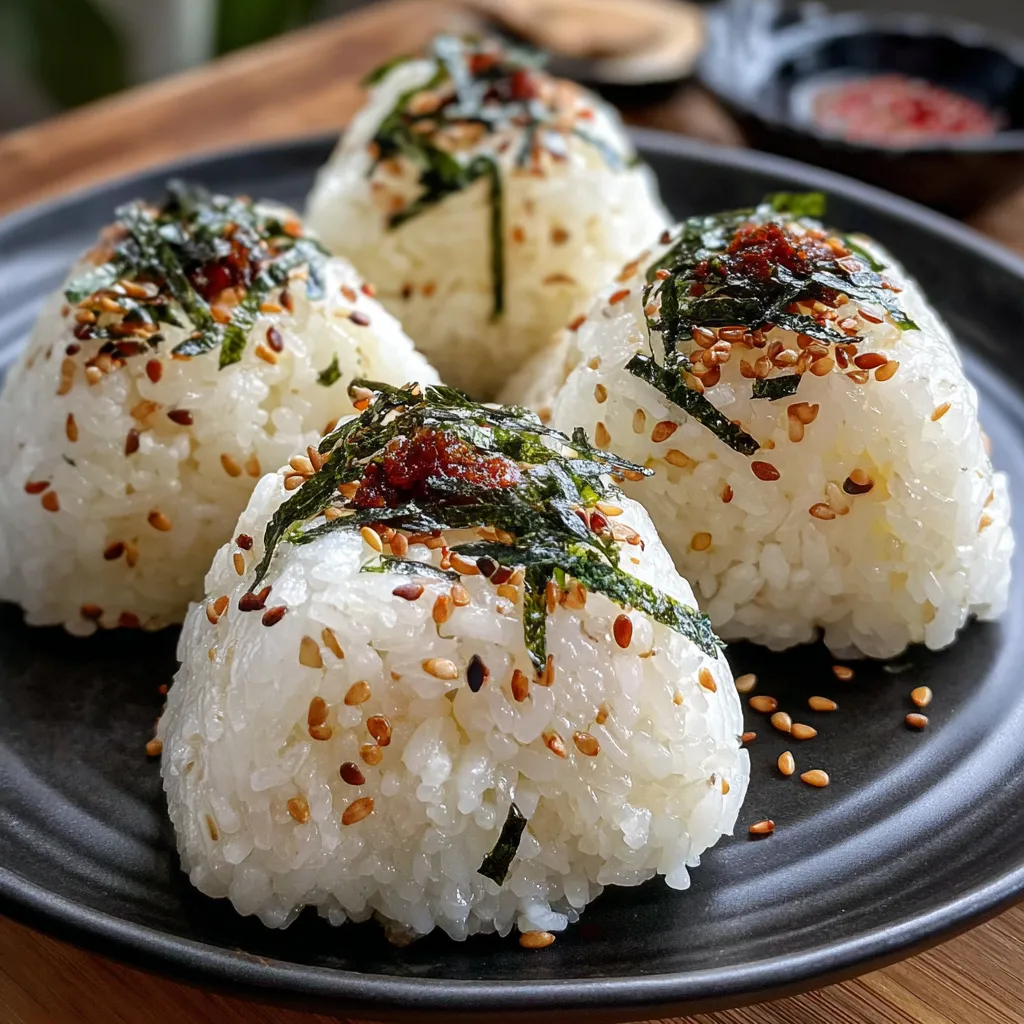

Flavorful Steamed Sticky Sushi Rice
Description
Glossy, tender sushi rice steamed to perfection and folded with rice vinegar, sake, mirin, and sugar. Each bite yields plump, sticky grains with a balanced sweet-tangy finish and that classic sushi texture.
Ingredients
Instructions
-
Place sushi rice in a bowl and rinse under cold water, swirling gently until water runs clear.
-
Drain rice and soak in water for 30 minutes, then drain again.
-
Combine rice, water, kombu, sake, and mirin in a pot or steamer; bring to a gentle boil, then cover and steam for 12 minutes.
-
Remove from heat, keep covered, and let rest for 10 minutes without lifting the lid.
-
While rice rests, mix rice vinegar, sugar, and salt in a small bowl until dissolved.
-
Remove kombu and transfer rice to a wooden hangiri or wide bowl, then gently fold in the vinegar mixture using a cutting motion.
-
Fan the rice as you fold to cool it quickly and create a glossy texture, then cover with a damp cloth until ready to serve.
Nutrition Facts
Serving Size 4
- Amount Per Serving
- Calories 85kcal
Note
- Use a hangiri or wide bowl for best seasoning absorption.
- Be careful not to mash the rice when folding in vinegar.
- If sushi rice is unavailable, use short-grain rice and adjust water to achieve stickiness.
- Sushi rice is best served at room temperature and consumed within a few hours.

