

This recipe will sweep you off your feet the moment you dip into that first bite. Treat yourself to these creamy, dreamy Frozen Greek Yogurt Peanut Butter Bites loaded with chocolate chips! You’ll love the way the tang of Greek yogurt brightens each mouthful, balancing the rich, nutty warmth of natural peanut butter. As you scoop out that smooth, velvety mixture, you can almost taste the sweet kiss of honey weaving its way through, and before you know it, you’re folding in those playful little chocolate chips that pop with every chew. There’s a delightful contrast between the cool, firm bite and the sunshiny sweetness that makes this snack feel like sunshine on a chilly day. Whether you’re craving a guilt-free dessert after dinner or hunting for a healthy pick-me-up, these bite-sized treats are here to rescue your cravings—without any oven drama or melting mess.
What makes this recipe feel like chatting with an old friend is how approachable it is. I still remember the first time I whipped up a batch on a lazy Sunday afternoon: I was experimenting with flavors in my tiny kitchen—flour on the counter, music playing in the background, and kids dancing around my legs. By the time those bites had frozen solid, the whole crew had disappeared into the living room, mouths stained with chocolate, faces lit up in pure delight. It was one of those rare moments when dessert felt like playtime, guilt-free and brimming with wholesome ingredients. You don’t need fancy equipment, just a bowl, a spatula, and two hours of freezer magic. So grab your favorite peanut butter, raid your chocolate stash, and let’s get into the simple joy of crafting these cool, protein-packed morsels that will have everyone asking, “Can I have just one more?”
KEY INGREDIENTS IN FROZEN GREEK YOGURT PEANUT BUTTER BITES WITH CHOCOLATE CHIPS
Every superstar snack starts with quality ingredients you can taste. Below is a breakdown of each element that makes these frozen bites so irresistible—and exactly why they belong in your freezer right now.
- Greek yogurt
Thick and creamy, this tangy base brings a dose of protein and probiotics to every bite. It also helps the mixture freeze into a smooth, spoonable texture that holds together beautifully.
- Natural creamy peanut butter
Rich and nutty, this pantry staple adds depth of flavor and healthy fats. Its natural oils meld with the yogurt, creating a luscious, scoopable consistency.
- Honey or maple syrup
A touch of liquid sweetness that balances the tang of yogurt and intensifies the overall flavor. Honey lends floral undertones, while maple syrup is a fantastic vegan swap with caramel-like notes.
- Vanilla extract
Just a splash of this aromatic liquid transforms the snack, enhancing all the other flavors and giving a hint of bakery-fresh warmth.
- Mini chocolate chips
Tiny bursts of chocolate throughout ensure each bite has a playful snap. They remain delightfully firm when frozen, making each morsel extra fun.
HOW TO MAKE FROZEN GREEK YOGURT PEANUT BUTTER BITES WITH CHOCOLATE CHIPS
Let’s walk through the no-fuss, no-bake process that turns everyday ingredients into a sensational frozen treat. With a few simple steps, you’ll have a tray of perfectly portioned bites ready to chill—and to wow anyone who tries them.
1. Gather all your ingredients and have them ready on the counter for efficiency. Having everything measured and within arm’s reach ensures a smooth, uninterrupted process.
2. In a medium mixing bowl, combine the Greek yogurt, peanut butter, honey, and vanilla extract. Make sure your bowl is large enough to stir without spilling!
3. Stir the mixture with a spatula or wooden spoon until it becomes smooth and well-combined. You’re looking for an even, creamy texture with no streaks of yogurt or peanut butter.
4. Gently fold in the mini chocolate chips, ensuring they are evenly distributed throughout the mixture. This folding technique prevents the chips from sinking to the bottom.
5. Line a baking sheet with parchment paper or use a silicone baking mat to keep the bites from sticking. These non-stick surfaces make removal a breeze.
6. Using a small spoon or a melon baller, scoop small amounts of the mixture and drop them onto the prepared baking sheet. Aim for bite-sized portions, around 1-inch in diameter, for the perfect hand-held treat.
7. Place the baking sheet in the freezer and let the bites freeze for at least 2 hours, or until they are firm to the touch. This ensures they hold their shape and have that satisfying chill.
8. Once frozen, you can transfer the portions into a resealable plastic bag or airtight container for easier storage and portion access.
9. These bites can stay stored in the freezer for up to a month but are best enjoyed within two weeks for optimal taste and texture.
SERVING SUGGESTIONS FOR FROZEN GREEK YOGURT PEANUT BUTTER BITES WITH CHOCOLATE CHIPS
When it’s time to share your labor of love, presentation can transform simple bites into showstopping treats. Whether you’re hosting a weekend brunch, packing lunchboxes, or just treating yourself, these serving ideas will elevate the experience and underscore how versatile these frozen nibbles can be.
- Colorful spring platter: Arrange the bites on a bright ceramic tray alongside fresh fruit like strawberries, kiwi slices, or blueberries. The contrast of colors makes the snack table pop and invites guests to dive right in.
- Mini dessert cups: Layer crushed graham crackers, slices of banana, and a few bites in small clear cups for an elegant parfait-inspired presentation. Top with a mint leaf for a gourmet twist.
- Chocolate drizzle station: Place the bites on a platter with small bowls of melted dark chocolate and toppings like chopped nuts or coconut flakes. Invite friends to customize their bites for a fun interactive dessert bar.
- Afternoon pick-me-up board: Combine these bites with energy balls, granola clusters, and dried fruit on a wooden board. Label each item with a cute chalk tag and let everyone graze at their own pace.
HOW TO STORE FROZEN GREEK YOGURT PEANUT BUTTER BITES WITH CHOCOLATE CHIPS
Keeping your creamy, dreamy bites at peak freshness is all about proper storage. With a few simple steps, you’ll maintain their flavor, texture, and that perfect frozen firmness—ready for whenever you need a quick, satisfying treat.
- Store in an airtight container: After the bites have fully frozen, layer them gently into a rigid container. This protects their shape and prevents freezer odors from seeping in.
- Use parchment paper separators: Place sheets of parchment paper between layers to stop the bites from sticking together. This makes it easy to grab a handful without smashing the rest.
- Label with freeze date: Write the date directly on the container or bag. These bites are best enjoyed within two weeks for peak flavor, but they’ll stay safe up to a month.
- Maintain a consistent freezer temperature: Fluctuating temperatures can cause ice crystals to form on the treats. Keep your freezer at a steady 0°F (-18°C) to preserve that smooth, creamy texture.
CONCLUSION
From start to finish, these Frozen Greek Yogurt Peanut Butter Bites with Chocolate Chips deliver all the sweetness and satisfaction of a decadent dessert—without the fuss of baking or an ingredient list that’s hard to pronounce. We’ve walked through every step, from whisking together tangy Greek yogurt and rich peanut butter, to folding in sweet honey and those joyful mini chocolate chips that make every bite feel like a celebration. Whether you’re a kitchen novice or a seasoned home cook, this recipe’s simplicity is its superpower. The no-bake process means you spend more time savoring and less time scrubbing pans, and the protein-packed Greek yogurt turns dessert into an energizing snack that feels almost too good to be true.
Feel free to print this article and save it in your recipe binder or on your fridge for those moments when dessert emergencies strike. You can also find a FAQ below to answer any lingering questions about ingredients, substitutions, or timing. If you give these bites a whirl, I’d love to hear how they turned out—drop a comment, share your tweaks, or let me know if you ran into any roadblocks. Your feedback helps me keep sharing kitchen-tested ideas that bring joy and flavor into everyday life. Happy freezing and even happier snacking!
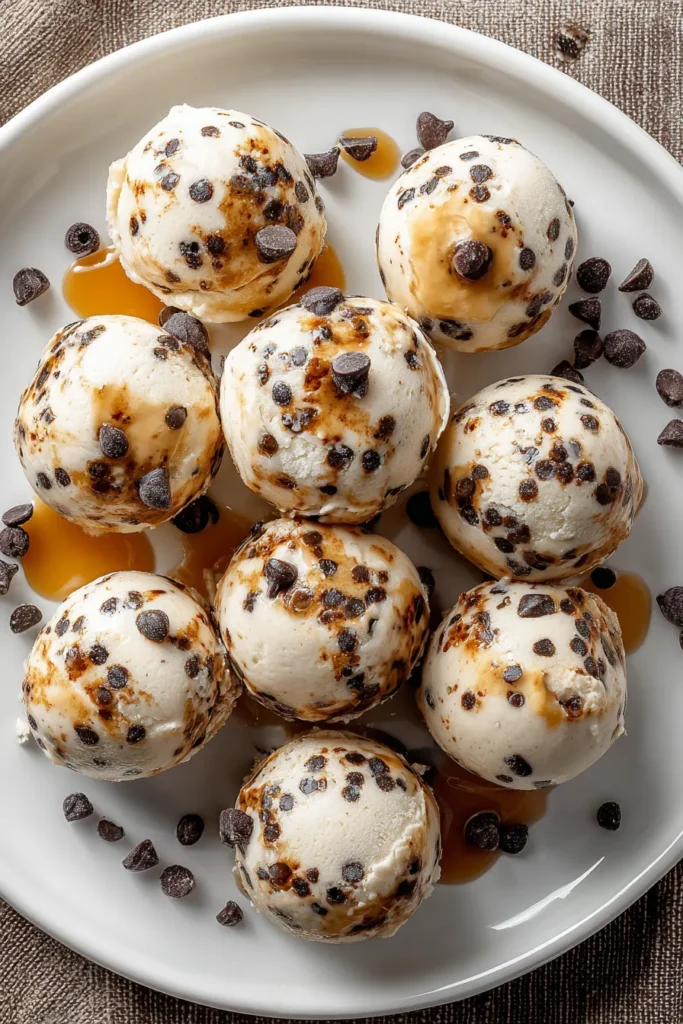

Frozen Greek Yogurt Peanut Butter Bites with Chocolate Chips
Description
These delightful frozen bites blend creamy Greek yogurt with rich peanut butter and sweet honey, all studded with mini chocolate chips for the perfect guilt-free treat.
Ingredients
Instructions
-
Gather all your ingredients and have them ready on the counter for efficiency.
-
In a medium mixing bowl, combine the Greek yogurt, peanut butter, honey, and vanilla extract.
-
Stir the mixture with a spatula or wooden spoon until it becomes smooth and well-combined. It should have an even, creamy texture.
-
Gently fold in the mini chocolate chips, ensuring they are evenly distributed throughout the mixture.
-
Line a baking sheet with parchment paper or use a silicone baking mat.
-
Using a small spoon or a melon baller, scoop small amounts of the mixture and drop them onto the prepared baking sheet. Aim for bite-sized portions, around 1-inch in diameter.
-
Place the baking sheet in the freezer and let the bites freeze for at least 2 hours, or until they are firm to the touch.
-
Once frozen, you can transfer the portions into a resealable plastic bag or airtight container for easier storage.
-
These bites can stay stored in the freezer for up to a month but are best enjoyed within two weeks for optimal taste and texture.
Nutrition Facts
Serving Size 12
- Amount Per Serving
- Calories 13kcal
Note
- Feel free to substitute almond butter or cashew butter if you have allergies to peanuts or preference for different nut flavors.
- For added texture, mix in crushed nuts, seeds, or desiccated coconut before freezing.
- Drizzle melted chocolate over the bites before freezing for an extra chocolatey touch.
- Serve immediately after removing from the freezer as the bites soften quickly at room temperature.

