

When weeknight schedules get hectic, you want something that’s quick to cook but never skimping on taste. Garlic Ginger Chicken packs a flavor punch that awakens your palate and transforms ordinary ingredients into an extraordinary meal. Juicy pieces of chicken thigh meet a sizzling hot skillet, where they brown to golden perfection before being joined by minced garlic and freshly grated ginger. As the garlic and ginger release their unmistakable warmth, vibrant strips of red and yellow bell pepper tumble in, offering a delicate crunch that contrasts beautifully with tender chicken. A drizzle of soy sauce, oyster sauce, and a touch of honey creates a sauce that is both savory and sweet, with a tang of rice vinegar cutting through to keep each bite lively. The dish comes together in under forty minutes, making it a lifesaver on busy evenings when you crave a homemade meal that feels anything but ordinary. Every forkful carries layers of flavor and texture that are destined to become a family favorite. It’s the kind of dish that makes your kitchen smell like a restaurant without the fuss of reservations. Plus, it’s beginner-friendly, so even if you’ve never wielded a wok before, you’ll feel like a pro.
One of the best parts about this Garlic Ginger Chicken is how adaptable it can be. With just 15 minutes of prep time and 20 minutes on the stovetop, you’re looking at a total cooking window that fits perfectly between work, homework, and life’s other demands. Plus, at around 400 calories per serving, it feels indulgent without tipping the scales, especially when you pair it with steamed rice, noodles, or even a crisp salad. I remember the first time I tossed in extra snow peas and broccoli during a midweek cook—those greens added a fresh dimension that had my family asking for seconds. Feel free to kick up the heat with red pepper flakes or sliced chilies if you crave a bit of spice, or swap chicken thighs for lean chicken breasts if you’re watching fat intake. Whether you’re a seasoned cook or a kitchen novice, this recipe invites you to make it your own, turning a simple meal into a palette of personalized flavors. This is the kind of weeknight hero that you’ll find yourself bookmarking, tucking into, and sharing with friends.
KEY INGREDIENTS IN GARLIC GINGER CHICKEN
Every great dish starts with fresh, high-quality ingredients that each bring their own unique character. In this Garlic Ginger Chicken, the harmony of flavors and textures begins with the staples listed below. From savory umami notes to crisp vegetables, here’s what you need and why each ingredient matters.
- Boneless, skinless chicken thighs
Tender and juicy, chicken thighs provide rich flavor and stay moist during high-heat cooking, making them perfect for stir-frying.
- Vegetable oil
A neutral oil with a high smoke point lets you sear the chicken and vegetables without burning, ensuring a clean, crisp finish.
- Garlic
Minced garlic infuses the dish with aromatic depth, adding pungency and savory undertones that harmonize with the ginger.
- Fresh ginger
Minced ginger brings bright, peppery warmth and a zesty kick that balances the sweetness of honey and the mild heat of garlic.
- Medium onion
Sliced onion adds natural sweetness and a tender bite, soaking up the sauce and enhancing the overall texture.
- Red bell pepper
This pepper’s mild sweetness and vibrant color contribute a crunchy contrast to the tender chicken pieces.
- Yellow bell pepper
Another pop of color and sweetness, yellow bell pepper keeps each forkful lively and visually appealing.
- Soy sauce
A classic umami powerhouse, soy sauce lends salty depth and savory complexity to the sauce.
- Oyster sauce
Adds a glossy sheen and rich, slightly briny flavor that elevates the sauce’s savory profile.
- Honey
Balances the salty and tangy elements with a gentle sweetness that caramelizes slightly during cooking.
- Rice vinegar
Introduces mild acidity and brightness, cutting through richness and lifting all the flavors.
- Chicken broth
Provides a succulent base for the sauce, ensuring it’s silky and coating every ingredient evenly.
- Cornstarch mixture
A simple slurry of cornstarch and water thickens the sauce quickly, creating a clingy glaze.
- Salt and pepper
Basic seasonings that bring out the natural flavors of the chicken and vegetables without overwhelming.
- Green onions
Sliced for garnish, they add a fresh, crisp finish and a pop of green to every plate.
- Sesame seeds
Optional but delightful, toasted sesame seeds offer nutty flavor and an extra layer of texture.
HOW TO MAKE GARLIC GINGER CHICKEN
Ready to transform these ingredients into a mouthwatering meal? This section will guide you through each sizzling step, helping you achieve perfectly cooked chicken and vegetables coated in a glossy, flavorful sauce.
1. Heat 1 tablespoon of vegetable oil in a large skillet or wok over medium-high heat, ensuring the pan is hot before you add the chicken.
2. Add the chicken pieces to the skillet and season with salt and pepper. Cook until browned on all sides, about 5–7 minutes, then remove the chicken from the skillet and set aside.
3. In the same skillet, add the remaining 2 tablespoons of vegetable oil. Add the garlic and ginger, and stir-fry until fragrant, about 1 minute, taking care not to let the garlic burn.
4. Add the sliced onion, red bell pepper, and yellow bell pepper to the skillet. Stir-fry for about 3–4 minutes until the vegetables are tender-crisp, preserving some bite and color.
5. Return the chicken to the skillet and combine it with the vegetables, tossing gently so nothing sticks.
6. In a small bowl, whisk together the soy sauce, oyster sauce, honey, rice vinegar, and chicken broth until smooth.
7. Pour the sauce over the chicken and vegetables in the skillet. Stir well to ensure everything is evenly coated in that savory-sweet mixture.
8. Bring the mixture to a gentle simmer, then add the cornstarch mixture to thicken the sauce. Stir constantly until the sauce has thickened and everything is heated through, about 2–3 minutes.
9. Taste and adjust seasoning with additional salt, pepper, or honey as desired, making the flavors truly your own.
10. Garnish with sliced green onions and sesame seeds before serving to add freshness and a delightful crunch.
SERVING SUGGESTIONS FOR GARLIC GINGER CHICKEN
After all the hard work of stir-frying and simmering, you’ll want to present your Garlic Ginger Chicken in a way that makes every bite feel special. Think about contrasting textures, complementary flavors, and visual appeal. A carefully chosen side or garnish can elevate this dish from simple weeknight fare to a meal worthy of celebration. Whether you’re hosting friends or dishing up a cozy family dinner, these ideas will help you serve your chicken in style, highlighting its sweet-tangy sauce, tender meat, and crisp vegetables. Remember, plating with intention not only tastes better but also makes your meal feel more memorable.
- Serve over steamed jasmine rice — Fluffy rice soaks up every drop of sauce, creating a comforting base that balances the bold ginger and garlic flavors.
- Toss with udon or soba noodles — Warm, slippery noodles make this dish feel heartier and add a fun twist, turning your stir-fry into a noodle bowl.
- Garnish with fresh cilantro and crushed peanuts — A sprinkle of fresh herbs and nuts introduces a burst of freshness and crunch, playing beautifully against the savory-sweet sauce.
- Plate alongside steamed broccoli or snap peas — Bright green veggies add color, nutrients, and that satisfying crisp bite, rounding out your meal and boosting the veggie quotient.
HOW TO STORE GARLIC GINGER CHICKEN
Whether you’re meal-prepping for a busy week or safeguarding leftovers for a quick lunch, proper storage will keep your Garlic Ginger Chicken tasting fresh and vibrant. The key is to let the dish cool slightly before sealing it away and to choose the right container to prevent moisture loss or flavor transfer. When handled correctly, this stir-fry can be refrigerated for up to three days or frozen for longer storage. Reheating gently with a splash of broth or water will revive the sauce’s glossy texture and ensure your chicken stays tender, not dry.
- Refrigerate in airtight containers — Allow the dish to cool to room temperature, then transfer to sealed containers. Store in the fridge for up to 3 days, reheating in the microwave or on the stovetop.
- Freeze in portioned bags — Divide into single-serving freezer bags or containers, squeeze out excess air, and freeze for up to 2 months. Thaw overnight in the fridge before reheating.
- Label and date your containers — Keeping track of when you cooked your meal helps you stay organized and avoids the guesswork of freezer-forgotten mystery dinners.
- Reheat with extra liquid — To bring back saucy consistency, add a splash of chicken broth or water when warming up the dish in a skillet over medium heat, stirring gently until everything is hot.
CONCLUSION
We’ve journeyed through the full recipe for Garlic Ginger Chicken, from gathering the freshest ingredients to stir-frying each component and coaxing a glossy, savory-sweet sauce into existence. You’ve learned how to balance flavors, master essential techniques like stir-frying and simmering, and even customize the dish with extra veggies or heat. Whether you’re cooking for one, feeding a family of four, or preparing meals in advance, this recipe adapts effortlessly. Feel free to print this article and save it in your recipe binder—its clear steps and helpful tips will be ready whenever you need a reliable weeknight winner. You can also find a FAQ section below, offering extra guidance on common questions like ingredient swaps and reheating tricks.
I hope this conversational guide has inspired you to get hands-on with Garlic Ginger Chicken in your own kitchen. If you try the recipe, please let me know how it turns out! Comments, questions, or feedback are always welcome—whether you need advice on adjusting flavors, want to share a tasty twist you discovered, or just want to gush about how much everyone loved dinner. Your experiences and tips enrich our cooking community, and I’m here to help you make each meal a delicious success. Happy cooking!
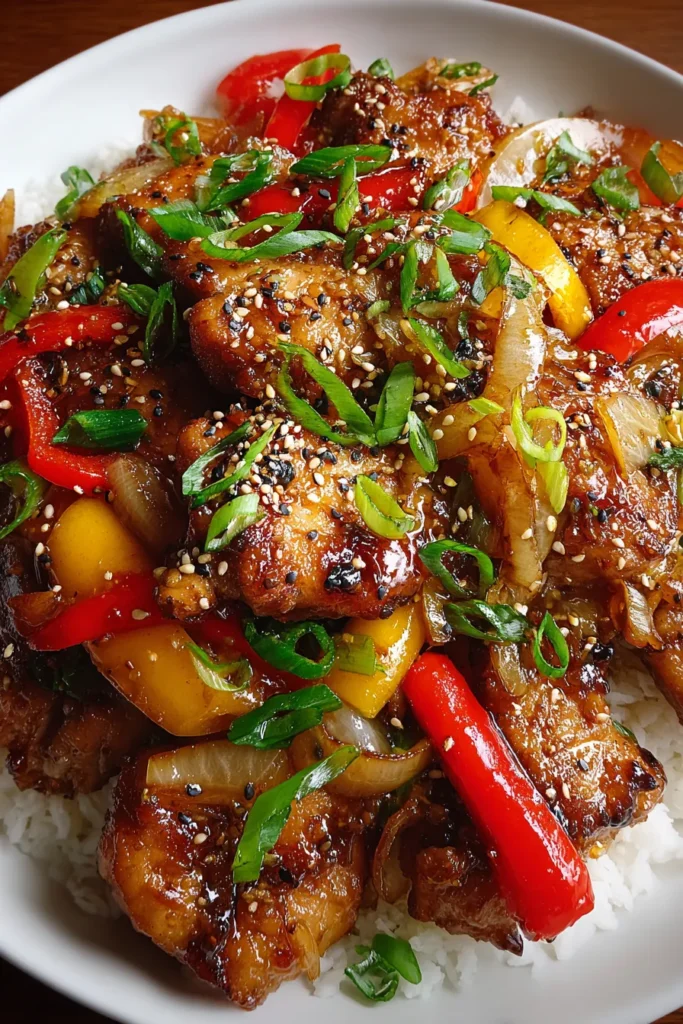

Garlic Ginger Chicken
Description
Juicy chicken thighs are stir-fried with aromatic garlic and ginger, colorful bell peppers, and a savory sauce that’s both sweet and tangy. Perfect with rice!
Ingredients
Instructions
-
Heat 1 tablespoon of vegetable oil in a large skillet or wok over medium-high heat.
-
Add the chicken pieces to the skillet and season with salt and pepper. Cook until browned on all sides, about 5-7 minutes. Remove the chicken from the skillet and set aside.
-
In the same skillet, add the remaining 2 tablespoons of vegetable oil. Add the garlic and ginger, and stir-fry until fragrant, about 1 minute.
-
Add the sliced onion, red bell pepper, and yellow bell pepper to the skillet. Stir-fry for about 3-4 minutes until the vegetables are tender-crisp.
-
Return the chicken to the skillet and combine with the vegetables.
-
In a small bowl, whisk together the soy sauce, oyster sauce, honey, rice vinegar, and chicken broth.
-
Pour the sauce over the chicken and vegetables in the skillet. Stir well to ensure everything is coated.
-
Bring the mixture to a gentle simmer, then add the cornstarch mixture to thicken the sauce. Stir until the sauce has thickened and everything is heated through, about 2-3 minutes.
-
Taste and adjust seasoning with additional salt, pepper, or honey as desired.
-
Garnish with sliced green onions and sesame seeds before serving.
Nutrition Facts
Serving Size 4
- Amount Per Serving
- Calories 113kcal
Note
- This dish pairs well with steamed rice or noodles.
- For an extra kick, add a sliced chili or some red pepper flakes.
- The recipe can be adjusted by adding other vegetables like broccoli or snow peas.
- Substitute chicken thighs with chicken breast if desired.
- Leftovers can be stored in an airtight container in the refrigerator for up to 3 days.

