

Soft, chewy, and dripping with festive flair, Halloween Crinkle Cookies are the perfect way to welcome the spooky season into your kitchen. These vibrant treats capture the essence of Halloween with their bold orange and midnight-black hues, all wrapped up in a moist, devil’s food–inspired dough that crinkles as it bakes. Each bite is an explosion of chocolatey goodness, balanced by the subtle sweetness of powdered sugar tucked into every crease. As a beginner-friendly dessert, you only need a handful of pantry staples—devil’s food cake mix, eggs, and vegetable oil—enhanced with eye-catching food coloring. In under 15 minutes of prep time and just 12 minutes in the oven, you’ll have a batch of 120-calorie cookies that are both visually striking and utterly delicious.
Whether you’re hosting a haunted house party or treating neighborhood trick-or-treaters, these cookies will stand out on any dessert table. The crinkled tops form naturally when the dough spreads, giving each cookie a unique pattern that looks almost too good to eat. With a quick 5-minute rest on the baking sheet, they’re firm enough to transfer without losing their chewy center. From a casual family bake-along to a themed gathering with friends, these Halloween Crinkle Cookies are bound to become a seasonal staple. Let’s embrace the spooky spirit and dive into this beginner-level dessert adventure!
KEY INGREDIENTS IN HALLOWEEN CRINKLE COOKIES
Every memorable recipe starts with quality ingredients, and these Halloween Crinkle Cookies are no exception. Each element plays a vital role in delivering that perfect balance of moisture, tenderness, and festive color. Ready to see what you’ll need? Let’s break it down:
- Devil’s food cake mix
This rich, chocolatey base brings deep flavor and structure to the cookies. The pre-mixed dry ingredients simplify your prep, ensuring consistent results and a tender crumb every time.
- Vegetable oil
Acting as the primary fat, vegetable oil makes these cookies soft and chewy. It combines seamlessly with the cake mix, creating a smooth dough that spreads beautifully in the oven.
- Large eggs
Eggs provide binding power and moisture. They help the dough hold together while baking, ensuring each cookie develops those signature cracks without falling apart.
- Powdered sugar
Known for its fine texture, powdered sugar coats each dough ball, creating the iconic crinkle effect. As the cookies bake and spread, the sugar cracks and reveals the colorful interior.
- Orange food coloring gel
A few drops of gel-based coloring give one half of the dough a bright, pumpkin-like hue. Gel formulas deliver vivid shades without altering the dough’s consistency.
- Black food coloring gel
The perfect contrast to orange, black gel coloring turns the second half of the dough into a dark, spooky tone. It pairs beautifully with the powdered sugar’s white highlights.
HOW TO MAKE HALLOWEEN CRINKLE COOKIES
Before you get started, make sure your workspace is clean and you have all the ingredients measured out. These step-by-step instructions will guide you through creating those iconic crinkled tops and vibrant colors.
1. Preheat your oven to 350°F (175°C) and line a baking sheet with parchment paper. This ensures even baking and makes cleanup a breeze.
2. In a large bowl, combine the devil’s food cake mix, vegetable oil, and eggs. Use a sturdy spoon or a hand mixer to stir until a uniform dough forms.
3. Divide the dough into two equal portions. Add a few drops of orange food coloring to one portion and black food coloring to the other. Knead each portion until the color is fully distributed and the dough is smooth.
4. Take about a tablespoon of each colored dough and roll them together in your palms to create a marbled ball. Repeat this process until all the dough has been shaped into balls.
5. Place the dough balls into a bowl of powdered sugar. Roll each ball around until it’s completely coated, making sure no colored dough is exposed.
6. Arrange the sugar-coated balls on the prepared baking sheet, leaving about 2 inches of space between each to allow for spreading.
7. Bake for 10–12 minutes, or until the cookies have spread out and developed those characteristic crinkled tops.
8. Remove the baking sheet from the oven and let the cookies cool on the sheet for about 5 minutes before transferring them to a wire rack to cool completely.
SERVING SUGGESTIONS FOR HALLOWEEN CRINKLE COOKIES
Once your cookies have cooled and reveal their stunning crackled surfaces, it’s time to think about presentation. Serving these treats can be just as fun and creative as baking them. Whether you’re sending them in goodie bags or displaying them on a dessert table, the right serving idea can elevate the entire experience. Here are a few festive ways to showcase your creepy-crinkle creations:
- Arrange the cookies on a large Halloween-themed platter, alternating orange and black to resemble a candy corn pattern. Garnish the platter with edible confetti or mini candy pumpkins for an extra spooky touch.
- Serve alongside warm apple cider or a rich hot chocolate bar. Provide toppings like whipped cream, marshmallows, and cinnamon sticks so guests can customize their fall-inspired beverages.
- Create individual treat bags with clear cellophane and tie them with black and orange ribbons. Add a small handwritten tag with a Halloween pun or spooky illustration for good measure.
- Place cookies in a tiered dessert stand, interspersed with mini gourds and dried leaves. This vertical display adds height to your table and makes it easy for guests to grab a bite.
HOW TO STORE HALLOWEEN CRINKLE COOKIES
Keeping these cookies at their best means protecting that tender interior and crinkled look. Proper storage is key to maintaining freshness, texture, and flavor—whether you’re prepping a week in advance or saving extras for later. Follow these simple guidelines to preserve your spooky treats:
- Store cooled cookies in an airtight container at room temperature for up to 5 days. Layer them between sheets of parchment paper to prevent sticking and preserve the crinkle pattern.
- If you live in a warm or humid climate, keep cookies in the refrigerator. Place them in a sealed container with a slice of bread to help retain moisture—replace the bread every day for best results.
- For longer storage, freeze the sugar-coated dough balls before baking. Pop them into a freezer-safe container or bag, then bake directly from frozen, adding an extra 1–2 minutes to the baking time.
- After baking, you can also freeze fully baked cookies. Arrange them in a single layer on a baking sheet, freeze until firm, then transfer to a zip-top bag. Thaw at room temperature for about 10 minutes before serving.
CONCLUSION
What began as a simple cake-mix recipe has transformed into a spectacular Halloween staple, perfect for both novice bakers and seasoned dessert enthusiasts. These Halloween Crinkle Cookies embody the best of seasonal baking: stunning visuals, approachable ingredients, and a hint of theatrical flair. You’ve learned how to whip up a tender, chocolaty dough, customize it with striking food-coloring gels, and master the art of rolling each ball in powdered sugar to achieve that signature crackled finish. From assembling the marbled dough balls to watching them spread and crisp in the oven, this recipe offers a delightful hands-on experience that’s as joyful as it is rewarding. Don’t forget the prep time (15 minutes), cook time (12 minutes), and a quick 5-minute cool-down—perfect for busy holiday schedules. At just 120 calories per cookie, you can indulge without too much guilt.
Feel free to print this article and save it for your Halloween baking binder or digital recipe folder. You’ll find a handy FAQ section below to troubleshoot any baking queries you might have, so you can bake with confidence every time. If you give these cookies a try, I’d love to hear how they turned out! Drop a comment with your thoughts, questions, or any fun variations you’ve experimented with. Happy baking, and may your Halloween be both eerie and delicious!
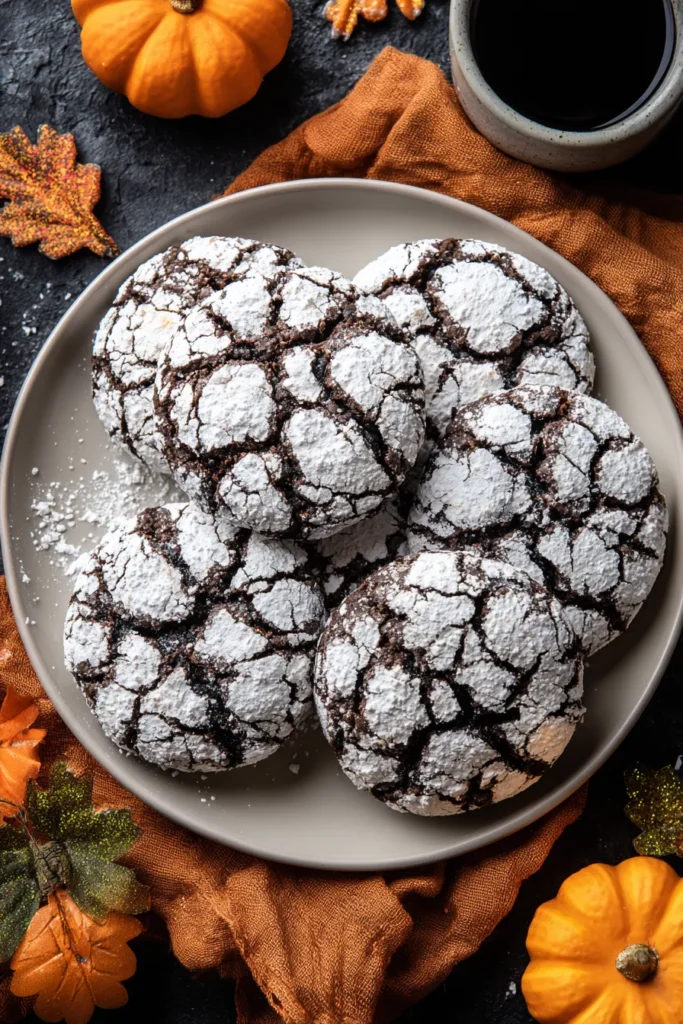

Halloween Crinkle Cookies
Description
Soft, chewy, and beautifully crinkled, these cookies are a treat for the eyes and the palate. With striking orange and black hues, they're perfect for spooky gatherings!
Ingredients
Instructions
-
Preheat your oven to 350°F (175°C) and line a baking sheet with parchment paper.
-
In a large bowl, combine the devil's food cake mix, vegetable oil, and eggs. Mix until a dough forms.
-
Divide the dough into two equal parts. Add a few drops of orange food coloring to one part and black food coloring to the other. Mix each part until the color is uniformly distributed.
-
Take about a tablespoon of dough from each color, roll them together to form a ball. Repeat with the remaining dough.
-
Roll each dough ball in a bowl of powdered sugar until fully coated.
-
Place the sugar-coated cookie balls on the prepared baking sheet, leaving space between each cookie to allow for spreading.
-
Bake for 10-12 minutes or until the cookies have spread and developed crinkled tops.
-
Remove from the oven and allow the cookies to cool on the baking sheet for about 5 minutes before transferring to a wire rack to cool completely.
Nutrition Facts
Serving Size 24
- Amount Per Serving
- Calories 6kcal
Note
- These cookies are perfect for adding a spooky vibe to your Halloween party.
- Store in an airtight container to keep them soft and chewy.
- Experiment with different food colorings to create a variety of festive designs.
- Rolling the dough in powdered sugar is crucial for achieving the crinkle appearance.

