

There’s something magical about capturing the spirit of Halloween in a decadent dessert, and these spooktacular Halloween Oreo Brownies do just that. Combining a rich, fudgy brownie base with a colorful layer of Halloween-themed Oreos, this treat is a showstopper that will have guests oohing and ahhing before they even take a bite. Each square is a celebration of chocolatey goodness, punctuated by pops of orange, black, and festive ghosts or pumpkins from limited-edition Oreos. The contrast between the gooey, melt-in-your-mouth brownie and the slightly crisp cookie layer creates a texture tango you won’t forget. Whether you’re hosting a Halloween movie marathon, a neighborhood trick-or-treat party, or just craving a fun fall dessert, these brownies add flair and serious flavor to any spooky spread.
What makes these brownies truly beginner-friendly is how effortlessly they come together. With just 15 minutes of hands-on prep time, 30 minutes of baking, and a quick 10-minute rest before slicing, you’ll go from mixing bowl to plate in under an hour. No specialized techniques or fancy equipment are needed—just a trusty family-size brownie mix, a pack of Halloween Oreos, and a handful of semi-sweet chocolate chips. At around 350 calories per serving (based on 12 generous squares), you can indulge without feeling overwhelmed. As someone who’s tossed oven mitts into more recipes than I can count, I promise these brownies deliver big flavor with minimal fuss—and they’re so festive that you’ll want to whip up a batch (or two) every autumn.
KEY INGREDIENTS IN HALLOWEEN OREO BROWNIES
Before diving into the mixing bowl, let’s break down the star players in this hauntingly delightful treat. Each component brings its own magic, transforming a simple brownie base into a Halloween sensation that’s perfect for parties, potlucks, or everyday indulgence.
- Brownie mix
A family-size box of brownie mix serves as the foundation, supplying the essential cocoa, sugar, and leaveners. This shortcut ensures consistent results without the fuss of measuring out individual dry ingredients.
- Oil, water, and eggs
These three simple pantry staples bind the mix together, delivering moisture and structure. The oil keeps the brownies rich and tender, while the eggs and water create the ideal batter consistency.
- Halloween Oreos
Limited-edition Oreos studded with festive orange, black, and white cream add a playful crunch. They infuse bursts of flavor and color, making every bite a fun surprise.
- Semi-sweet chocolate chips
Sprinkled on top, these chocolate chips melt slightly during baking, lending extra pockets of gooey chocolate. They boost the overall richness and elevate the indulgence factor.
HOW TO MAKE HALLOWEEN OREO BROWNIES
Baking these brownies is a breeze once everything is prepped. In a few straightforward steps, you’ll layer gooey batter, playful cookies, and extra chocolate to achieve a dessert perfect for any Halloween celebration.
1. Preheat your oven to 350°F (175°C). This ensures an even baking temperature throughout the pan, giving you that fudgy center and crisp edges.
2. Prepare the brownie batter according to the instructions on the box. In a mixing bowl, whisk together the oil, water, and eggs until fully combined, then gently fold in the dry mix until just smooth—overmixing can lead to tougher brownies.
3. Grease a 9×13 inch baking pan or line it with parchment paper. A light coating of nonstick spray or butter helps the finished brownies release cleanly.
4. Pour half of the batter into the prepared pan, using a spatula to spread it evenly. A level layer here sets the stage for your Oreo surprise in the middle.
5. Arrange a single layer of Halloween Oreos over the brownie batter, pressing them in gently so they sit snugly. Make sure no gaps remain to get that signature cookie layer in every bite.
6. Cover the Oreos with the remaining brownie batter. Spoon it on slowly and use the spatula to smooth the top, ensuring the cookies are fully enveloped.
7. Sprinkle the semi-sweet chocolate chips evenly over the top of the batter. These will melt just enough to add extra gooey pockets of chocolate.
8. Bake for 25–30 minutes, or until a toothpick inserted into the center comes out with only a few moist crumbs. Keep an eye on the edges—they should be set but not dried out.
9. Remove from the oven and let the brownies cool in the pan on a wire rack for about 10 minutes. This brief rest helps them set before you slice them into neat squares.
SERVING SUGGESTIONS FOR HALLOWEEN OREO BROWNIES
Once your brownies have cooled and you’re ready to share the spooky goodness, presentation can take them from tasty to totally Instagram-worthy. These serving ideas help you showcase those festive layers and delight guests of all ages.
- Arrange on a themed platter alongside candy corn, gummy worms, and mini pumpkins for a playful centerpiece. The contrast of bright orange and black ties the whole Halloween buffet together.
- Serve warm with a generous scoop of vanilla ice cream. The cold, creamy ice cream melts over the warm brownie, creating a dreamy, decadent contrast.
- Chill and slice: Pop the pan into the refrigerator for 15 minutes before cutting. A sharp knife warmed under hot water yields perfectly clean edges and neat squares—ideal for potlucks.
- Package individual squares in cellophane bags tied with orange and black ribbon for a sweet take-home favor. These brownie bundles are perfect for party guests or classroom treats.
HOW TO STORE HALLOWEEN OREO BROWNIES
Proper storage ensures these festive brownies stay moist, flavorful, and ready to enjoy long after the Halloween chaos has died down. With just a few simple steps, you can maintain that fresh-baked texture and rich chocolate taste.
- Store at room temperature in an airtight container for up to 3 days. Keep brownies on a flat surface to prevent them from sliding around and becoming misshapen.
- Refrigerate for up to 5 days by sealing the cooled brownies in plastic wrap or a container. Bring them to room temperature or briefly warm in the microwave for a soft, gooey treat.
- Freeze individual squares for up to 2 months. Wrap each piece tightly in plastic wrap, then place in a freezer-safe bag. Thaw overnight in the refrigerator and let them sit at room temperature before serving.
- Layer brownies with parchment paper between stacks to prevent sticking. This trick keeps each square intact and makes it easy to pull one out at a time.
CONCLUSION
These Halloween Oreo Brownies are the ultimate way to celebrate the season with a dessert that’s as fun to make as it is to devour. From the beginner-friendly preparation to the dazzling layers of cookies and chocolate chips, every step is designed to make you look like a baking superstar. With just 15 minutes of prep, 30 minutes in the oven, and a quick 10-minute rest, you’ll have a pan of rich, gooey brownie squares that blend festive Oreo flair with classic chocolate goodness. Feel free to print this article and tuck it into your recipe binder for the next spooky gathering. You can save it for later, knowing that the Spooktacular Halloween Oreo Brownies recipe will be ready whenever the mood for a chocolatey treat strikes. Also, don’t forget to scroll down to the FAQ below to find answers to common questions about baking times, ingredient swaps, and more.
I’d love to hear how your batch turns out! If you have comments, questions, or need tips for customizing this recipe—whether it’s swapping in white chocolate chips or adding a swirl of caramel—drop a note below. Sharing your feedback not only helps me improve future recipes but also creates a cozy community where we can swap tricks and treats. Happy baking, and here’s to a deliciously haunting Halloween celebration!
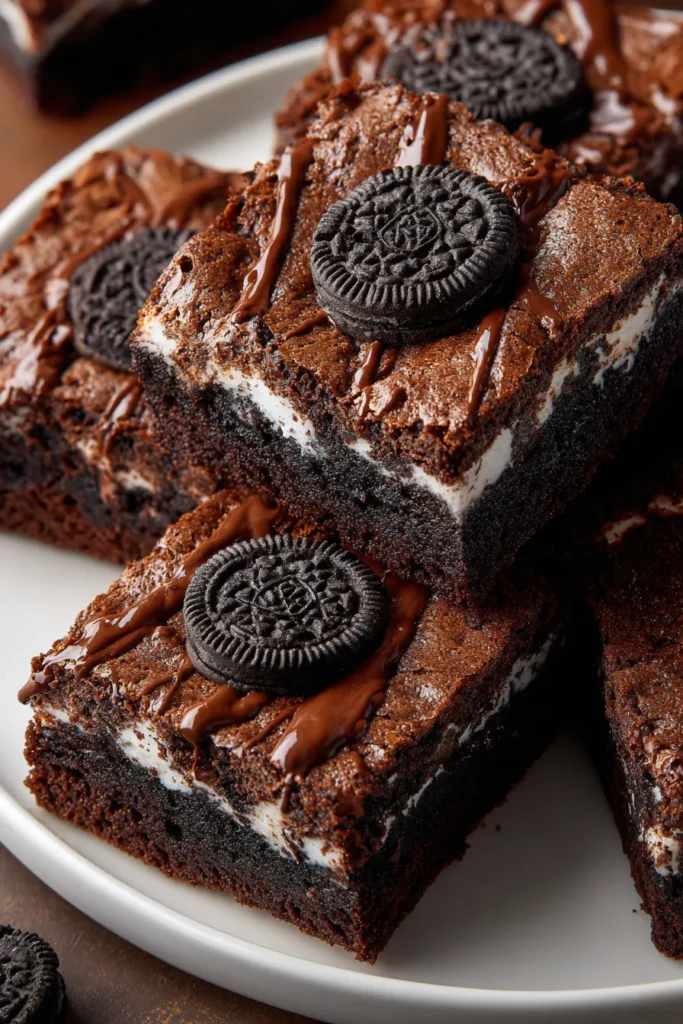

Halloween Oreo Brownies
Description
These Halloween Oreo Brownies blend rich chocolate flavors with a burst of festive Oreo fun. Perfectly gooey and irresistibly delicious, they're a treat everyone will love!
Ingredients
Instructions
-
Preheat your oven to 350°F (175°C).
-
Prepare the brownie batter according to the instructions on the box.
-
Grease a 9x13 inch baking pan or line it with parchment paper for easy removal.
-
Pour half of the brownie batter into the prepared pan, spreading it evenly with a spatula.
-
Place a single layer of Halloween Oreos over the brownie batter, making sure they cover the entire surface.
-
Pour the remaining brownie batter over the Oreo layer, carefully spreading it so that the cookies are completely covered.
-
Sprinkle the semi-sweet chocolate chips over the top of the brownie batter for an extra chocolate flavor.
-
Place the pan in the preheated oven and bake for 25-30 minutes, or until a toothpick inserted into the center comes out with only a few moist crumbs.
-
Remove the brownies from the oven and allow them to cool in the pan on a wire rack before cutting into squares and serving.
Nutrition Facts
Serving Size 12
- Amount Per Serving
- Calories 21kcal
Note
- Use your favorite brownie mix or homemade brownie recipe if preferred.
- Try adding Halloween-themed sprinkles on top for extra festive decoration.
- The Halloween Oreos add a fun, colorful layer that makes these brownies perfect for a party.
- Allow brownies to cool completely before cutting to ensure clean edges.

