

When the moon casts its silvery glow and the leaves crunch underfoot, there’s something undeniably magical about baking up a batch of cookies that celebrate the season’s spooky spirit. These Hauntingly Delicious Chocolate Chip Spooky Cookies are more than just a dessert; they’re an invitation to sink your teeth into a world where chocolatey goodness meets playful fright. Each bite delivers that perfect balance of soft, chewy center and golden-brown edge, punctuated by pockets of semisweet and white chocolate that melt in your mouth like little surprises. Adorned with candy eyeballs, black and orange sprinkles, or Halloween-themed candies, these little treats transform an ordinary afternoon into a festive baking adventure that’s sure to enchant kids and grown-ups alike.
From the first moment you scrape the silky dough from the bowl to the final crackle as you bite through a still-warm cookie, you’ll appreciate how effortless and joy-inducing this recipe truly is. Designed for home cooks of any skill level, it requires just 20 minutes of prep time, a swift 12-minute bake, and a gentle 5-minute cool-down to deliver about a dozen haunting delights—each packing around 180 calories of pure fun. Whether you’re gathering around the kitchen island with friends, hosting a Halloween party, or simply craving a sweet pick-me-up on a crisp autumn day, these cookies promise to make spirits bright and taste buds dance.
KEY INGREDIENTS IN HAUNTINGLY DELICIOUS CHOCOLATE CHIP SPOOKY COOKIES
Before you summon your inner wizard of the whisk, let’s talk about the essential ingredients that give these cookies their irresistible texture and flavor. Each component plays a starring role, working in harmony to create that classic cookie profile with a festive twist.
- All-purpose flour
This pantry staple provides the structure and backbone of every cookie. It gives the dough just enough heft to hold onto chocolate chips and spooky decorations without turning dense or gummy.
- Baking soda
Acting as the leavening agent, baking soda encourages the dough to rise ever so slightly during baking, ensuring a tender crumb and those invitingly crackled tops.
- Unsalted butter
At room temperature, butter whips together effortlessly with sugars, creating air pockets that yield a light, fluffy dough. Its rich, creamy flavor enhances every bite and balances the sweetness.
- Granulated sugar
This fine sugar helps cookies spread just the right amount and contributes to that desirable crisp rim. It also blends seamlessly with brown sugar for a nuanced sweetness.
- Light-brown sugar
Packed with molasses, brown sugar lends moisture and chewiness to the center of each cookie. It also deepens the overall flavor profile with caramel-like notes.
- Salt
A pinch of salt sharpens and brightens the sweetness, allowing the chocolate chips and sugars to truly shine without becoming cloying.
- Pure vanilla extract
Vanilla adds warm, floral undertones that round out the buttery richness and meld the flavors together in perfect harmony.
- Eggs
Acting as a binding agent, eggs provide structure and stability. They ensure that cookies hold their shape while giving them just a touch of lift.
- Semisweet and/or white chocolate chips
These pockets of melty delight deliver bursts of sweet and slightly bitter chocolate in every bite. Mixing both varieties adds visual contrast and flavor variety.
- Assorted spooky decorations
From candy eyeballs to black and orange sprinkles and tiny Halloween-themed candies, these finishing touches transform your cookies into mini works of edible art.
HOW TO MAKE HAUNTINGLY DELICIOUS CHOCOLATE CHIP SPOOKY COOKIES
Ready to embark on a baking adventure? Follow these detailed steps to create cookies that are delightfully soft yet perfectly golden, with whimsical Halloween flair. Each technique is explained to help even the most novice baker achieve mouthwatering results.
1. Preheat your oven to 350°F (175°C). Proper oven temperature ensures your cookies bake evenly, achieving golden edges and a soft interior. Line two baking sheets with parchment paper or silicone baking mats to prevent sticking and promote even browning, then set aside.
2. In a medium bowl, whisk together the flour and baking soda until fully combined. This step distributes the leavening agent evenly and helps prevent lumps. Once thoroughly mixed, set the bowl aside.
3. In a large bowl, attach your electric mixer with the paddle attachment. Beat the room-temperature butter and both sugars on medium speed for about 2 minutes, until the mixture is light and fluffy. This aeration creates tender, melt-in-your-mouth cookies.
4. Add the salt, vanilla extract, and eggs to the butter-sugar mixture. Continue mixing until well combined, pausing to scrape down the sides of the bowl with a rubber spatula to ensure an even consistency.
5. Gradually introduce the flour mixture to the wet ingredients, mixing at low speed until just combined. Overmixing can develop gluten, leading to tougher cookies, so stop as soon as there are no visible streaks of flour.
6. Remove the bowl from the mixer and stir in the semisweet and/or white chocolate chips by hand with a wooden spoon or spatula. This gentle folding keeps the dough tender and evenly distributes chocolate throughout.
7. Using a cookie scoop or a tablespoon, drop rounded mounds of dough onto the prepared baking sheets, spacing them about 2 inches apart to allow for spread.
8. Decorate each mound of dough with your spooky adornments, pressing them lightly so they adhere during baking. This step lets you personalize each cookie with candy eyeballs, sprinkles, or festive shapes.
9. Bake in the preheated oven for 10 to 12 minutes, watching closely. You want the edges to turn golden brown while the centers remain soft and slightly underbaked for that signature chew.
10. Remove the sheets from the oven and let the cookies rest on them for about 5 minutes. This cooling period allows them to set before you transfer them to wire racks to cool completely, ensuring the perfect texture.
SERVING SUGGESTIONS FOR HAUNTINGLY DELICIOUS CHOCOLATE CHIP SPOOKY COOKIES
When those hauntingly delicious cookies are ready to make their grand entrance, presentation and pairing can elevate your Halloween gathering from fun to fabulously festive. Whether you’re hosting a costume party, serving a cozy movie night, or treating trick-or-treaters, these ideas will keep your spooky sweets in the spotlight.
- Tiered Dessert Stand Display
Arrange cookies on a multi-level stand draped in black lace or orange ribbon. The height variation adds drama, while the spooky decorations pop against dark fabric, making it the centerpiece of your dessert table.
- Spooky Snack Board
Build a hauntingly handsome board alongside mini pumpkins, caramel popcorn, and spiced nuts. Use chalkboard labels to name each item (“Ghastly Popcorn,” “Witch’s Nuts”) and let guests graze at their leisure.
- Gothic Glass Cloche Presentation
Place a small cluster of cookies under a glass dome on a mirrored tray. Add a flickering LED candle beneath for a ghostly glow that will mesmerize kids and adults alike.
- Festive Treat Bags
For party favors or school events, layer cookies in clear cellophane bags with orange ribbon. Tuck in a personalized Halloween tag, then display them in a rustic wooden crate or basket for an inviting, grab-and-go style.
HOW TO STORE HAUNTINGLY DELICIOUS CHOCOLATE CHIP SPOOKY COOKIES
Keeping your spooky cookies fresh and flavorful ensures you can enjoy their soft chew and melty chocolate days after baking. Proper storage also preserves those playful decorations, so every treat remains a visual and culinary delight.
Storing these cookies correctly helps maintain their texture. The goal is to keep them away from moisture and other odors while allowing them room to breathe. With a few simple methods, you can savor their ghostly charm whenever the craving strikes.
- Airtight Container at Room Temperature
Place cooled cookies in a single layer inside a sealed container. If stacking is necessary, layer them with parchment paper to prevent sticking. Store at room temperature for up to one week.
- Refrigerator Storage
If you prefer a firmer, slightly chewy texture, refrigerate cookies in an airtight container for up to 10 days. Bring to room temperature before serving to revive their softness.
- Freezing Baked Cookies
Flash-freeze cooled cookies on a baking sheet for about 1 hour, then transfer to a freezer-safe bag. They’ll keep for up to 3 months—perfect for spontaneous Halloween cravings. Thaw at room temperature.
- Freezing Dough
Scoop dough mounds onto a tray and freeze solid, then store in a labeled freezer bag. When you’re ready for fresh-baked treats, pop frozen dough onto a baking sheet and add 2–3 minutes to the bake time.
CONCLUSION
Baking these Hauntingly Delicious Chocolate Chip Spooky Cookies has been a delightful journey from mixing bowl to decorated masterpiece. We’ve explored every step, from gathering key ingredients like all-purpose flour and semisweet chocolate chips to mastering the gentle folding technique that keeps each cookie tender and chewy. Along the way, you’ve learned how to prep your oven, decorate with eerie flair, and store your spooky creations to preserve their texture and festive appeal. Whether you’re a beginner dipping your toes into festive baking or a seasoned home cook looking for the perfect Halloween dessert, this recipe offers an enchanting blend of simplicity and showmanship.
Feel free to print this article and save it for later use—your future self will thank you when the Halloween spirit calls for an easy, crowd-pleasing cookie. Once you’ve had a chance to whip up a batch, don’t forget to check out the FAQ below for answers to common questions about dough consistency, substitution ideas, and troubleshooting tips. And of course, if you try the recipe or need help making it, I’d love to hear from you! Leave your comments, questions, or feedback—your kitchen tales and spooky cookie triumphs make this baking community come alive. Happy haunting and happy baking!
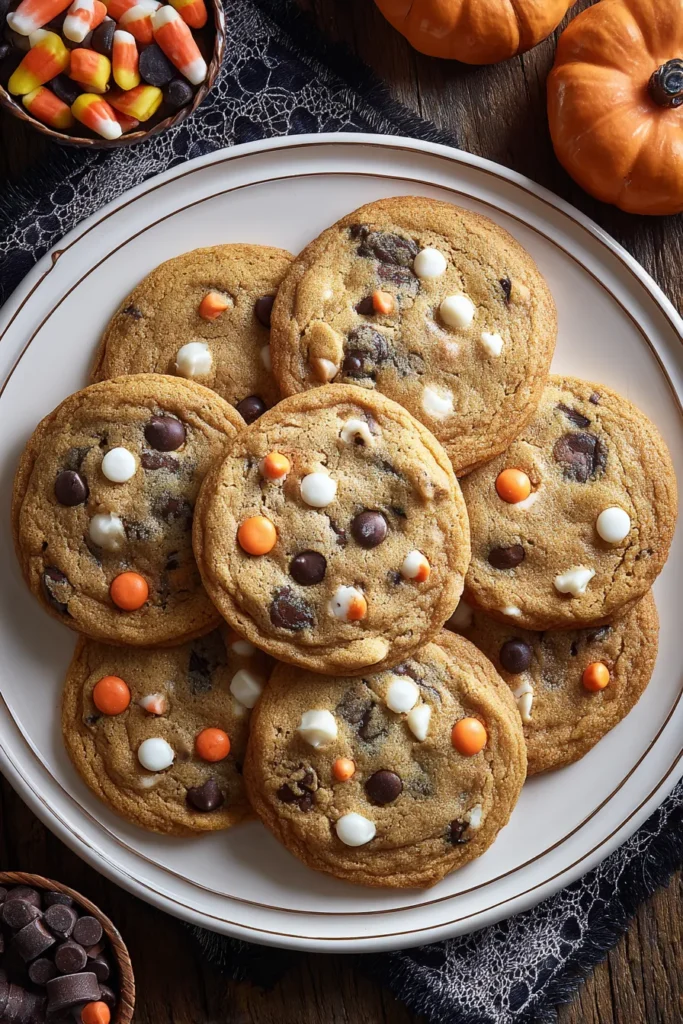

Hauntingly Delicious Chocolate Chip Spooky Cookies
Description
These cookies are soft, chewy, and packed with chocolatey goodness, accented by playful spooky decorations that will enchant your Halloween gatherings.
Ingredients
Instructions
-
Preheat your oven to 350°F (175°C). Line two baking sheets with parchment paper or silicone baking mats and set aside.
-
In a medium bowl, whisk together the flour and baking soda; set aside.
-
In a large bowl, using an electric mixer, beat the butter and sugars on medium speed until light and fluffy, about 2 minutes.
-
Add the salt, vanilla, and eggs to the butter mixture. Mix until well combined, scraping down the sides of the bowl as needed.
-
Gradually add the flour mixture to the butter mixture, beating at low speed until just combined.
-
Stir in the chocolate chips by hand using a wooden spoon or rubber spatula.
-
Using a cookie scoop or tablespoon, drop dough onto the prepared baking sheets about 2 inches apart.
-
Decorate each cookie with your spooky decorations, gently pressing them into the dough so they stick while baking.
-
Bake cookies in the preheated oven for 10 to 12 minutes or until edges are golden brown but centers are still soft.
-
Remove the cookies from the oven and let them cool on the baking sheets for about 5 minutes before transferring to wire racks to cool completely.
Nutrition Facts
Serving Size 24
- Amount Per Serving
- Calories 6kcal
Note
- These cookies can be stored in an airtight container at room temperature for up to one week.
- For an extra spooky touch, use cookie stamps to create ghostly shapes before decorating.
- You can mix in colored dough chunks using gel food coloring for an eclectic Halloween swirl effect.
- These cookies make for an ideal treat to serve at Halloween parties or as a festive gift.

