

Italian Zucchini Scarpaccia is a golden chickpea pancake studded with zucchini and fresh rosemary, offering crisp edges and a tender, savory center. This gluten-free, vegetarian delight brings warm zucchini slices and fragrant herbs into a smooth batter that bakes up beautifully for lunch, snacks, or light dinners—perfect for both beginner cooks and seasoned food lovers looking for an easy, flavorful twist.
Key Ingredients
Let’s look at the simple, wholesome ingredients that make this scarpaccia shine:
- 200 g chickpea flour: The nutty, gluten-free base that binds everything into a tender, flavorful pancake.
- 250 ml water: Hydrates the chickpea flour to create a smooth, pourable batter.
- 3 tablespoons extra-virgin olive oil: Adds richness and helps achieve those coveted golden, crispy edges.
- 1 teaspoon sea salt: Enhances all the savory flavors in the batter and vegetables.
- 1/2 teaspoon freshly ground black pepper: A gentle heat that balances the nuttiness of the chickpeas.
- 1 medium zucchini: Thinly sliced to provide tender bites and prevent sogginess.
- 1 small onion: Adds a mild sweetness and depth when baked.
- 1 tablespoon fresh rosemary leaves: Brings piney, aromatic notes that pair beautifully with zucchini.
How To Make Italian Zucchini Scarpaccia
Ready to whip up this simple yet impressive pancake? This section guides you through each step, from whisking the batter to getting that perfect golden crust. By following these clear instructions, you’ll achieve a smooth, vegetable-studded batter that bakes into a crispy-edged, tender-centered masterpiece every time.
1. Preheat your oven to 200°C and lightly grease a baking sheet or shallow baking dish with a drizzle of olive oil to prevent sticking.
2. In a large bowl, whisk together the chickpea flour and water until completely smooth and lump-free, ensuring an even texture.
3. Stir in 2 tablespoons of olive oil, the sea salt, and freshly ground black pepper until the mixture is homogenous.
4. Thinly slice the zucchini and onion, then chop the rosemary leaves finely to distribute flavor evenly.
5. Fold the zucchini, onion, and rosemary into the batter, gently tossing so each slice is coated without overmixing.
6. Pour the mixture onto the prepared baking sheet, spreading it into an even layer about 1 cm thick using a spatula.
7. Bake for 25–30 minutes, or until the edges turn golden brown and the center is set but still moist.
8. Remove from the oven and let it cool slightly; then slice into squares or wedges before serving to showcase those crisp edges.
Serving Suggestions
Once your scarpaccia is out of the oven, you’ll want to serve it in fun ways that highlight its texture and flavor. Whether you’re plating for a casual family lunch or sharing as appetizers, these ideas will elevate your dish:
- As an appetizer: Cut into bite-sized squares and serve with a dollop of whipped ricotta or your favorite vegan spread for an elegant starter.
- With a fresh salad: Pair wedges with a crisp arugula salad dressed in lemon vinaigrette to balance the pancake’s nuttiness.
- Picnic‐style: Pack slices at room temperature in a bento box alongside cherry tomatoes and olives for a portable, crowd-pleasing snack.
- Bruschetta twist: Top warm scarpaccia squares with diced tomatoes, basil, and a drizzle of olive oil for an Italian-inspired treat.
Tips For Perfect Italian Zucchini Scarpaccia
With a few insider pointers, you’ll nail this recipe every time. From texture tweaks to flavor swaps, here’s how to make your scarpaccia stand out:
- For a crispier edge, slide the scarpaccia under the broiler for 1–2 minutes at the end of baking.
- Allow the batter to rest for 10 minutes after mixing to hydrate the chickpea flour fully.
- You can replace fresh rosemary with thyme or oregano for a different flavor profile.
- Serve warm or at room temperature as an appetizer, side dish, or picnic snack.
How To Store It
Keeping your scarpaccia fresh and delicious is simple, whether you’re saving leftovers or prepping ahead. Follow these storage methods to maintain texture and flavor:
- Refrigerate cooled scarpaccia in an airtight container for up to 3 days to keep it tender and prevent drying out.
- Reheat in the oven at 180°C for 8–10 minutes to restore those crispy edges without losing moisture.
- Microwave individual slices for 1 minute if you prefer a softer, quicker warm-up—perfect for busy days.
- Freeze wrapped slices in plastic wrap and foil for up to one month; thaw overnight in the fridge before reheating.
Frequently Asked Questions
Here are some quick answers to common questions about Italian Zucchini Scarpaccia:
- How long does it take to prepare and bake Italian Zucchini Scarpaccia?
It takes about 10 minutes to prepare the batter and vegetables, plus a 10-minute rest for the chickpea flour to hydrate fully, and 25–30 minutes to bake. In total, plan for roughly 45–50 minutes.
- Why is it recommended to let the batter rest for 10 minutes?
Resting allows the water to fully hydrate the chickpea flour, resulting in a smoother batter and a tender interior. Skipping this step may leave small lumps and a drier texture.
- How can I achieve extra-crispy edges on my scarpaccia?
During the last 1–2 minutes of baking, slide the scarpaccia under the broiler on high, watching closely to prevent burning. You can also spread the batter slightly thinner or use a rimmed baking sheet to promote crisping along the edges.
- What herb substitutions or additions can I use in place of rosemary?
Fresh thyme or oregano work well as a substitute, using the same quantity. If using dried herbs, reduce by half. For extra flavor, you can also mix in chopped parsley or basil after baking.
- Is this recipe gluten-free and suitable for vegan diets?
Yes. This scarpaccia uses chickpea flour and water as a base, making it naturally gluten-free and vegan. Just ensure your olive oil and other ingredients are certified vegan and gluten-free.
- How should I store leftovers and reheat them?
Store cooled scarpaccia in an airtight container in the refrigerator for up to 3 days. Reheat in a preheated 180°C oven for 8–10 minutes to restore crispiness, or microwave for 1 minute if you prefer a softer texture.
- Can I add other vegetables or ingredients to the batter?
Absolutely. Thinly sliced bell peppers, cherry tomatoes, or grated carrots can be folded into the batter, keeping the total vegetable volume similar so the batter consistency remains about 1 cm thick when spread on the baking sheet.
What Makes This Special
This Italian Zucchini Scarpaccia is a winner because it’s fuss-free, gluten-free, and packed with fresh veggies and herbs that bake into a crispy-edged, tender-centered delight. The chickpea flour base gives a subtle nutty depth, while zucchini and rosemary bring bright, savory flavors in every bite. It’s the perfect recipe to print, save, and share—whether you’re a busy home cook or hosting friends. Give it a try, let me know how it turned out, and drop any questions or feedback below if you need help or just want to gush about your favorite slice!
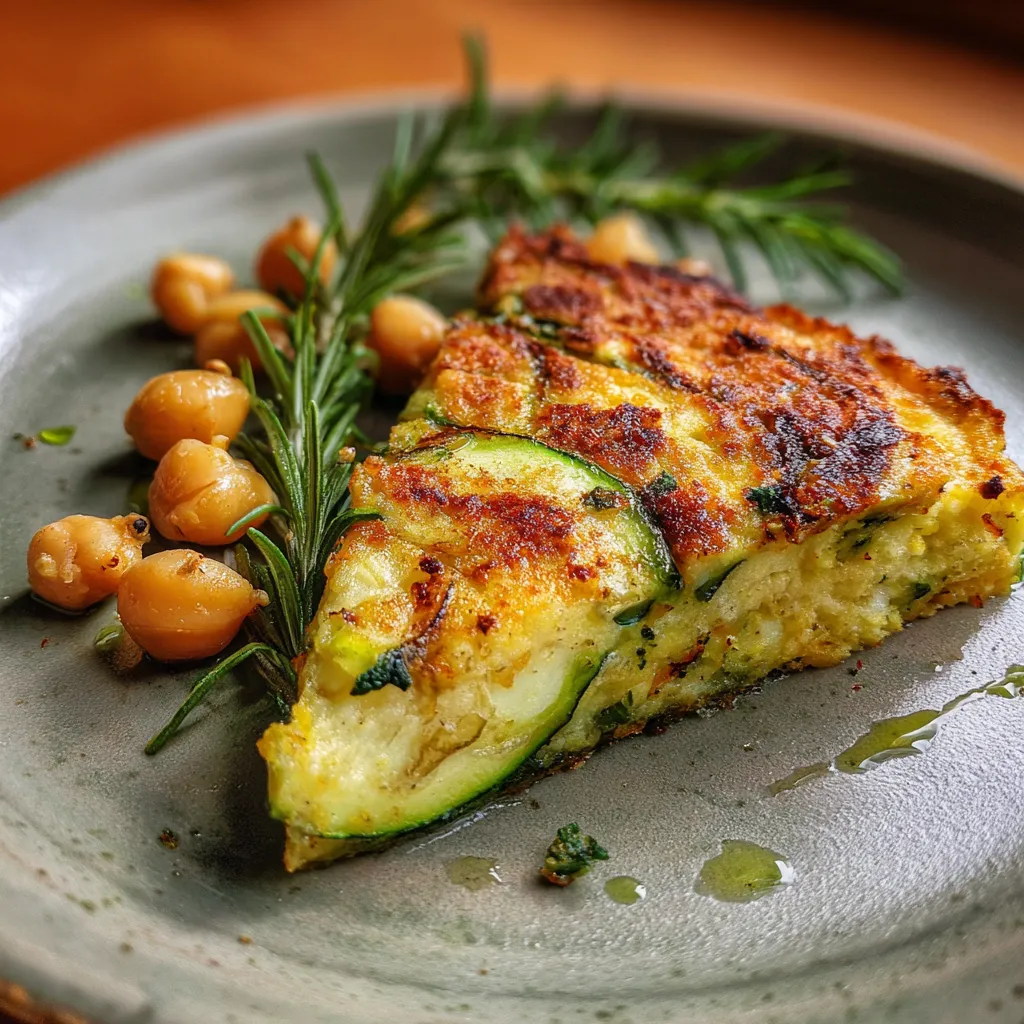

Italian Zucchini Scarpaccia
Description
Warm zucchini slices mingle with fragrant rosemary in a smooth chickpea batter that bakes into a golden, crisp-edged pancake, delivering nutty depth and a tender bite in every square.
Ingredients
Instructions
-
Preheat the oven to 200°C and lightly grease a baking sheet or shallow baking dish with a little olive oil.
-
In a large bowl, whisk together the chickpea flour and water until smooth and lump-free.
-
Stir in 2 tablespoons of olive oil, the sea salt, and black pepper until fully incorporated.
-
Thinly slice the zucchini and onion, then chop the rosemary leaves finely.
-
Fold the zucchini, onion, and rosemary into the batter so the vegetables are evenly distributed.
-
Pour the mixture onto the prepared baking sheet, spreading it into an even layer about 1 cm thick.
-
Bake for 25–30 minutes, or until the edges are golden brown and the center is set.
-
Remove from the oven, let cool slightly, then cut into squares or wedges before serving.
Nutrition Facts
Serving Size 4
- Amount Per Serving
- Calories 70kcal
Note
- For a crispier edge, slide the scarpaccia under the broiler for 1–2 minutes at the end of baking.
- Allow the batter to rest for 10 minutes after mixing to hydrate the chickpea flour fully.
- You can replace fresh rosemary with thyme or oregano for a different flavor profile.
- Serve warm or at room temperature as an appetizer, side dish, or picnic snack.

