

Do you ever find yourself craving a rich, fudgy treat but don’t have the patience for a full-scale bake? That was me last Tuesday night after a marathon of video calls—my sweet tooth was begging for mercy. I rummaged through the pantry, hoping for a chocolate emergency fix, when I realized I had everything I needed for a microwave brownie mug cake. In less than five minutes, I was holding a steaming mug of pure chocolate bliss. No oven preheat, no mixing bowls piled on the counter—just the simple joy of a warm, single-serving dessert that felt like a hug in a cup.
With a handful of pantry staples—flour, sugar, cocoa, a dash of baking powder, and a few extras—I whisked up a batter so smooth it felt almost luxurious. I popped the mug into the microwave, and within two minutes, the cake rose to perfection, its edges slightly crisped and its center oozy and decadent. Each bite transported me back to childhood afternoons baking brownies with my grandmother, yet this version was even quicker and made just enough to satisfy one person’s indulgence. Whether you’re a total kitchen novice or a seasoned home cook, this microwave brownie mug cake delivers big flavor without breaking a sweat.
For those moments when you need a fast chocolate fix, this recipe is your new best friend. It’s a beginner-level dessert that comes together in a flash—five minutes of prep, two minutes of cooking, and a brief two-minute rest so it’s cool enough to enjoy. At around 350 calories per serving, it’s a perfectly portioned treat that you can customize any way you like. Drizzle caramel, stir in peanut butter, or sprinkle chopped nuts—each variation is a chance to make this mug cake uniquely yours. Ready to transform pantry basics into a cozy, fudgy delight? Let’s dive into the key ingredients and step-by-step instructions so you can start spoiling yourself with minimal effort and maximum chocolatey satisfaction.
KEY INGREDIENTS IN MICROWAVE BROWNIE MUG CAKE
Before you whip out your favorite mug, let’s get to know the essential stars of this recipe. Each ingredient plays a crucial role in creating that perfect balance of moist crumb, fudgy center, and chocolaty richness. Even though this is a super simple dessert, treating each component with a little respect will elevate your mug cake from "just okay" to spectacular.
- All-purpose flour
Provides the structural foundation of the cake, giving it enough body to rise and maintain a tender crumb without being too dense.
- Granulated sugar
Sweetens the batter while helping to create a slightly crisp top layer when microwaved, balancing the deep cocoa notes.
- Unsweetened cocoa powder
Delivers intense chocolate flavor and a beautiful, dark color. Opt for a good-quality powder for the richest taste.
- Baking powder
Acts as the leavening agent that helps your mug cake spring up in the microwave, creating a light and airy texture.
- Salt
Just a pinch enhances all the flavors—especially the chocolate—by bringing out subtle depth and preventing the sweetness from becoming one-note.
- Milk
Adds moisture and richness to the batter. You can use dairy or swap in almond or plant-based milk for a vegan-friendly treat.
- Vegetable oil
Keeps the cake tender and moist. Its neutral flavor allows the chocolate and vanilla to shine.
- Vanilla extract
Introduces a layer of warm, floral sweetness that rounds out the cocoa’s intensity and ties all the flavors together.
- Chocolate chips (optional)
For extra bursts of melty chocolate, fold these into the batter. They create little pockets of gooey goodness in every bite.
HOW TO MAKE MICROWAVE BROWNIE MUG CAKE
Now that you’re familiar with the cast of characters, let’s talk about the simple sequence of actions that turn them into a heavenly cake in a cup. You’ll be amazed at how quickly pantry staples transform into a luscious, single-serving dessert.
1. Begin by taking a microwave-safe mug or an 8-ounce ramekin. Ensure it is clean and completely dry, as any leftover moisture can affect the texture of the cake.
2. Add all-purpose flour, granulated sugar, cocoa powder, baking powder, and a pinch of salt to the mug. Use a fork or whisk to combine these dry ingredients thoroughly, ensuring no clumps remain.
3. Pour in the milk, vegetable oil, and vanilla extract. Stir the mixture vigorously until the batter is smooth and homogenous, scraping down the sides so everything is fully incorporated.
4. If desired, gently fold in the chocolate chips using a spoon or spatula. This distributes them evenly without deflating the batter.
5. Place the mug in the microwave and cook on high for about 1 minute and 30 seconds to 2 minutes. Because microwave power varies, start checking at the 1-minute mark. The cake is done when it has risen visibly and springs back lightly to the touch.
6. Carefully remove the mug from the microwave using a towel or oven mitt, since it will be very hot.
7. Let the brownie mug cake rest for a minute or two—this brief cooldown allows the center to set slightly and makes each spoonful an even creamier, more indulgent experience.
SERVING SUGGESTIONS FOR MICROWAVE BROWNIE MUG CAKE
Once you’ve mastered the basic mug cake, serving it becomes your moment to shine. Whether you want to elevate it into a gourmet-looking dessert or simply enjoy it straight from the mug, these ideas will inspire your next chocolatey creation.
- Top with vanilla ice cream and a drizzle of warm fudge sauce for a classic hot-and-cold contrast. The melting ice cream seeps into cracks in the cake, creating little streams of creamy goodness.
- Add a handful of fresh berries—like raspberries or strawberries—to brighten the rich chocolate. Their natural tartness balances the sweetness beautifully.
- Sprinkle chopped nuts (walnuts, pecans, or almonds) over the top for crunch. Lightly toast them in a pan first to bring out their nutty aroma.
- Add a dollop of whipped cream and a dusting of cocoa powder or powdered sugar for an elegant finish. It’s like serving a petite chocolate soufflé without the fuss.
HOW TO STORE MICROWAVE BROWNIE MUG CAKE
While microwave brownie mug cake is best enjoyed fresh, there are ways to keep leftovers tasting almost as good as the moment they came out of the microwave. With a little care, you can preserve moisture and flavor so you can revisit this cozy dessert later.
- Store the cake in its mug, loosely covered with plastic wrap or a reusable silicone lid at room temperature for up to 24 hours. This prevents the top from drying out while keeping the center soft.
- Transfer the cooled cake to an airtight container and refrigerate for up to 2 days. Before serving, let it come to room temperature or gently reheat in the microwave for 10–15 seconds.
- For longer storage, wrap the cooled brownie mug cake tightly in plastic wrap and then in aluminum foil. Freeze for up to one month. Thaw overnight in the refrigerator, then warm briefly in the microwave.
- To revive a refrigerated or frozen piece, microwave on medium power in 10-second bursts. This helps prevent overheating and ensures the cake warms evenly without drying out.
CONCLUSION
This microwave brownie mug cake proves that a decadent, fudgy dessert doesn’t require hours in the kitchen or a mountain of dirty dishes. With pantry staples and a trusty mug, you can whip up a sweet, single-serving treat in just minutes—making it perfect for solo movie nights, spontaneous celebrations, or that irresistible late-night chocolate craving. We’ve covered everything from the roles of each key ingredient to step-by-step cooking instructions, creative serving ideas, and tips on storing your creation so you can savor every last bite. As a fellow home cook who loves sharing quick and delightful desserts, I can’t wait for you to experience how easy and rewarding this recipe truly is.
Feel free to print and save this article for your recipe collection, and don’t forget that there’s an FAQ section below to answer any lingering questions. If you try this microwave brownie mug cake or put your own twist on it, I’d love to hear how it turns out! Leave a comment with your favorite add-in, ask any questions you have, or share feedback. Your kitchen adventures inspire me, and I’m always here to help you achieve that perfect, gooey chocolate moment—one mug at a time.
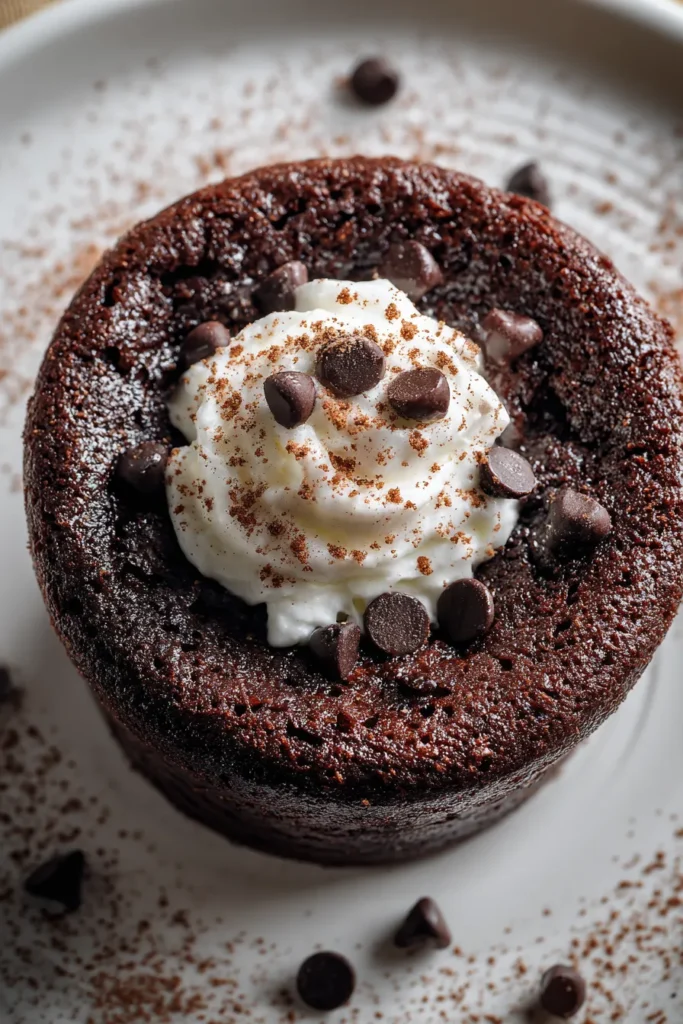

Microwave Brownie Mug Cake
Description
This brownie mug cake is rich, fudgy, and oh-so-easy to make. Perfect for a quick dessert fix, it comes together in just a few minutes and is customizable to your taste.
Ingredients
Instructions
-
Begin by taking a microwave-safe mug or an 8-ounce ramekin. Ensure it is clean and dry.
-
Add all-purpose flour, granulated sugar, cocoa powder, baking powder, and a pinch of salt to the mug. Stir with a fork or whisk to combine the dry ingredients thoroughly.
-
Pour milk, vegetable oil, and vanilla extract into the mug with the dry ingredients. Stir well to combine, ensuring there are no lumps remaining. The batter should have a smooth consistency.
-
If desired, gently fold in the chocolate chips into the batter, distributing them evenly.
-
Place the mug in the microwave and cook on high for about 1 minute and 30 seconds to 2 minutes. Microwave power levels may vary, so start checking at the 1-minute mark to avoid overcooking. The brownie cake is ready when it has risen and springs back lightly to the touch.
-
Carefully remove the mug from the microwave using a towel or oven mitt, as it will be hot.
-
Allow the brownie mug cake to cool for a minute or two before enjoying it directly from the mug or transferring it to a small plate.
Nutrition Facts
Serving Size 1
- Amount Per Serving
- Calories 350kcal
Note
- Customize your brownie mug cake by adding nuts or a scoop of vanilla ice cream for added texture and flavor.
- For a vegan option, substitute the milk with almond milk or any plant-based milk.
- Experiment with different add-ins like marshmallows or peanut butter for a unique twist.
- Be cautious of the microwave time, as microwaving for too long can result in a dry cake. Adjust according to your microwave's power.

